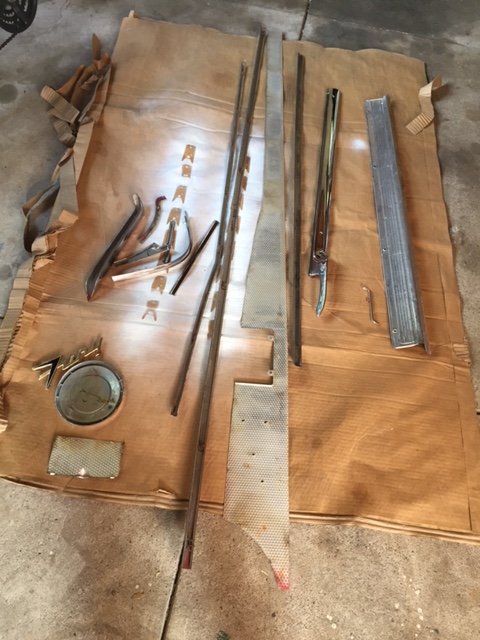
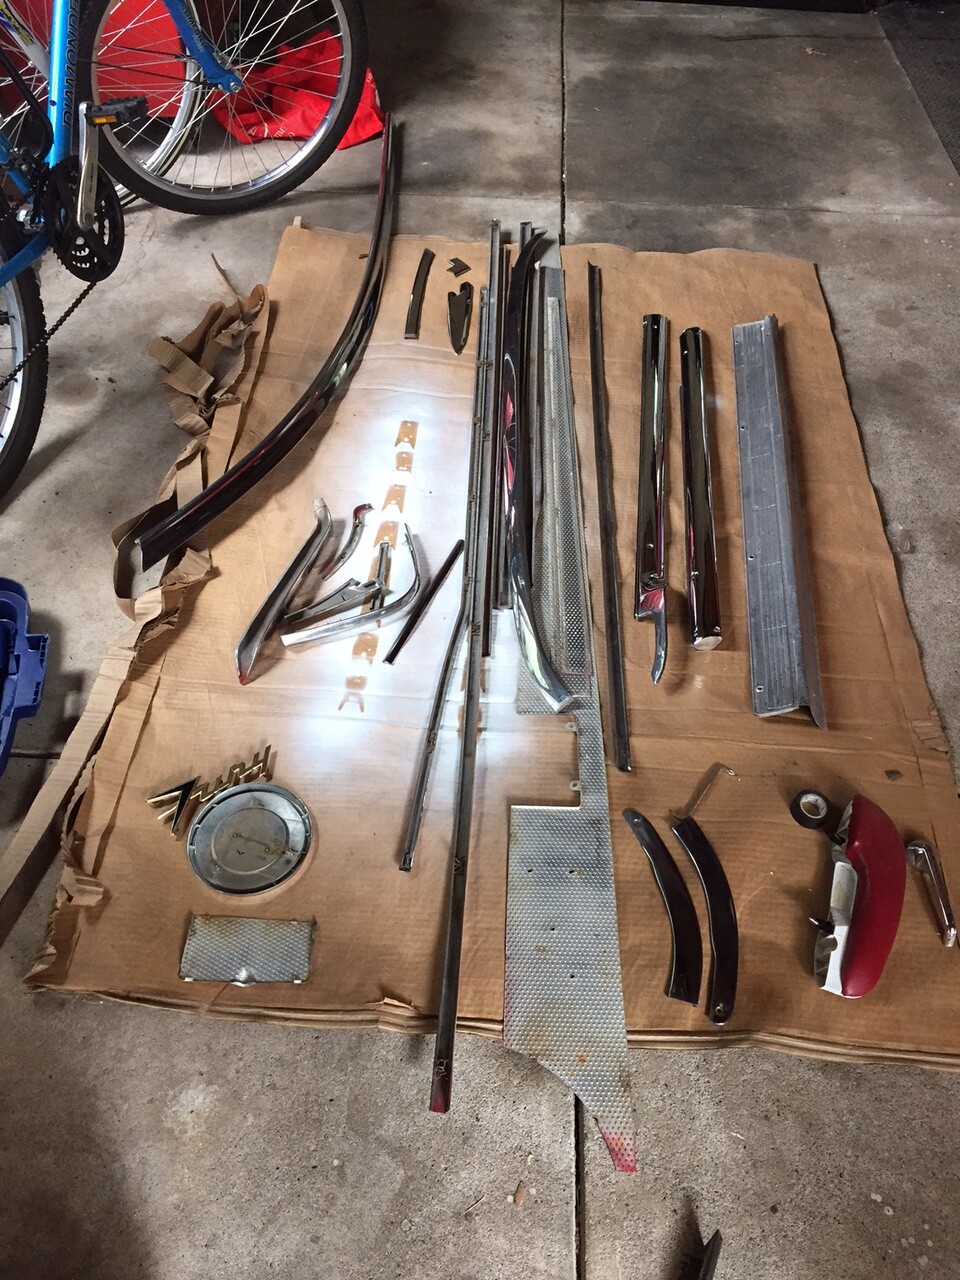
Today I crossed the Rubicon - started removing the trim from Faulkner. My plans include getting all the trim redone (word up, Dick - a PVC tube will coming your way soon), reanodizing the aluminum, getting some chrome redone, putting in new carpet and painting the interior black, a little body work here and there and restoring the paint to the original copper color. I will also be scraping and painting the undercarriage and installing a new exhaust system.
I was futzing with compressing the center of the spring clips, until it occurred to me - if you spread the wire ends, the center compresses and pops through the hole. D’Oh! This was a revelation to me. I’ve gotten fair warning about the reverse procedure, however - to be very careful pushing the clip back through the hole when it’s time to put back on, lest you ding the trim.
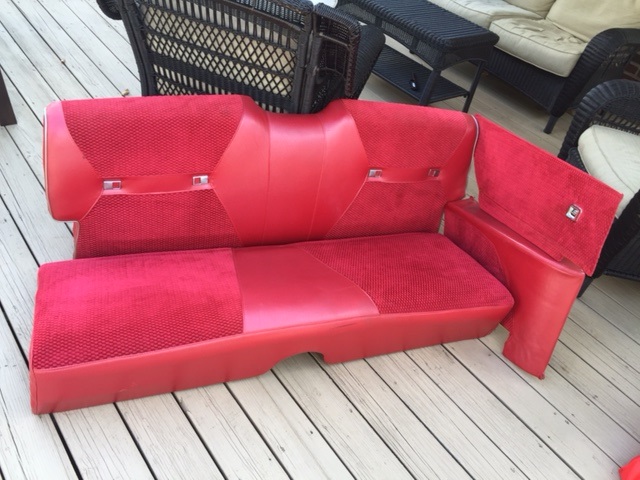
Everything came off pretty easily, although I took my time. I removed the back seat and side panels to make it easier - I’ll be painting these black anyway, so the interior has to come out.
This sure would go a lot faster, if Matthew were here…
Will Faulkner be ready for next Carlisle? Hard to say. The World’s Slowest Auto Mechanic may need two years to nibble away at this project.
More stainless came off today - just about everything on the driver’s side.
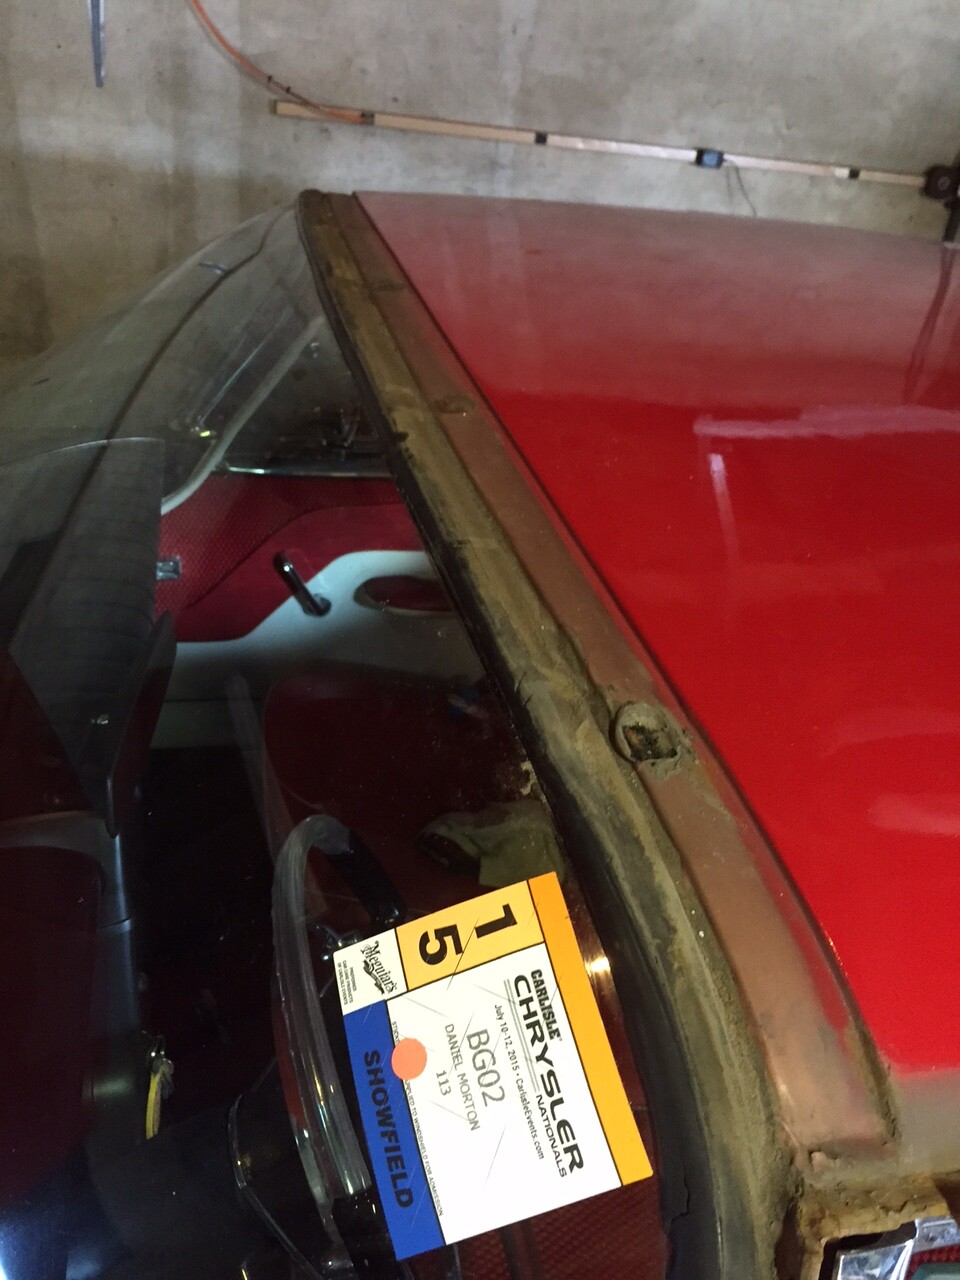
I’m stuck, though, on the top of the windshield. This is the part that the Keijs warned me would be difficult. The three screws are out of the doorpost piece, and the one screw in the bottom - I thought perhaps I could just slide if off, but it won’t budge. What’s the trick?
And what about the bottom - does it have the kind of clips that hold the rear window bottom strip on, and am I going to have to use the Dick Koch Patented Milk Crate trick to get under the dash to remove?
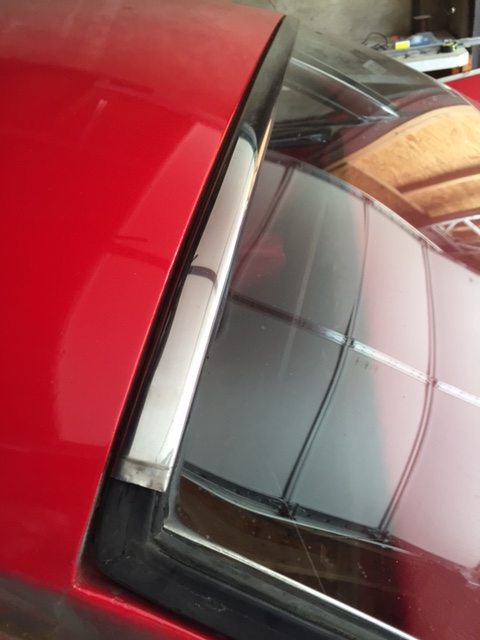
Also, does the rear window upper trim snap onto the gasket, the way the side trim does? Any tricks here, besides carefully prying off?
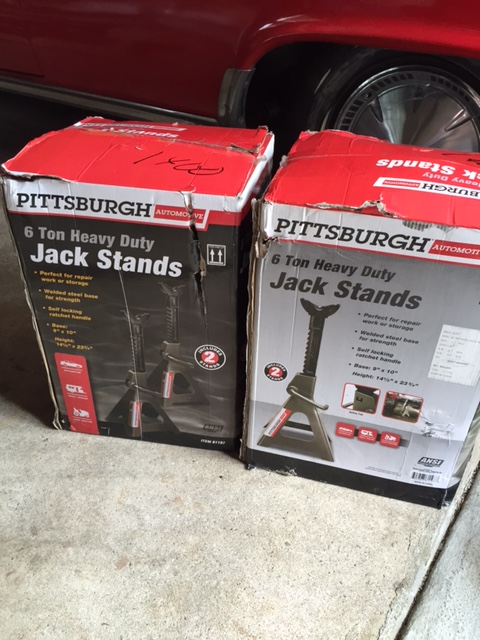
Oh, and check out the jackstands and floorjack I scored from Harbor Freight, $200. Six bucks of that was for shipping! Amazing - I’m inclined to take “3 Ton Floor Jack” quite literally.
Windshield:
You got the screws out, the side part attaches to the top part slide outwards if I remember.
Then you get get the top part off. The lower side pieces are screwed on.
Lower piece, yes! Under the dash. Same as the lower rear window piece.
As the top part of your rear window. It’s snapped in the rubber. Lift the part that’s is closest to your roof and it the trim should be pushed towards the rear
Dan - The center top piece of the windshield moulding is removed by taking the screws out on each end then prying up on the rear side of the moulding, make sure you protect the paint on the car using something like a plastic credit card under your pry tool, use something at least 1" wide so as not to damage the stainless. Under the piece are three clips with a flat rubber washer under them (these washers can be had at ACE Hardware). To install the piece place it on the front of the clips and snap it on at the rear. Do not tighten the end screw too much because it will show when you slide the end pieces on. There is a discussion about this on the site, do a search “2 DR. HT WINDSHIELD STAINLESS MOULDING”.
Now that I have given you a lesson on how to use this site, let’s AHEM! move on. heh, heh.
The front bottom clips as Matthew says are the same type as the rear but if I’m not mistaken the two on the ends at the front are longer that the rest. I think these longer clips are holding the side pieces down and will have to be removed before you slide the pieces off. Make sure you use plenty of sealant on these clips when reinstalling them or your feet will get wet in a hard rain. I’m including the site where you can get these clips NEW.
Re-anodizing the Aluminum can really get expensive and unless you find somebody real good can sometimes turn into a disaster. I cleaned all of my sport tone with Autosol sourced from Eastwood or Mothers Alum and Mag Cleaner and they came out pretty good, even after 37 years in the California Sun. The door sills can be polished to a bright brilliance, send them to me. The long inner rails on the sides that hold up the Headliner panels are chrome plated, you may want to consider have them re-plated. The ones in Greenie are rusting badly and will have to be done soon. A lot of the chrome plated pieces can be brightened using Brass Wool that can also be sourced at ACE Hardware. Use a good grade of Carnauba paste wax on chrome plating never an abrasive type cleaner. This a tip from my plating company.
You can cut the time to complete in half if you will dedicate 1-1/2 hrs. 4 times per week. You must write this in Stone and have it Notarized.
Good luck,
Dick.
Dick,
Morah the Princess Granddaughter was with me all weekend - and she does not share my love for all things '59 Plymouth. Sorry to just now be getting to your reply.
OK, so I don’t know how to use my own site. So, sue me! I did the search on your search string, but I’m a visual kinda guy. AND YOU DIDN"T INCLUDE ANY PIKCHERS! Whassup widdat?! End screws? What end screws?! Where’s the pix?!?
It looks like I have to remove the windshield post trim, before I can remove the top center windshield trim - it overlaps it. But I can’t get those suckers to budge. What’s the holdup, besides the three screws?
With regards to the lower windshield piece - it’s easy enough for me to unscrew underneath the dash, using your patented technique. But, are all the clip nuts accessible this way? Is it possible I have to remove the cowl vents to access some of the nuts?
Thanks for the tip about anodizing. Mine’s in pretty good shape, I think I’ll try the Autosol. The door sills have a few dings in them, but are in pretty good shape. They will find their way to you.
The interior chrome has all been redone, thanks to decent pieces that Ed Ober provided for rechroming. Everything that needs touchup is on the exterior.
Dan
The bottom of the post trim on the bottom overlaps the middle piece of trim. Under the dash all the nuts are fairly easy to get too. The nuts on the ends hold the post trim down. Besides the screws on the post there is another screw just to the rear of the fender, you can see it when the door is open. The post trim slides towards you, sliding off the middle moulding and also sliding off the bottom end clip. The two screws are under top end of the post trim, you can not see them until the moulding is removed. You should not have to remove anything under the dash.
The correct spelling of pitchus is pitchus. I will look for some.
Dick
Can’t find pitchus but I will keep looking. For now you will have to use my mental pictures as I see things or as I remember seeing things!!!
Since you plan on taking your time with Faulkners re do, I suggest you remove the front seat, it’s easy, four nuts that are easily reached, then you can forgo the patented lay down on your back Koch method. You will bless me forever.
Dick.
Opps, four nuts on each side, a memory picture glitch.
Dick.
Found a pitchuh, only one, the clips are hand made from a very rusty sample, I got lucky and they worked. Go to “Show your ride”, Dick’s 59 Red and white SF Restoration, page 9.
Dick.
Wow - amazing work, Dick. It looks like it’s going to be a bugger to get those off..
D’Oh! Of course there’s a nut holding the post trim on, just like the rear piece.
That’s why it’s not sliding off. Now, that’s a mental pitcha I can use.
Not that I’m saying you’re mental, or nuthin’.
Dan
All it takes is a Phillips screw stick. If they seem tight use a impact screw driver with a light touch. Under each clip is a rubber sealing washer. You can also twist the clip ccw to break it’s grip. I tried to post that pitcher but to no avail.
Dick
The post trim is off! For all my tugging and pulling, I got nowhere - then, I took a block of wood and a light persuader to the lip at the top. Light taps showed me that it was moving, so I knew I was onto something. Fifty-six years of caked Idaho dirt! Very little in the way of rust on this car, though - those desert conditions have been good to Faulkner.
With a good tug, I can slide the top center trim back and forth with the screws out. But, I came back inside to reread your post, Dick - headed back out to take a wide plastic trim remover to the back lip and see if I can pop that bad boy off of there.
Dan
It’s all so easy!! You just have to figure out how to do it 
Come over here and make it look easy, Matthew! I should take your father’s advice - a few shots of whiskey, and a grinder 
Actually, beer helps. I tried my soft block of wood trick with the rear window upper trim, and it too popped off the window grommet perfectly intact. But I’m getting nowhere with the upper windshield trim. Back in the house cooling off (it’s 95 F in the garage!), but I’ll be back at it soon.
Dan
I might be in the neighborhood in February.
As for the top trim, I think I pulled the front up and the rear (towards the roof) clicks off.
All the trim can be removed in 1 day 
Hmm…
When I look at the clips from either end of the moulding, I can see the rear curved tip of the clip nestled in the rear trim curve, and the flat end of the clip in the front trim curve. It seems to me that it should come off the way it goes back on, and that would be to engage the front part of the clip first, and then pop the rear end down over the curved part. So I’m going to try Dick’s approach first, with a little WD-40. Wish me luck…
OK - I noticed that the upper moulding has a little play in it, front to back. I took one end, and moved it as far as I could towards the rear of the car, in an attempt to reduce the pressure of the rounded end of the clip on the moulding. I then ran my fingers under the rear of the trim and… pop! I got a similar result with the other two clips. (Dick - there is a little “wave” in the trim that was there before I started - I swear! Should be easy for you to take out, I’m guessing.)
The clips themselves are in perfect condition, although caked in Idaho dirt. They are now safely ensconced in a separate marked baggie, with all the bazillion clips and screws I’ve removed, bagged and marked.
But it’s now 100F in the garage, so I am quitting for the day - maybe tomorrow I’ll prepare a tube, Dick.
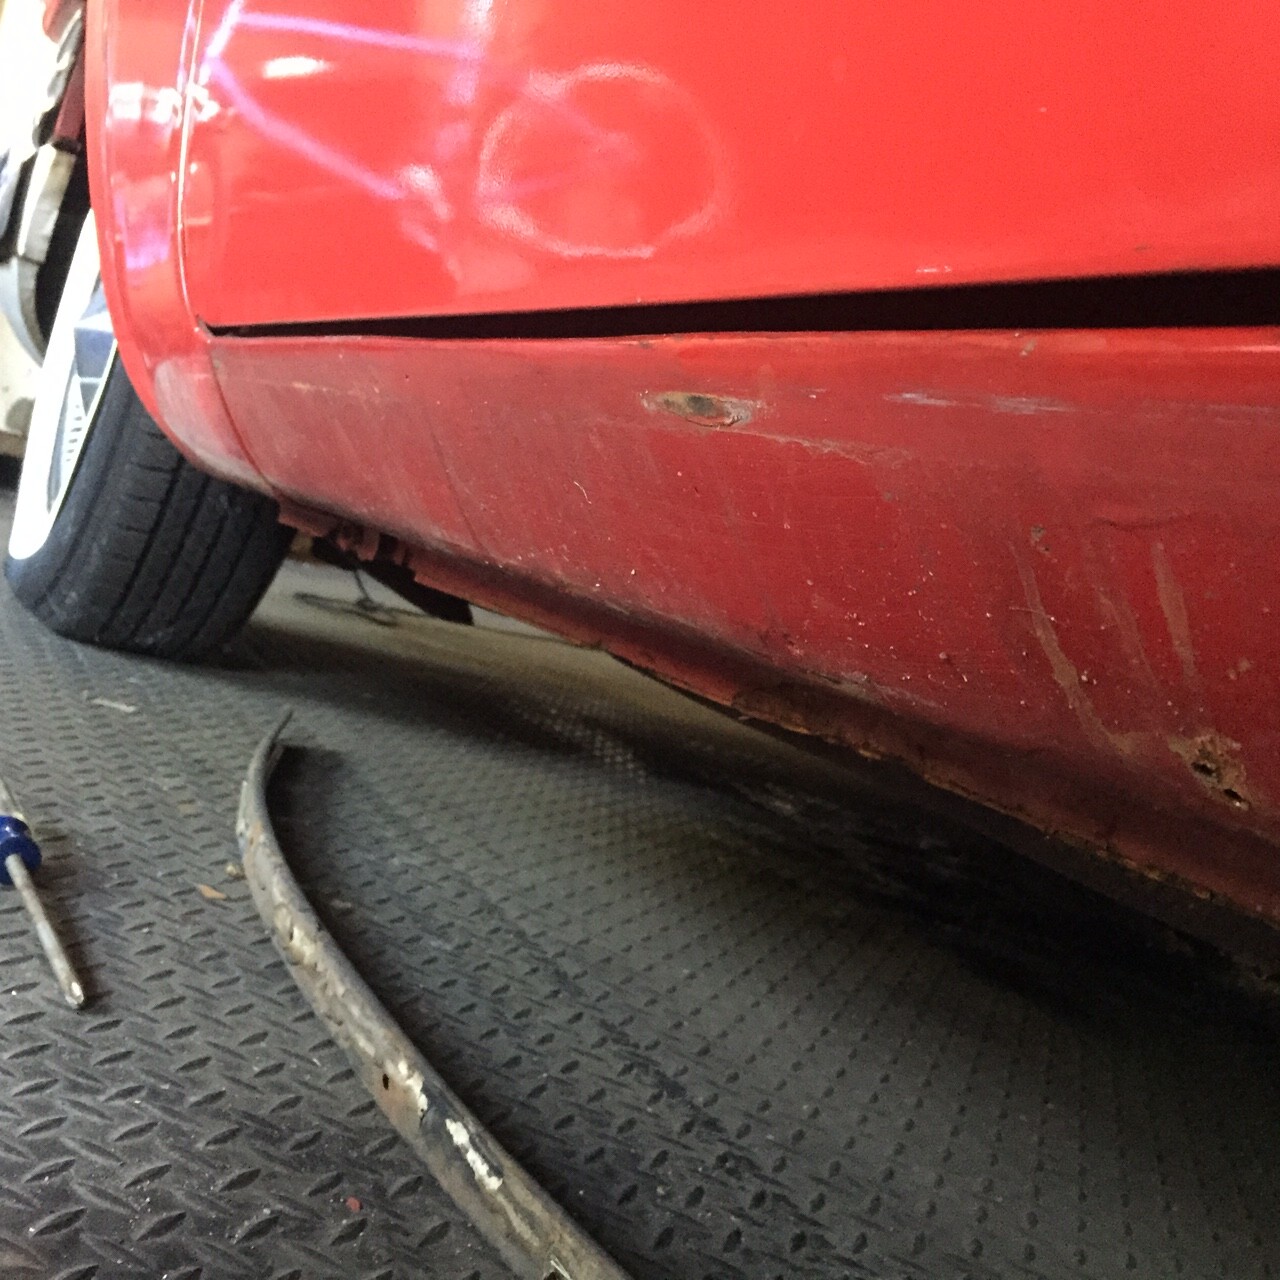
Now that the easy part’s done , how do I get the d*mn rocker moldings off?! 
Yea Dan, way to go. The rocker moulding clips are similar. The clip on one end is flat (up) the other end is not (down). Remove the screws on each end then pry up on the bottom of the moulding. Look closely the clips could be installed the other way.
Dick.
I was really concerned that removing the rocker moldings would be a difficult proposition. It turned out to be a piece of cake.
There weren’t any clips! 


That’s right, just three screws holding each on. So, looks like I’ll be trying Goers or Bernbaum for 12 clips (unless someone has a better source).
They’re a little beat up, Dick, but let’s see what you can do with them. Unfortunately, someone drilled two small holes along the upper lip of the passenger side one - nothing to be done there, but they’re pretty small. I’m not going to worry about it.
The rockers are really solid, to my amazement. But what’s surprising is that the holes for the two front clips on the driver’s side are missing! On closer inspection, I can see that there was some body work done here, and a piece of metal spliced in. Not sure what happened here - if it had rusted out, I would have expected more signs of rust elsewhere, but they are rock solid. So, I’ll be measuring and drilling holes like John Fowlie did.
Looks like I’m going to have to drill out the gravel shield trim screws on the passenger side - they are rusted tight.
Yes, that’s a bottle of Belgian beer. The only thing the Belgians do better than the Dutch!
Dan - The clips for the rocker moulding are available from Gary Goers. You may want to consider what I did on the Convertible. Eastwood has a product in a spray can with a long tube, the tube has a nozzle on the end that sprays paint out several small holes on the sides. You insert the tube into the drain holes of the rocker, move the tube back and forth and wala, you have rust protection. Two cans will do it giving you two coats. Sounds like the rockers have a rust issue considering some metal was replaced. Harbour Freight has a small AIR impact tool for screws, that tool has saved my butt many times. It’s Central Pneumatic Reversible Air Screwdriver Item #90059. I think they are Under 20 Bucks.
Dick.