Is it done? ![]()
If not, go to the garage!!!
Is it done? ![]()
If not, go to the garage!!!
Matthew, Good evening to you and morning to me. No not in garage but was waiting at Airport for your arrival! Sadly, I came home and am working on the wiring part this AM.
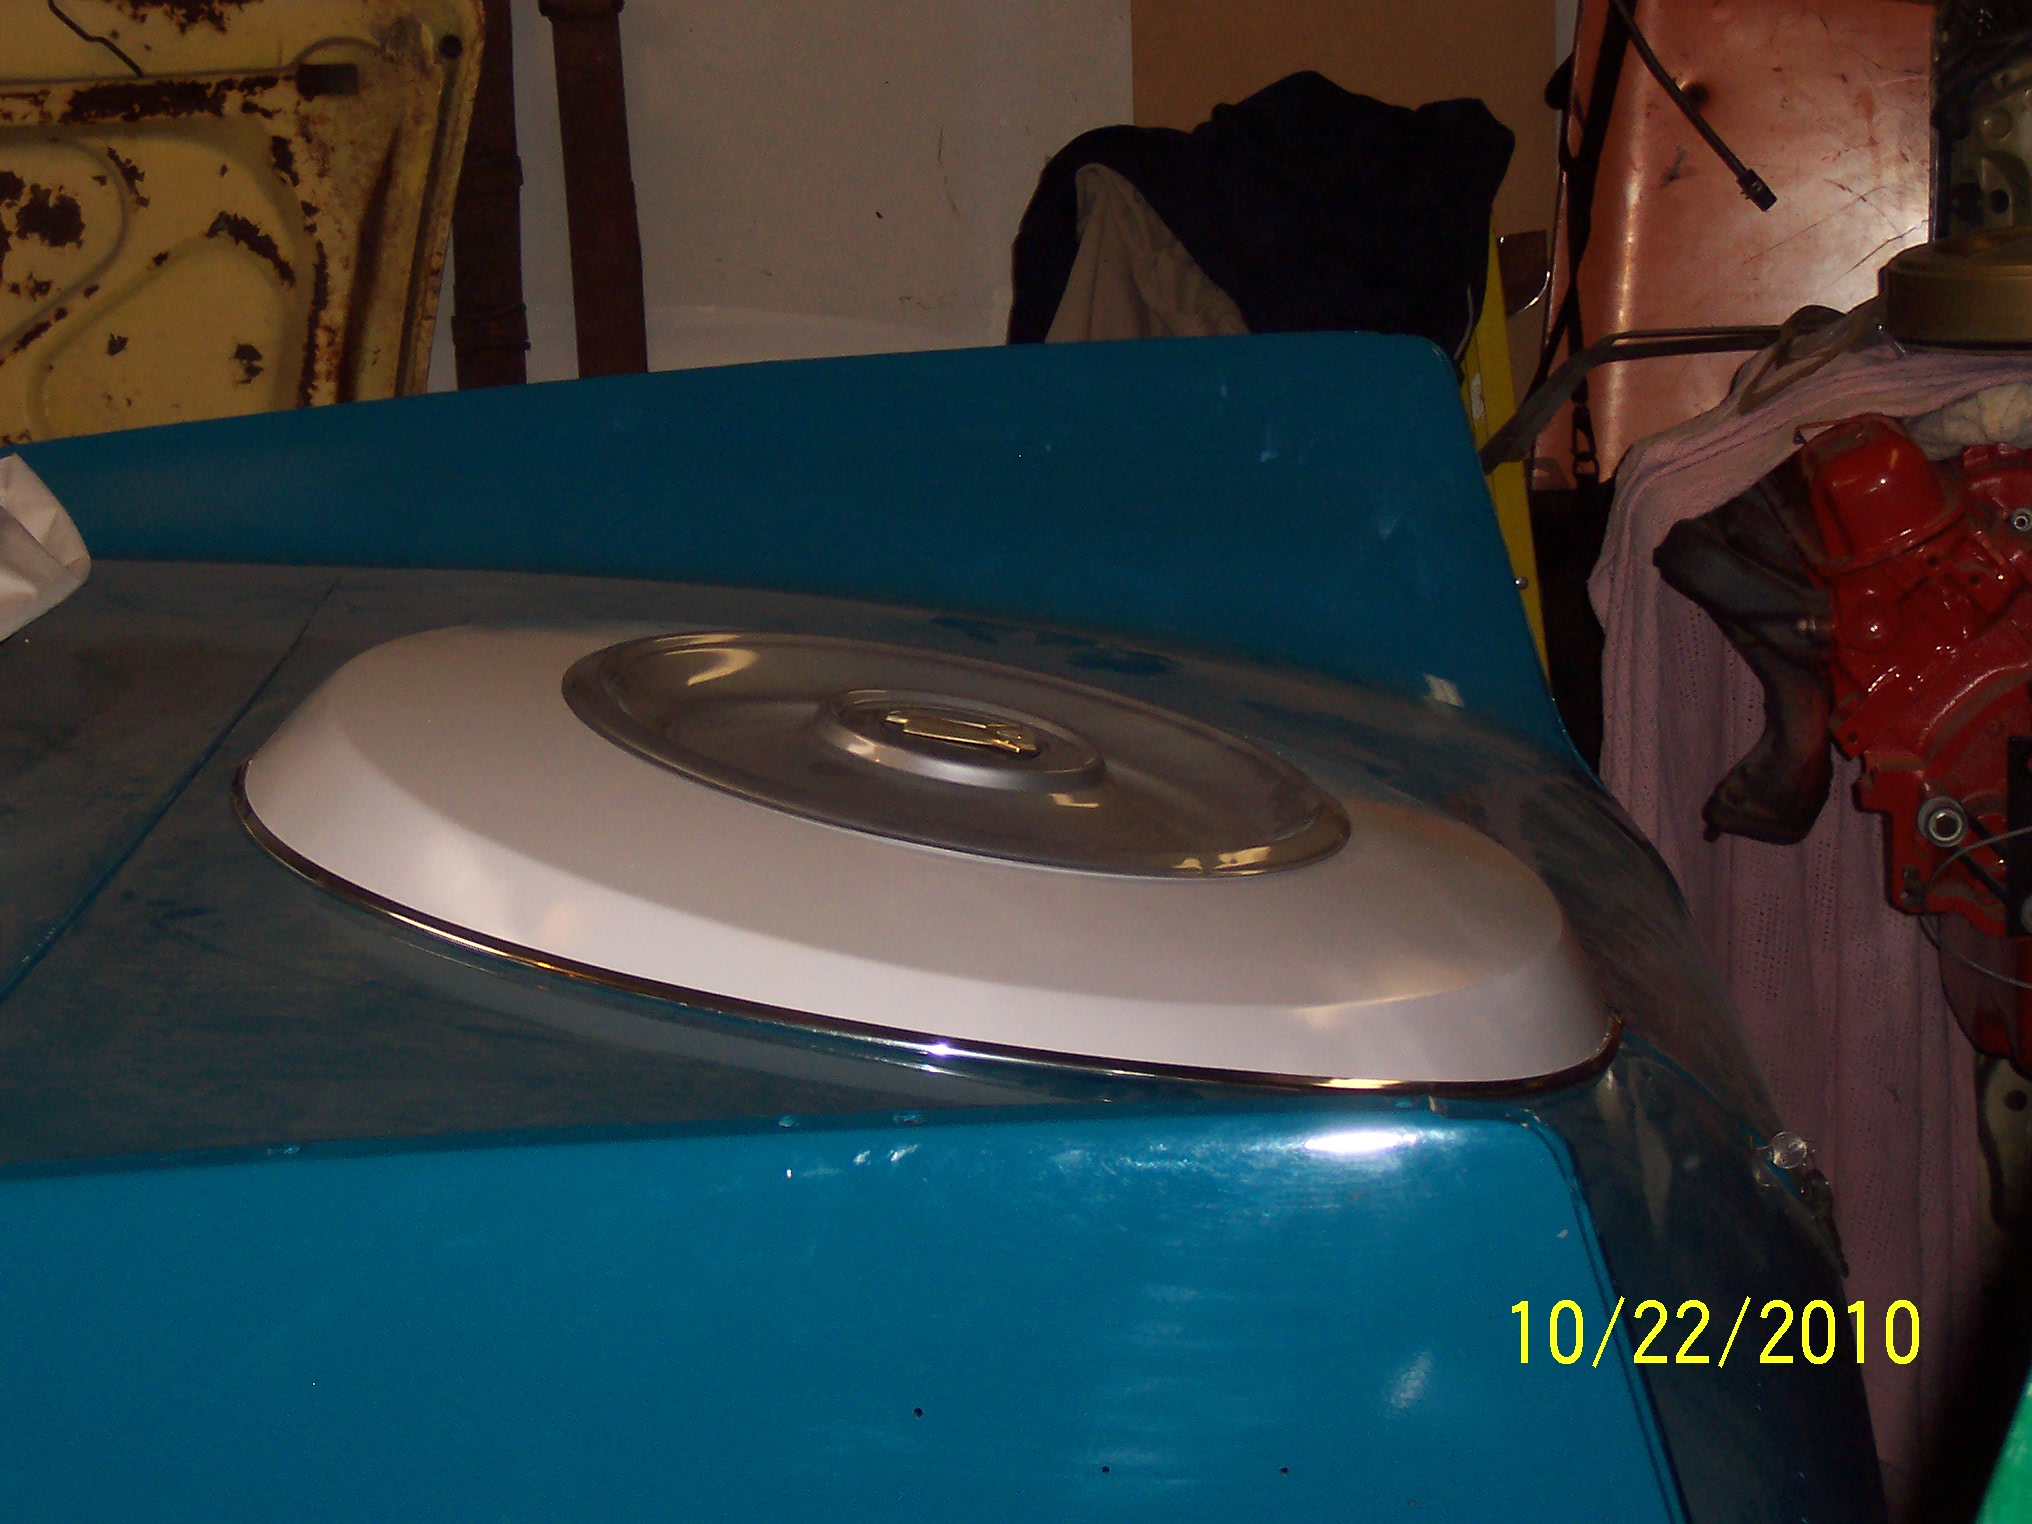
Gas tank is in. Welded on front sway bar brackets this week. Need to grind welds then paint them.
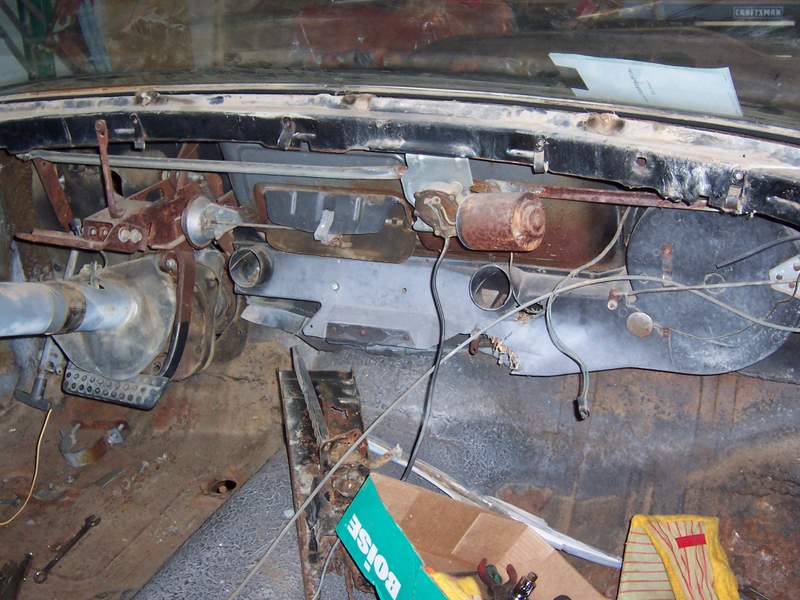
Getting there. Life keeps getting in the way. I will start terminating the engine wires today and will put the dash frame in today and pull then dash panel lights thru the opening to connect to Instrument panel with the newer modern fuse protected harness.
I forgot to pull the rear harness thru the cowl structure and run inside the upper rocker area and back to the rear. So last night I did that and all is well there. Which reminds me to take a picture of that area too!
With your new purchase, we are drop top buddies!
John Q.
John,
I bet you already knew that your post with the pictures today was #10000 on this forum ![]() Congrats to you and our IT geek webmaster
Congrats to you and our IT geek webmaster ![]()
![]()
![]()
Your welding looks very good and I couldn’t have done it better myself! Keep posting pictures as your project is reaching the final stage, next year you can start cruising, top down and the wind in your hair ![]() And I don’t have to say that your drop top looks drop dead gorgeous
And I don’t have to say that your drop top looks drop dead gorgeous ![]()
Ron
Well, it was post #10000 - but there are fewer posts than that (because of deletes, etc.). But we are closing in on Ten Thousand total posts.
I wonder who will get to post topic #1959? ![]()
Dan
We are also counting deleted posts ![]() And I have been waiting for years to open topic 1959, guess I’ll have to wait a few months…
And I have been waiting for years to open topic 1959, guess I’ll have to wait a few months…
Ron
What did I win for the #10000?, I also had my 500 post milestone today too, it went to Matthew! Time flies when you are rambling in these posts.
Had a good day in the garage. Re-routed the rear wiring harness down the area where the sill plate goes. I had no Idea that is where it went since my harness was chewed up and not in its normal place when I took it down to bare steel.
Luckily, a buddy came by last night who has a 58 Dodge and looked at where I had routed it (just inside the sill on the main floor) he said that would work for my 70 Cuda but not what they did in the late 50’s. Opps! I had not terminated anything to the rear brakes light area yet,so it was easy to pulll it back forward and using an old heater cable, I attached the beginning of the wiring harness to it and fished it thru from the kick panel cowl area rearward along the channel in the upper sill area and then back thru the lower quarter window area. The extra heater temp cable. I had used it kinda like an electrician’s Fish Tape would be used. Pulled it thru in less then 5 mins. Saved by procastination yet again!
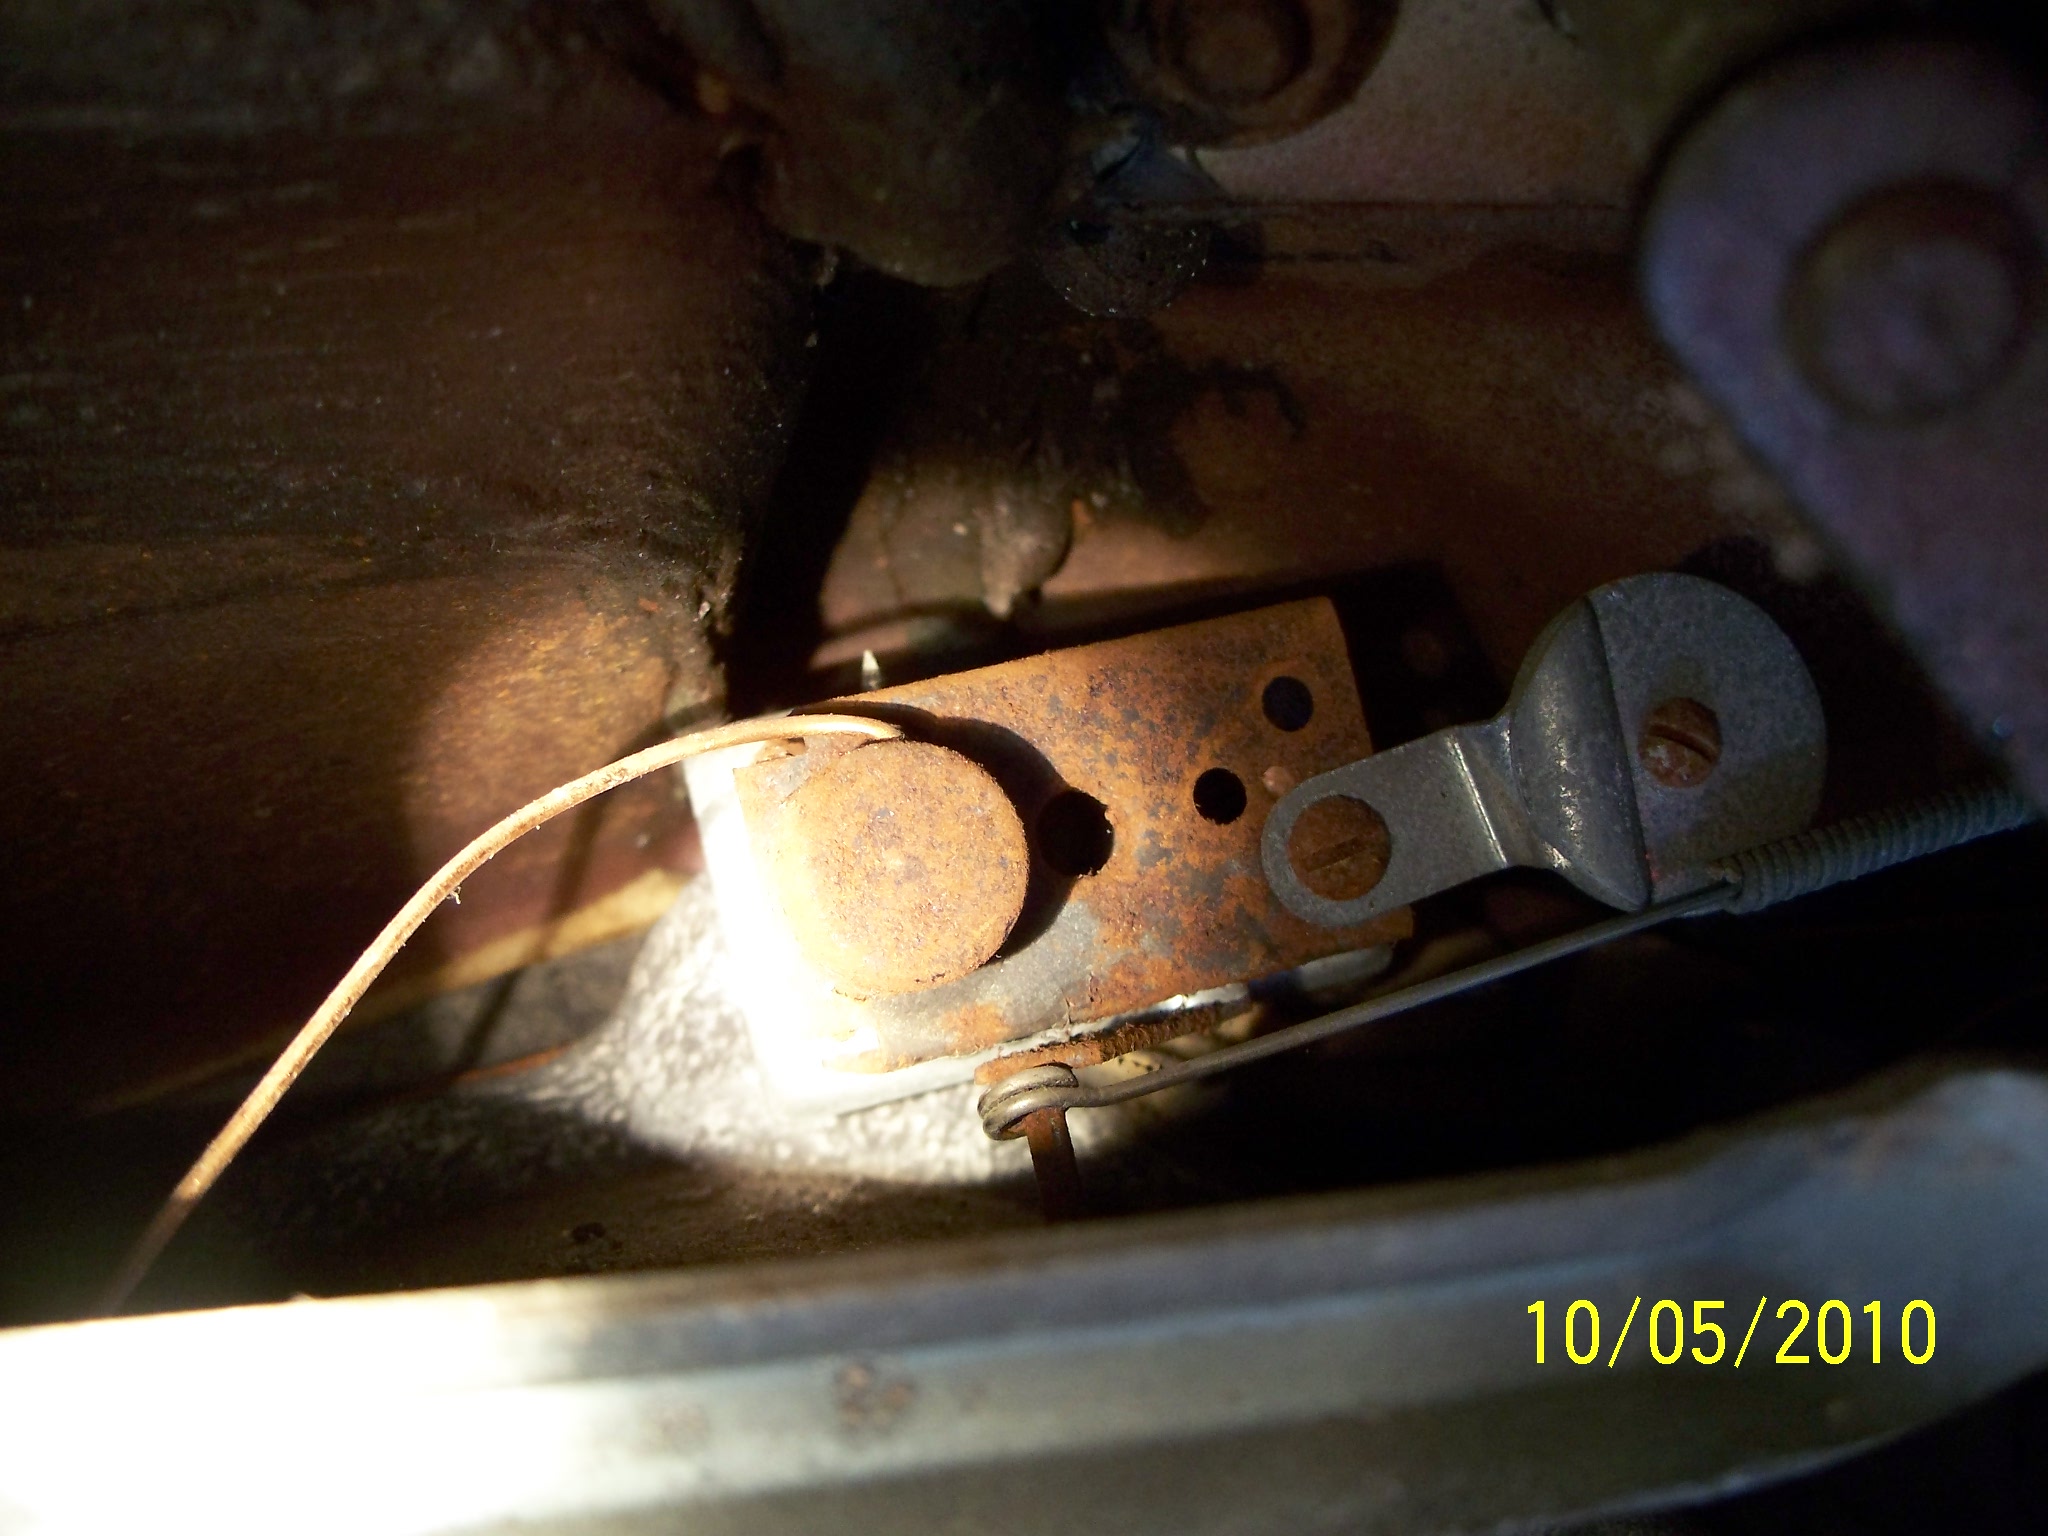
Also installed the Rebuilt Heater Control Valve, so there should be no reason to go back under the dash again. Barring that I installed the HCV in the correct Orientation. Dick Koch will let me know if I need to rotate 180 degrees the HCV or leave it. Looks right but…I will defer to wizer men.
The replacement valve was only 10 bucks at Napa and with a PDF instructions from one of the Forward Look guys (who got it from a Packard guy…) all looks well. Tested out good at least.
John Q.
Looking good John - Man I wish I had recruited you to do my welding, my guy Larry is good but not as good as you. The heater control valve is entirely different for a AC car. There was a NOS AC control valve on ebay last week and I fell asleep in my recliner and missed it, dammit. Don’t do like I did and put the glove box in too early. Leave it out until you are sure everthing is working right.
Dick
Yes, the wiring to the truck goes thru the sill space.
$10 for a water valve at Napa? Wow! That’s news to me.
Not sure what Dick means about water valve being entirely different for a/c, but you John don’t have to worry about that!
Dick is right, the AC version is different the the non-ac valve. And requires an even harder part to find. The part number for this little Non-AC valve (that when old, leaks a lot, Not talking about Dick Koch..). Now this is not the entire HCV but the little rubber valve that makes it all work is for 10 bucks. My radiator shop guy said there was not rebuild kit available but I thought I had heard there was and did some digging on the Forward Look site and found it.
The part number at Napa is 660-1000 and it went for $9.90 plus tax. My NAPA had it for me the same day. Read about this in the Heating, Cooling section of the Forward Look when I put out a call to how to get his valve. I need to stock up on this part.
A FL member then gave me the Link to the Packard Club where they use the same Ranco H-16 HCV on an early 50’s Packard. The PDG the Packard guy then went thru it step by step.
Let me see if I can find it and post it here the PDF on the HCV rebuild. I did not do the copper gasket spray part of this how, to since it seemed like overkill and I did not have any on hand anyhow!
On the wiring, I thought I was doing the routing right since that is how it is done on E bodies and B bodies I have done over the years. Did not even think it was wrong to even asked you seasoned 59 guys!
It would have worked OK but then it is under the carpet and subject to abrasions etc. The way the 59 is wired is cool since all wires are protected in the sill.
John Q.
HOW-TO%20Ranco%20Valve%20Seal%20Replacement.pdf (1.34 MB)
The Ranco repair PDF is great. Restoring these cars is maybe getting easier?
I see that in the Parts Book, cars with types 903 or 904 A/C used Valve 1187 019 .
Regular cars with 706, 707, 708 heaters used Valve 2084 273.
How do they differ?
I wish I could weld like that. I usually warp or burn through, but I got a cheap wire feed…we’ll blame it on that.
Back in 2004 I replaced part of a rocker panel and the dog leg section just behind drivers door. I didn’t trust my welding so I used 3M panel adhesive to attach the new metal to car. That was 6 years ago and everything is holding up good. Cannot see where repairs were made. So for you non-welders that’s another way to go. Some of my old school buddies scoffed at that technique but like I said, it’s holding up and I did it myself and probably saved a few $$.
Talked to a few body shop guys before I did this and got their advice. One shop guy said his guys did not believe in this stuff so they “glued” two pieces of sheet metal together and then tried to pull them apart with a frame straightening machine and it couldn’t do it, the adhesive held.
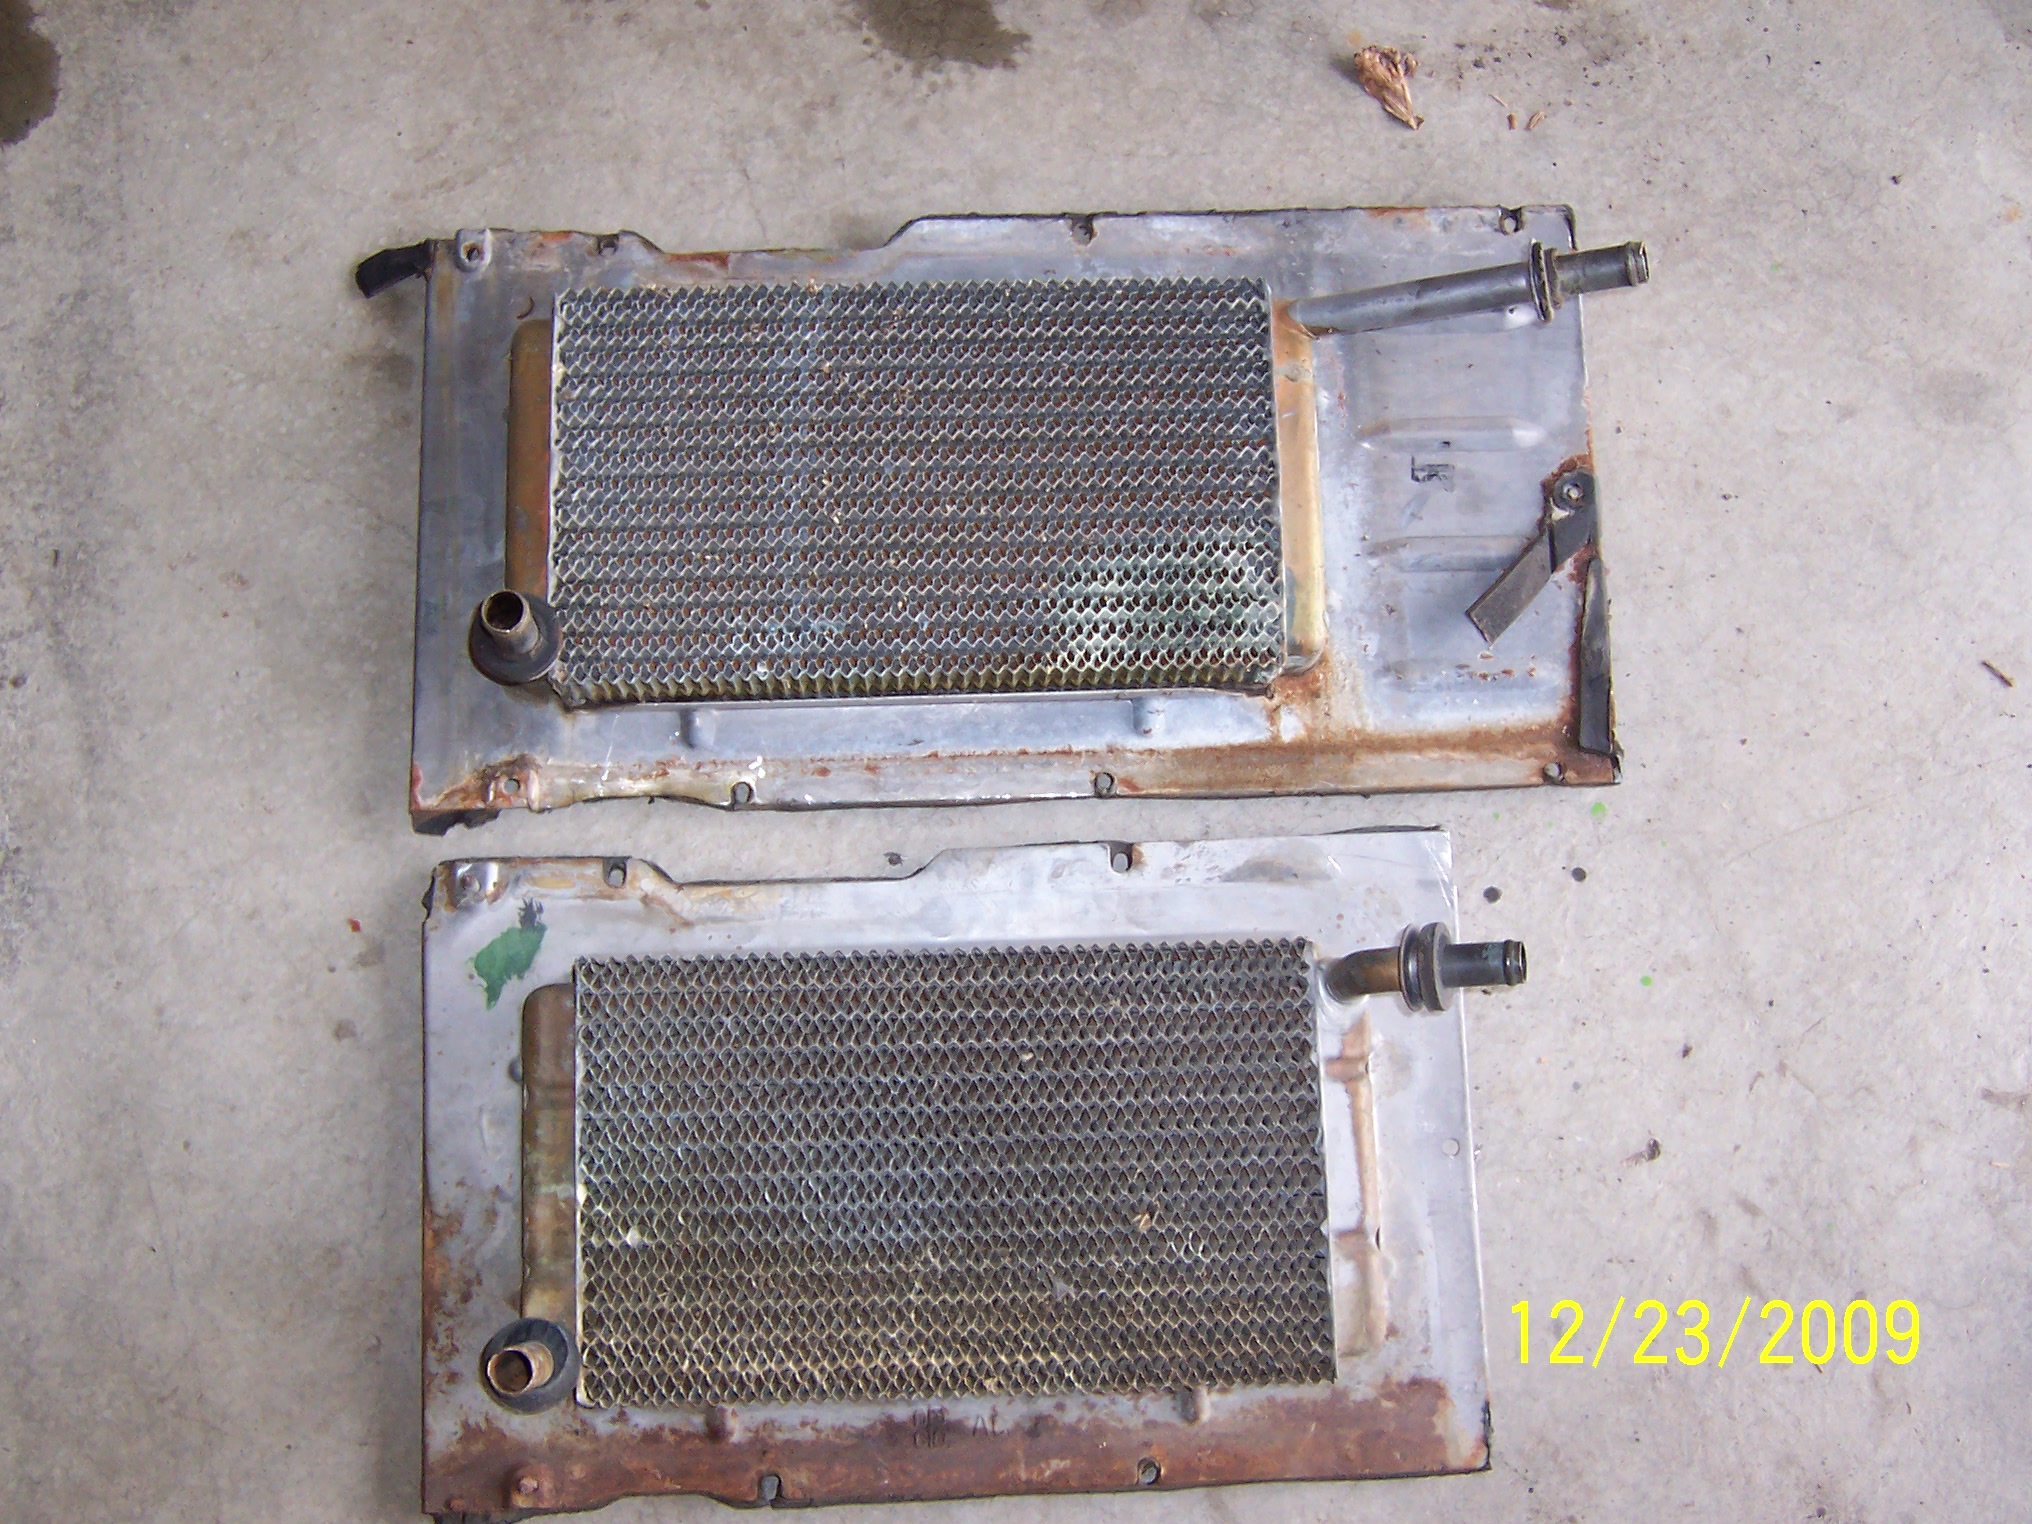
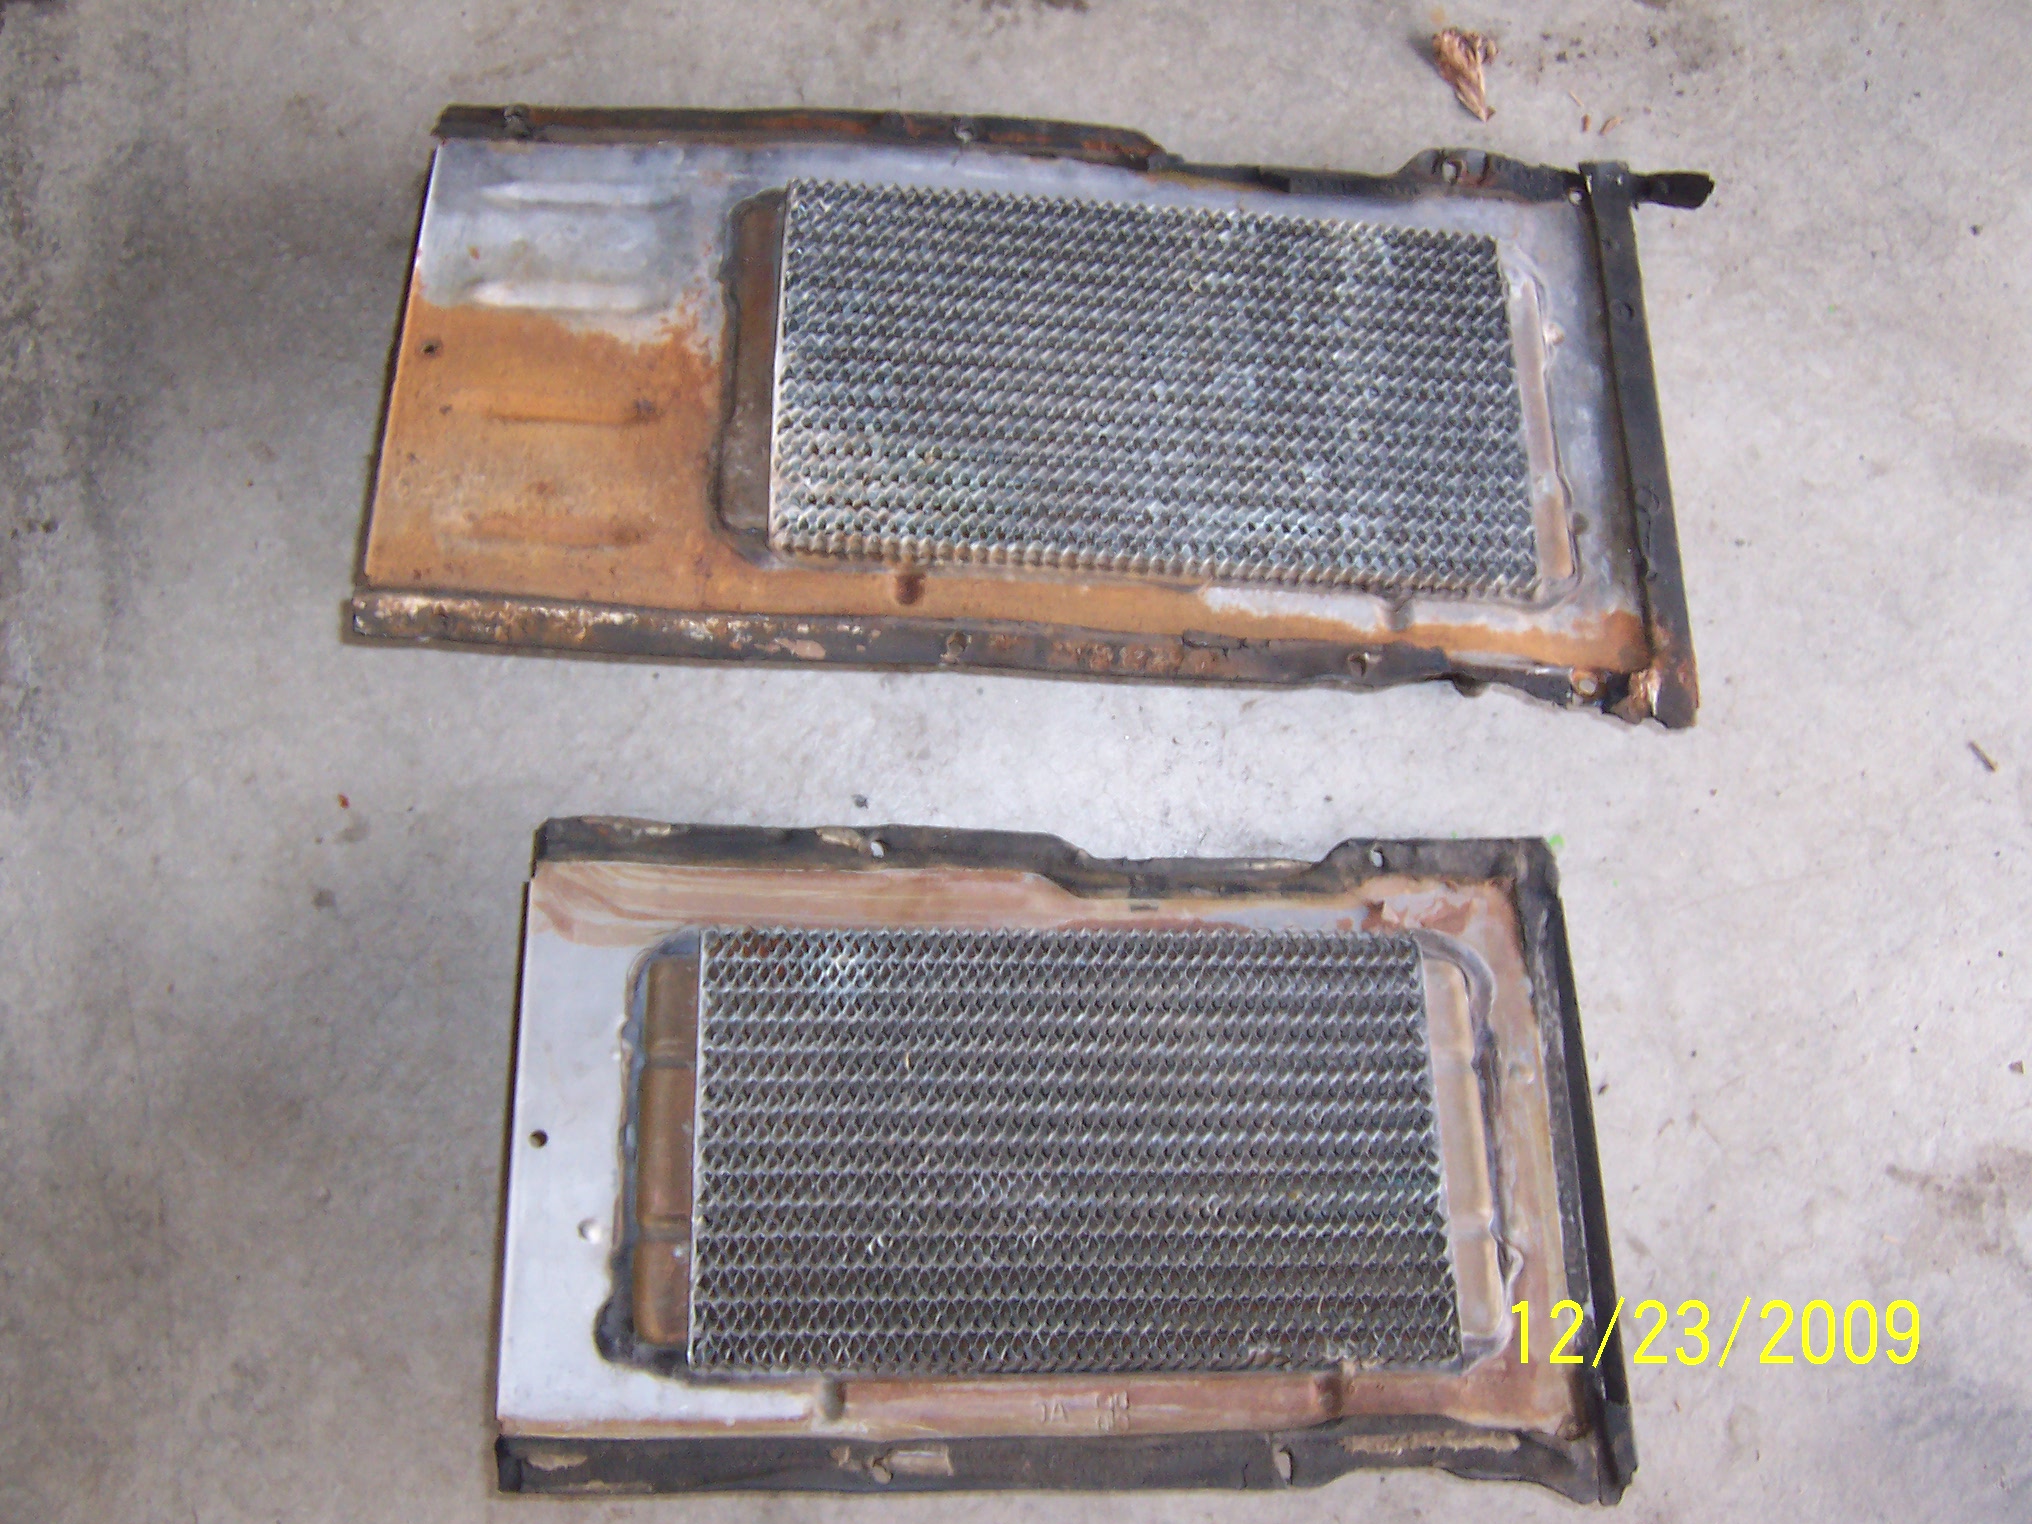
Roger, I am using the 707 fiberglass engine compartment shroud. Which I have been told by someone at the FL site that I have a Deluxe heater box. The area on the box stretchs to the 2nd upper mouting hole (from the Drivers side) versus going to about the 2 1/2 hole beginning before the box swing out as my original box went. (see page one of this thread for a view of my 707 Heater box in one of my engine shots)
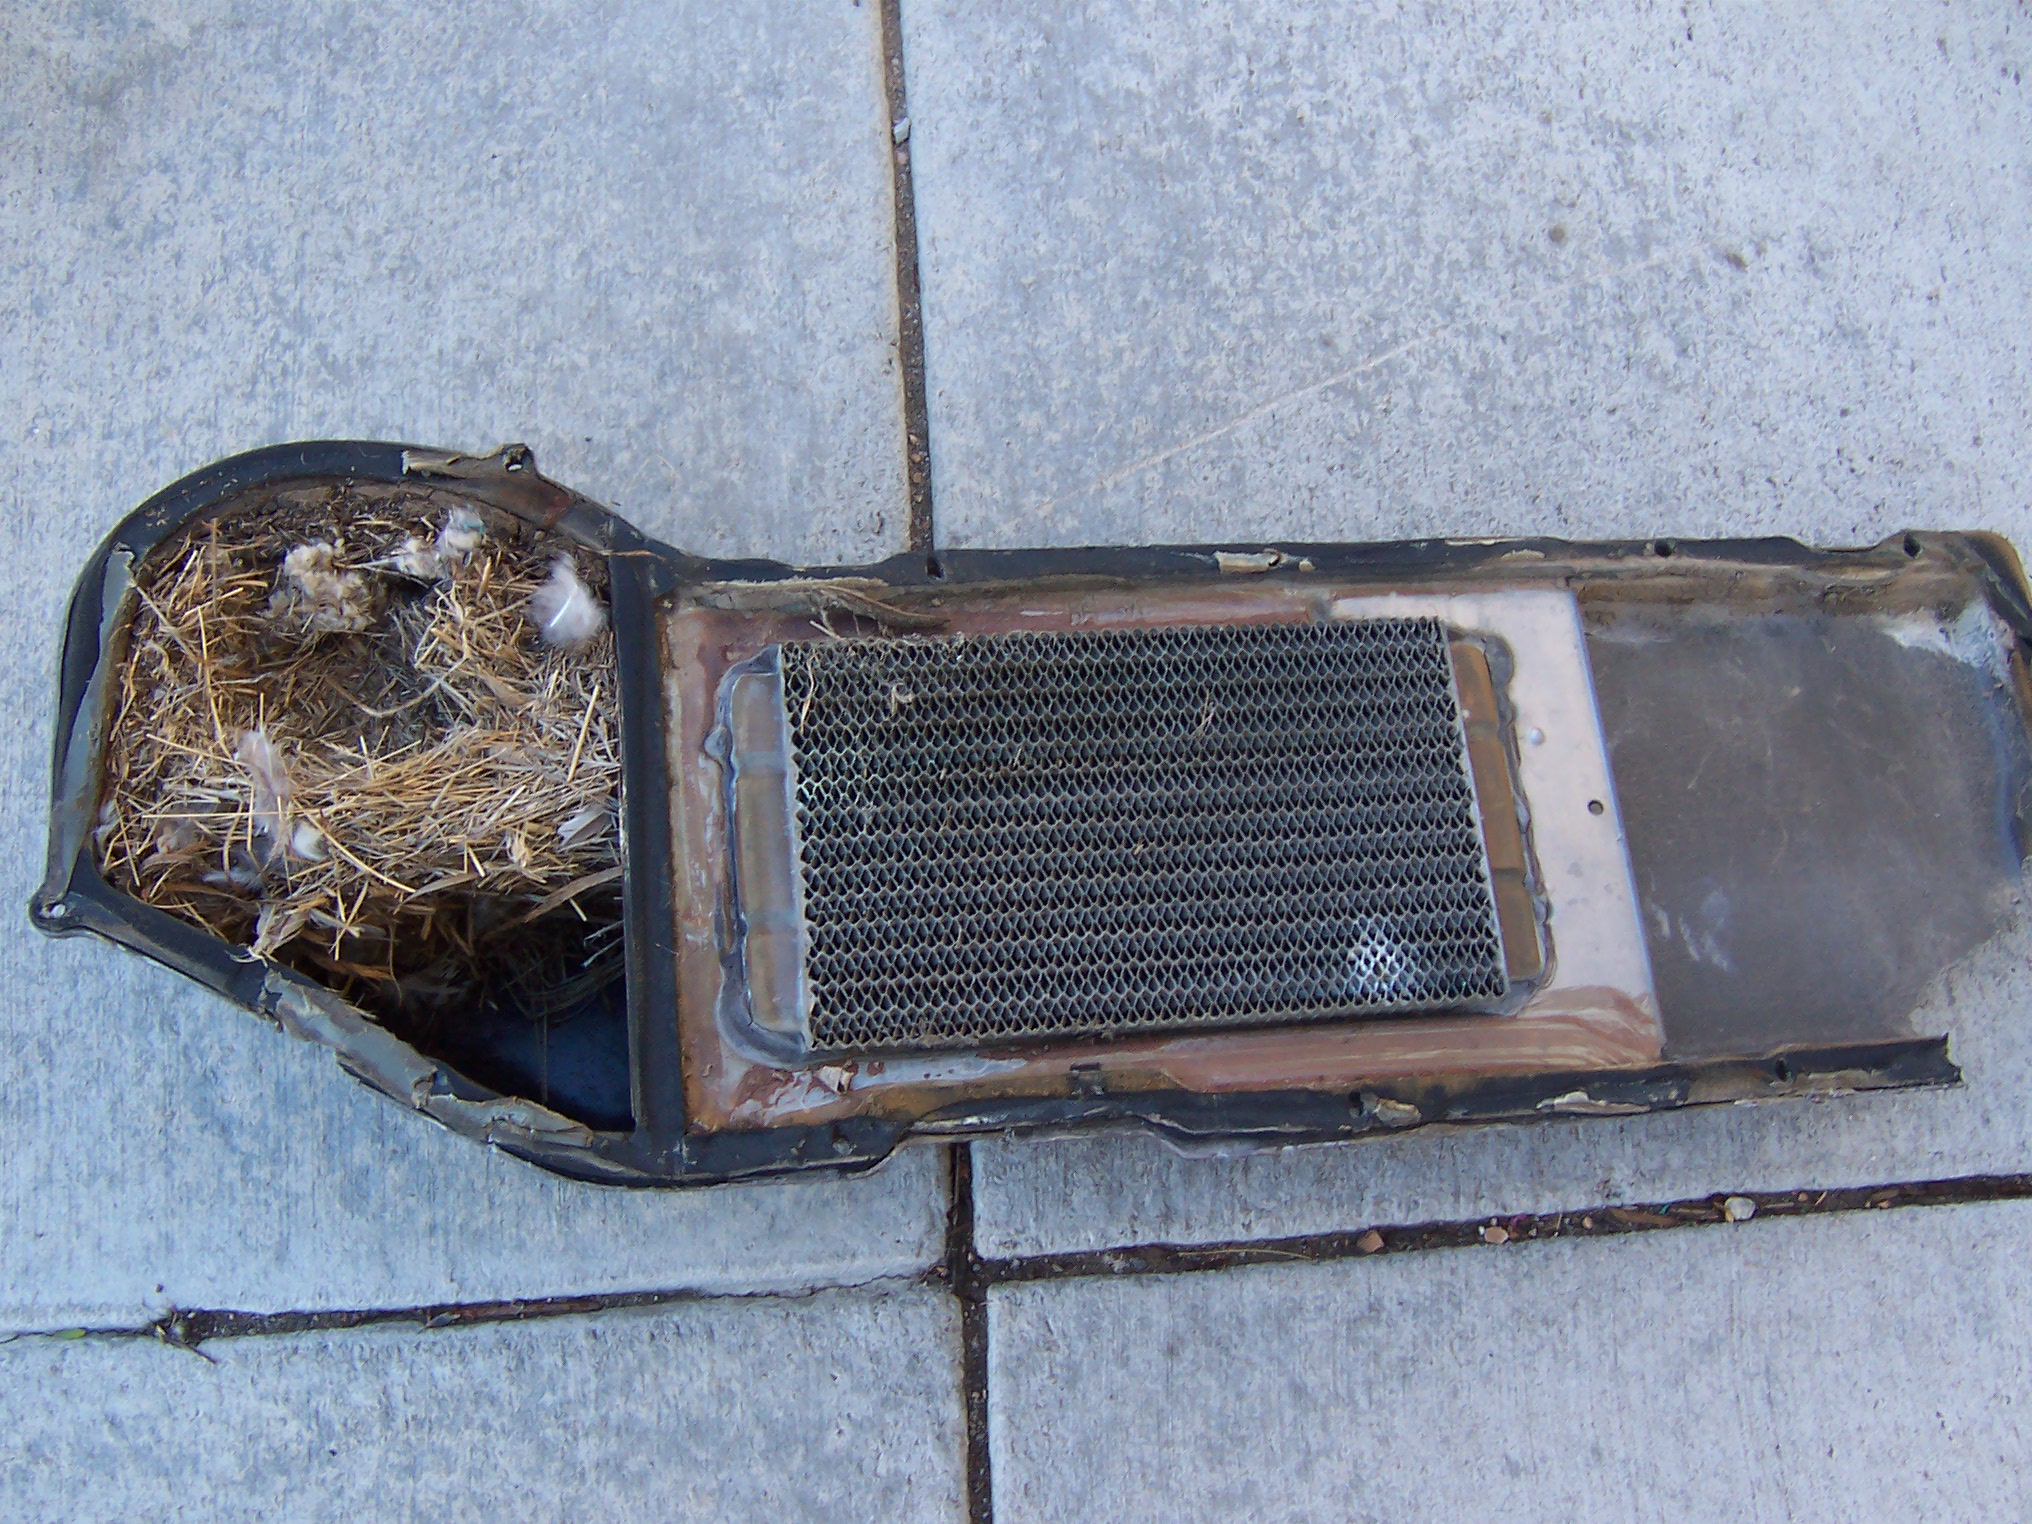
My original box had a huge hole in it and birds had made a nest around the fan unit. See pictures below. I had purchased a new to me, but used fiberglass box a couple years ago off of Ebay, it just happened to be this 707 casing. I don’t know what was deluxe about the heater because it has the same surface area as the original heater core. Just that the flat steel exteded further to the drivers side and sealed this area up a bit. Maybe making more efficient. See a photo of the two heater cores below.
In answer to your question…I don’t know why the HCV would show a different Part number for it over a std. Heater core. Perhaps with this more effecient Heater core with the bigger flat support structure the HCV may have been slighly bigger in diamenter or even in flow rate. I have a 60 Chrysler HCV and it is a Ranco H16 also but the inlet and outlet are the same size as a 59’s is. I did not get the HCV that was original to the 707 shroud and heater core.
John, I almost went this route with the adhesive but actually wanted to learn how to weld these panels on. I did have a lot of burn thru as I learned how to adjust the weld temperature and wire feed. I had invested in a copper paddle tool that acts as a backing device when filling the burn thru areas with additiona weld.Then grind it down flush.
Todays adhesives do work fine and will try this on my 69 charger when I get around to putting on full quarters to the car.
John Q.
The birds’ nest photo is priceless, but I think you veer off topic…the water valve.
Since the water valve PN is different for A/C vs. non- A/C, and my memory is fuzzy, all I can guess is the A/C valve has some added sensor…for what, I can’t imagine.
Veering is my middle name. (Segway is my confimation name) I was commenting on the 707 etc heater boxes and my H16 will work fine on it. I think you are right on the AC part with more sensors.
The fan motor that surrounded the birds nest was imbedded with straw and twigs. Had to pick it out with tweezers. But it is a classic photo. Should make that my Avatar for a while…
John Q.
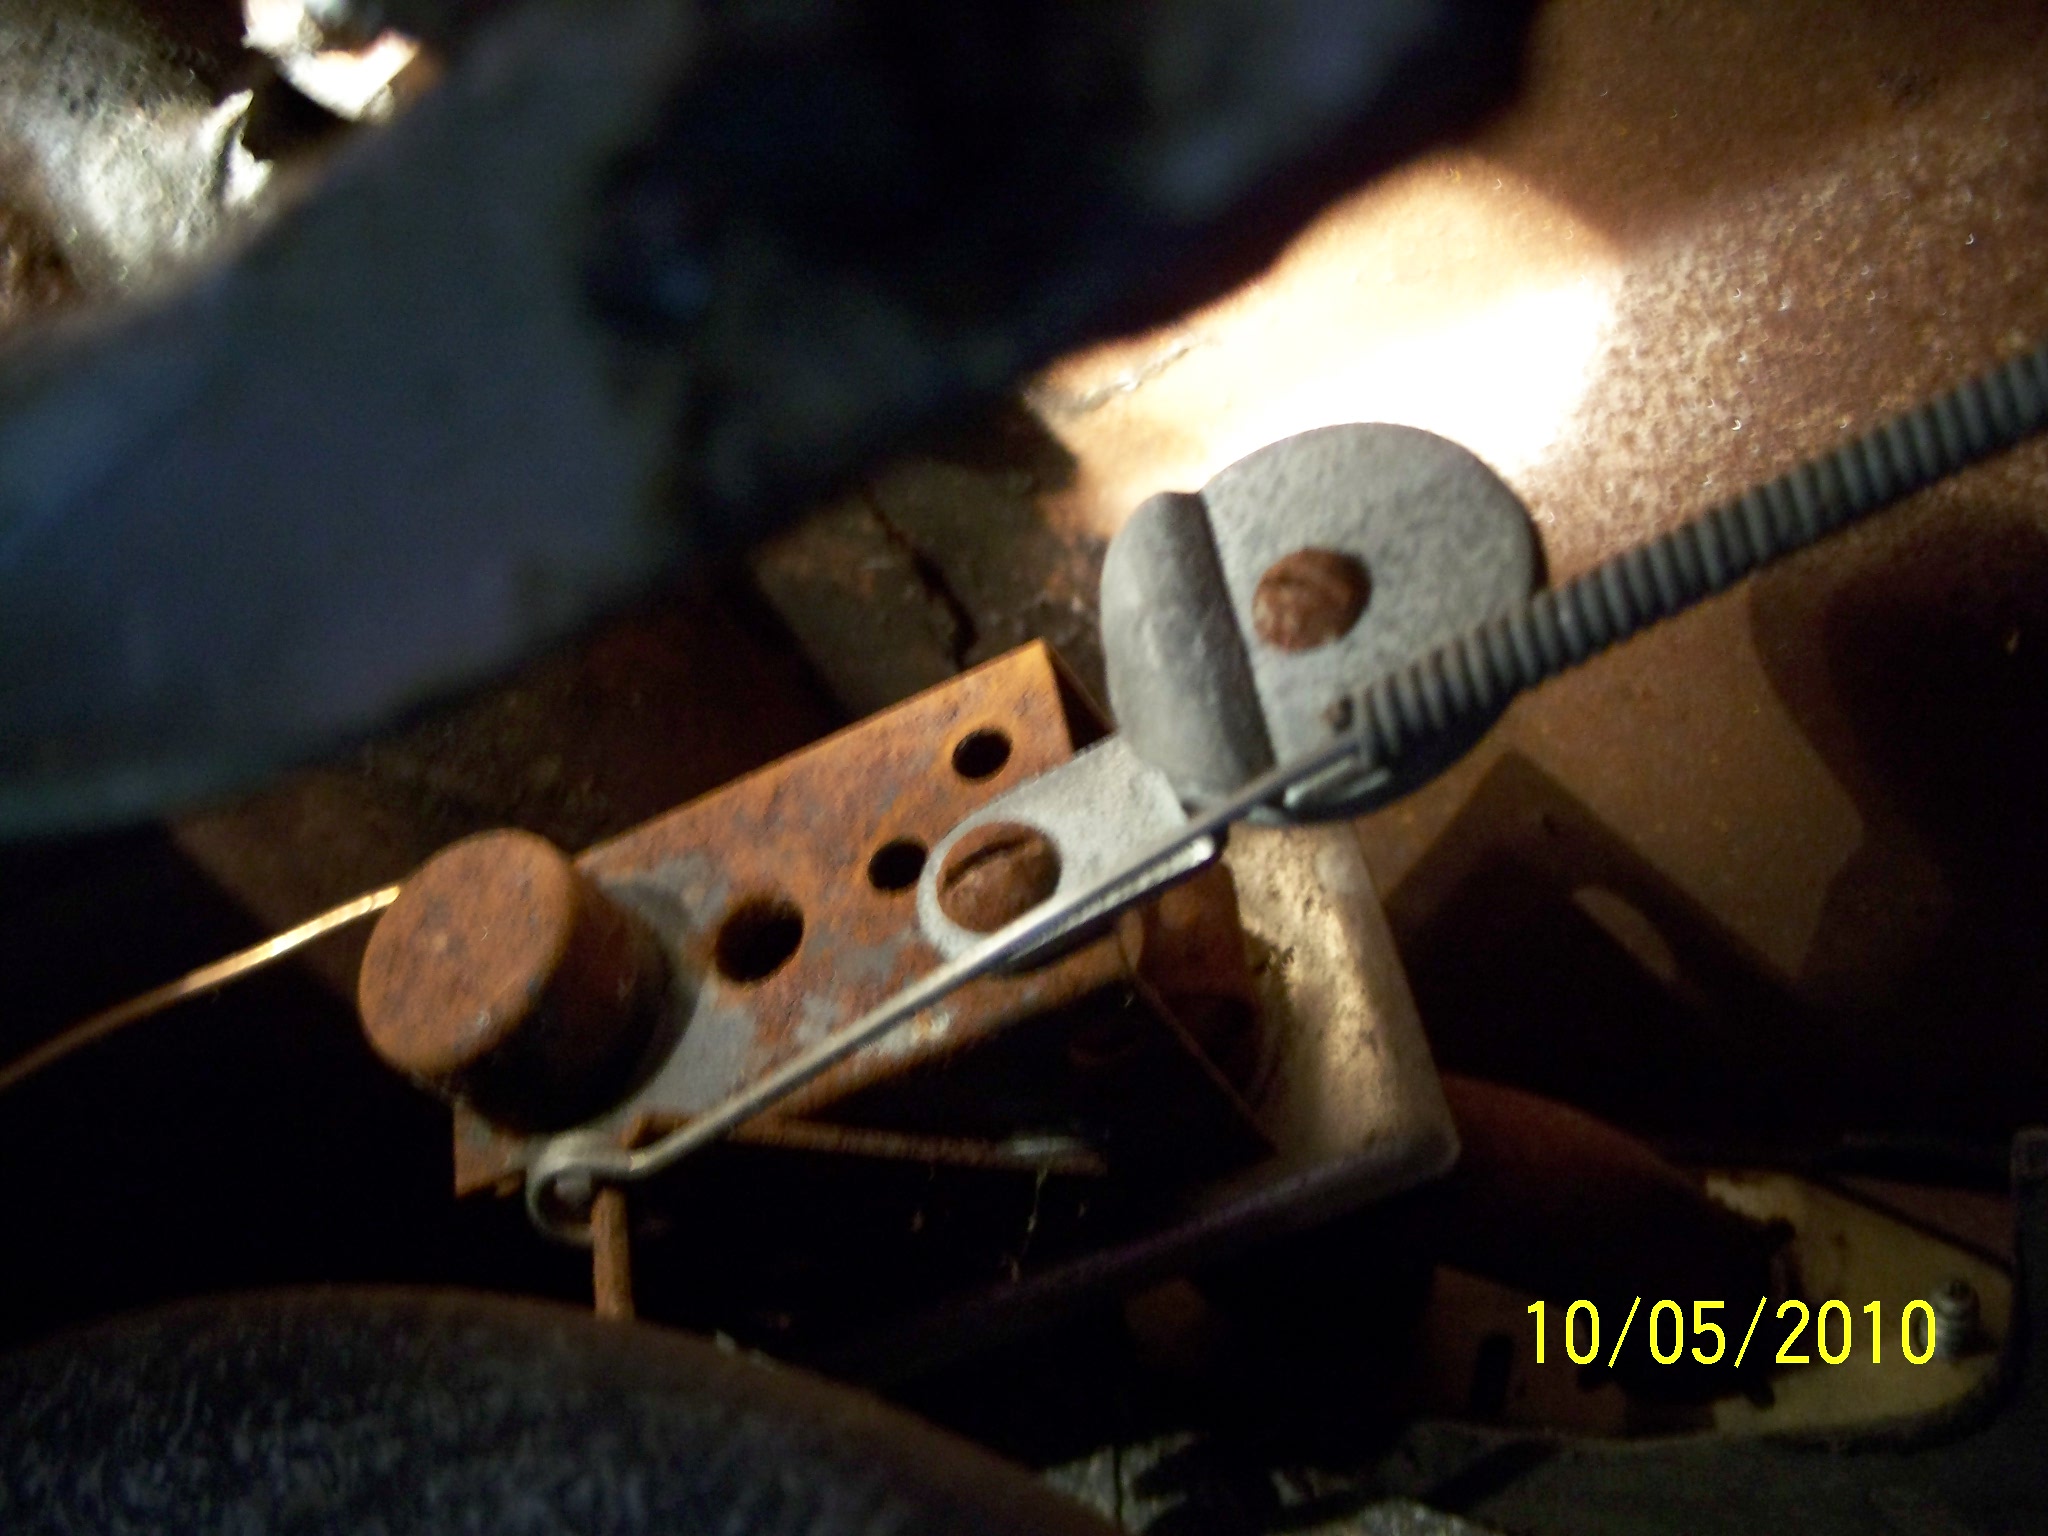
John - Just for you, since the flash on my camera would not work I took a flashlight and got a couple of pictures, these are from a 4 dr. parts car I have. It looks like the valve operating lever is on the bottom and works back and forth horizontally. the cable snakes in from the right hand side and when the lever is all the way up the lever on the valve is to the right.
The windshield moulding clip is in the mail today. Cost is a ride in that convertible when you come to Florida or I go to Colorado, deal?
Dick.
Thanks Dick! It looks like I need to flip my HCV 180 degree’s. What made me stop was a picture I had taken of the interior that showed the temp control cable coming from the right and and being supported by the clip in the interior Heater housing. The way I have it in now is way to far to the center to be correct and was beyond the support clip. Your picture confirms that I had flipped it around 180 degree’s.
Now after flipping back to the correct orientation I can put the dash frame in. Better to correct now with the frame out then have be upside down under the dash switching it. Here is the picture that made me stop and ask you what is correct.
You are on for the ride out here in the Belvy convert! Or I will mooch a ride off of you someday! I would probably ask you for a Diet Pepsi too! That is just how I roll!
John Q.
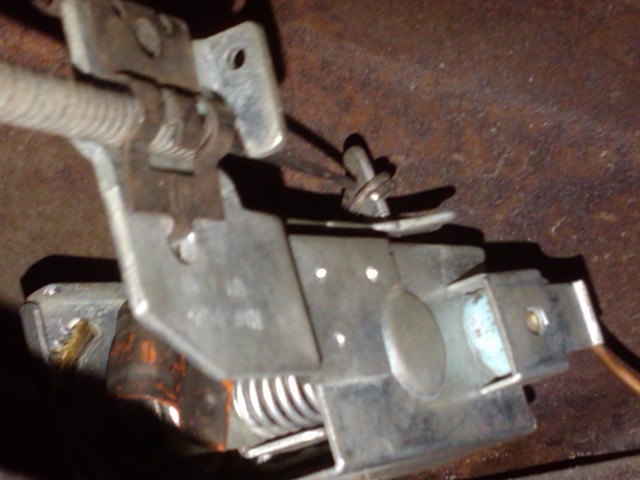
Here is a shot at my inverted HCV after I rebuilt it. It was off by 180 degree’s in placement. Had a 50/50 chance and choose the wrong 50%. Thanks to members like Dick and actually all of you, who I ask silly questions of, I learn a lot!
John Q.
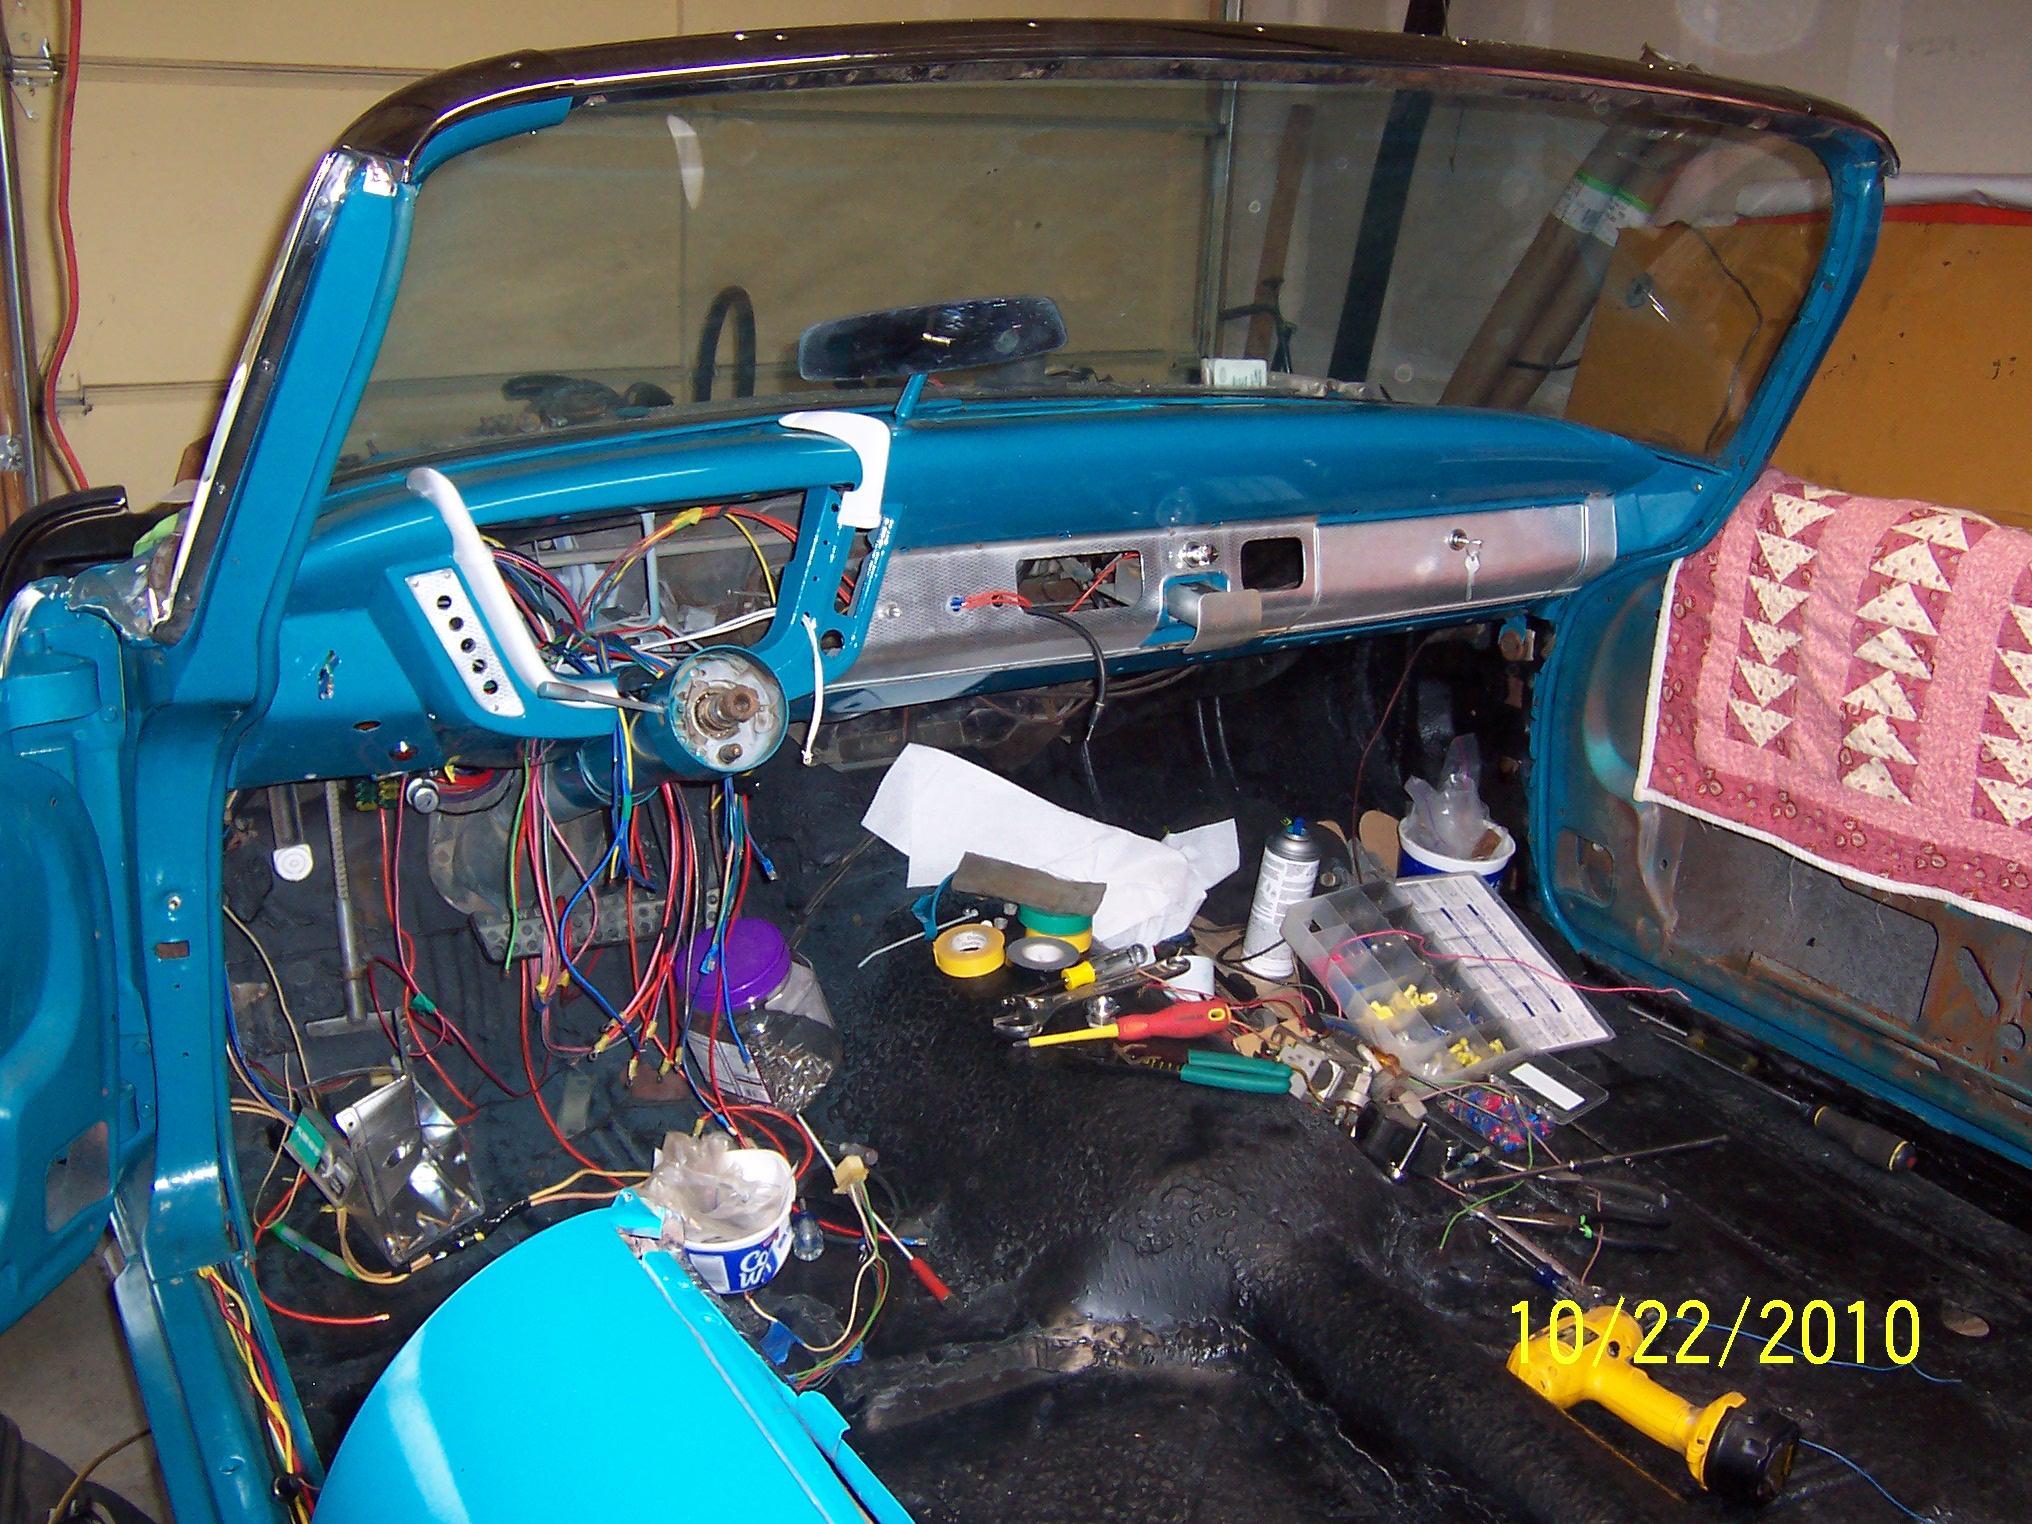
Wiring the car up is taking longer then expected trying to blend the brand new harness into the steering column harness. I figured it was easier to keep the steering column harness assembly together and splice into it using the old harness plug.
Easier said and done there! The newer harness (Similar to a Painless harness) just has a different way of routing thru the fused bulkhead then the old direct wiring method.
My old harness was cut up and had cracked or mouse eaten sections, so I had to go to a more modern approach. but with wrapping it in non-ahesive Year One Tape. It will look old school. (except for you guys and gals sharp eyes!)
Dash frame is in and some of the molding is on. I will get some Forward Look friends help this weekend to finish the column wiring. All other terminations are straight forward to do.
PS. Sent a $650 Money Order to Gary Goers today for a bunch of needed parts. Weatherstripping, door glass rubber, Convert top rubber seals etc.
It’s just money! I am also applying for Stimulus Money from my Congressman to get the last batch of Goers parts for detailing parts of stickers etc. ![]()
Should get that in a week or two so I can populate the doors and get that sub-assembly done.
I guess I better get some snow tires at the rate I am going… ![]()
John Q.
Hey John - Looking good, you will be on the road way ahead of me. Diet Pepsi is my favorite.
Dick