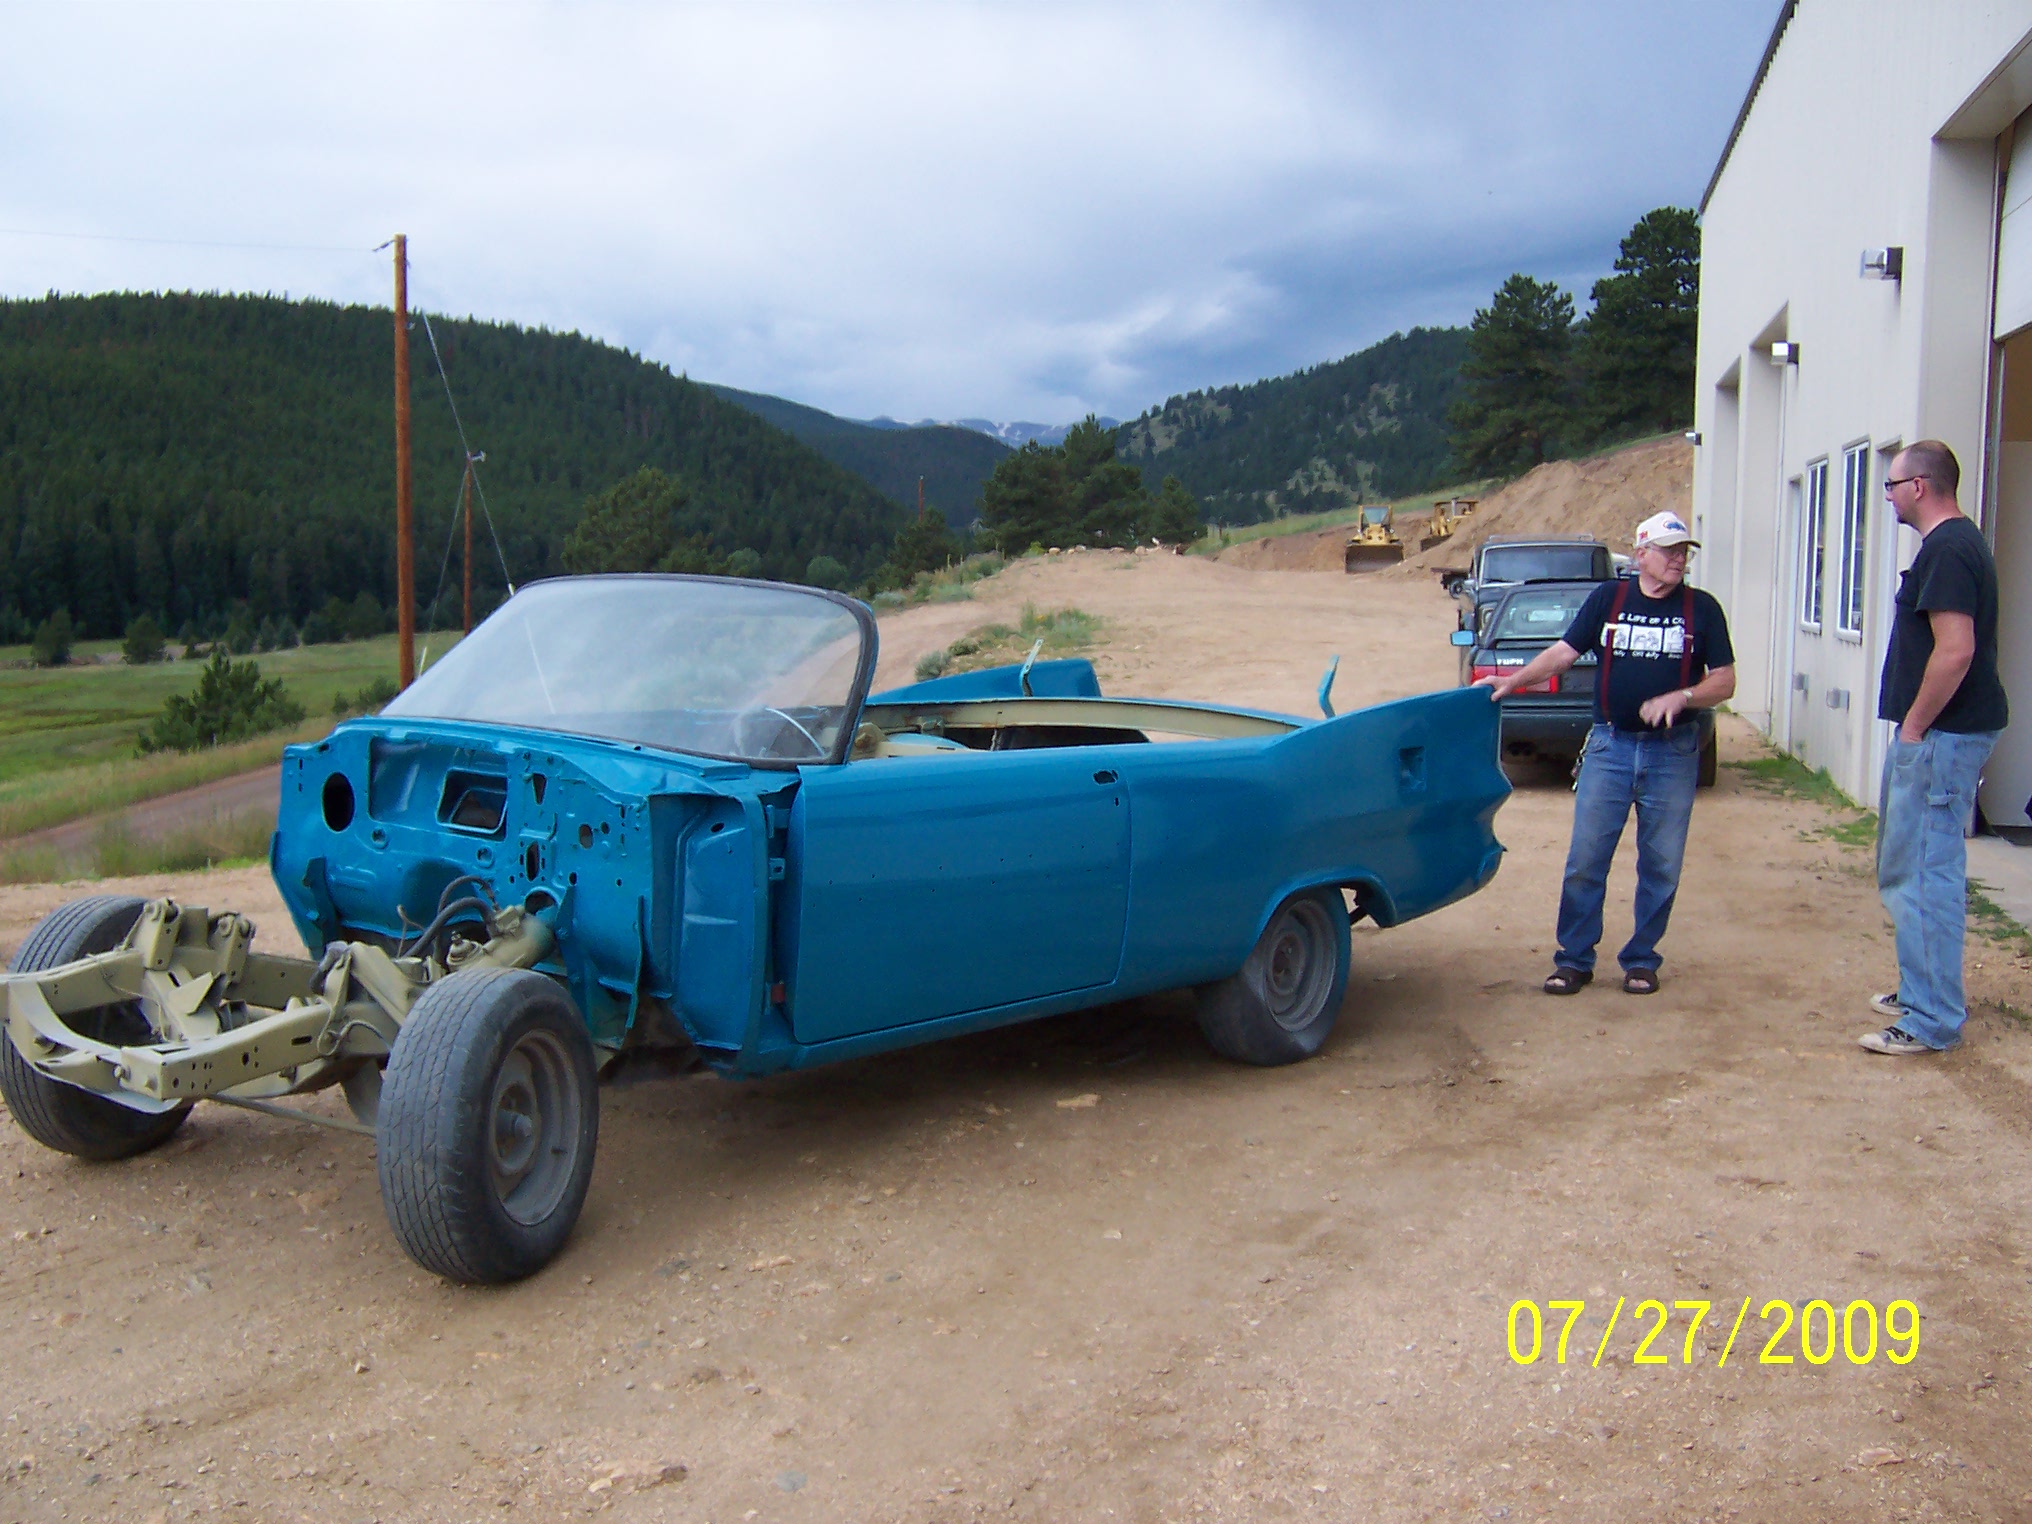
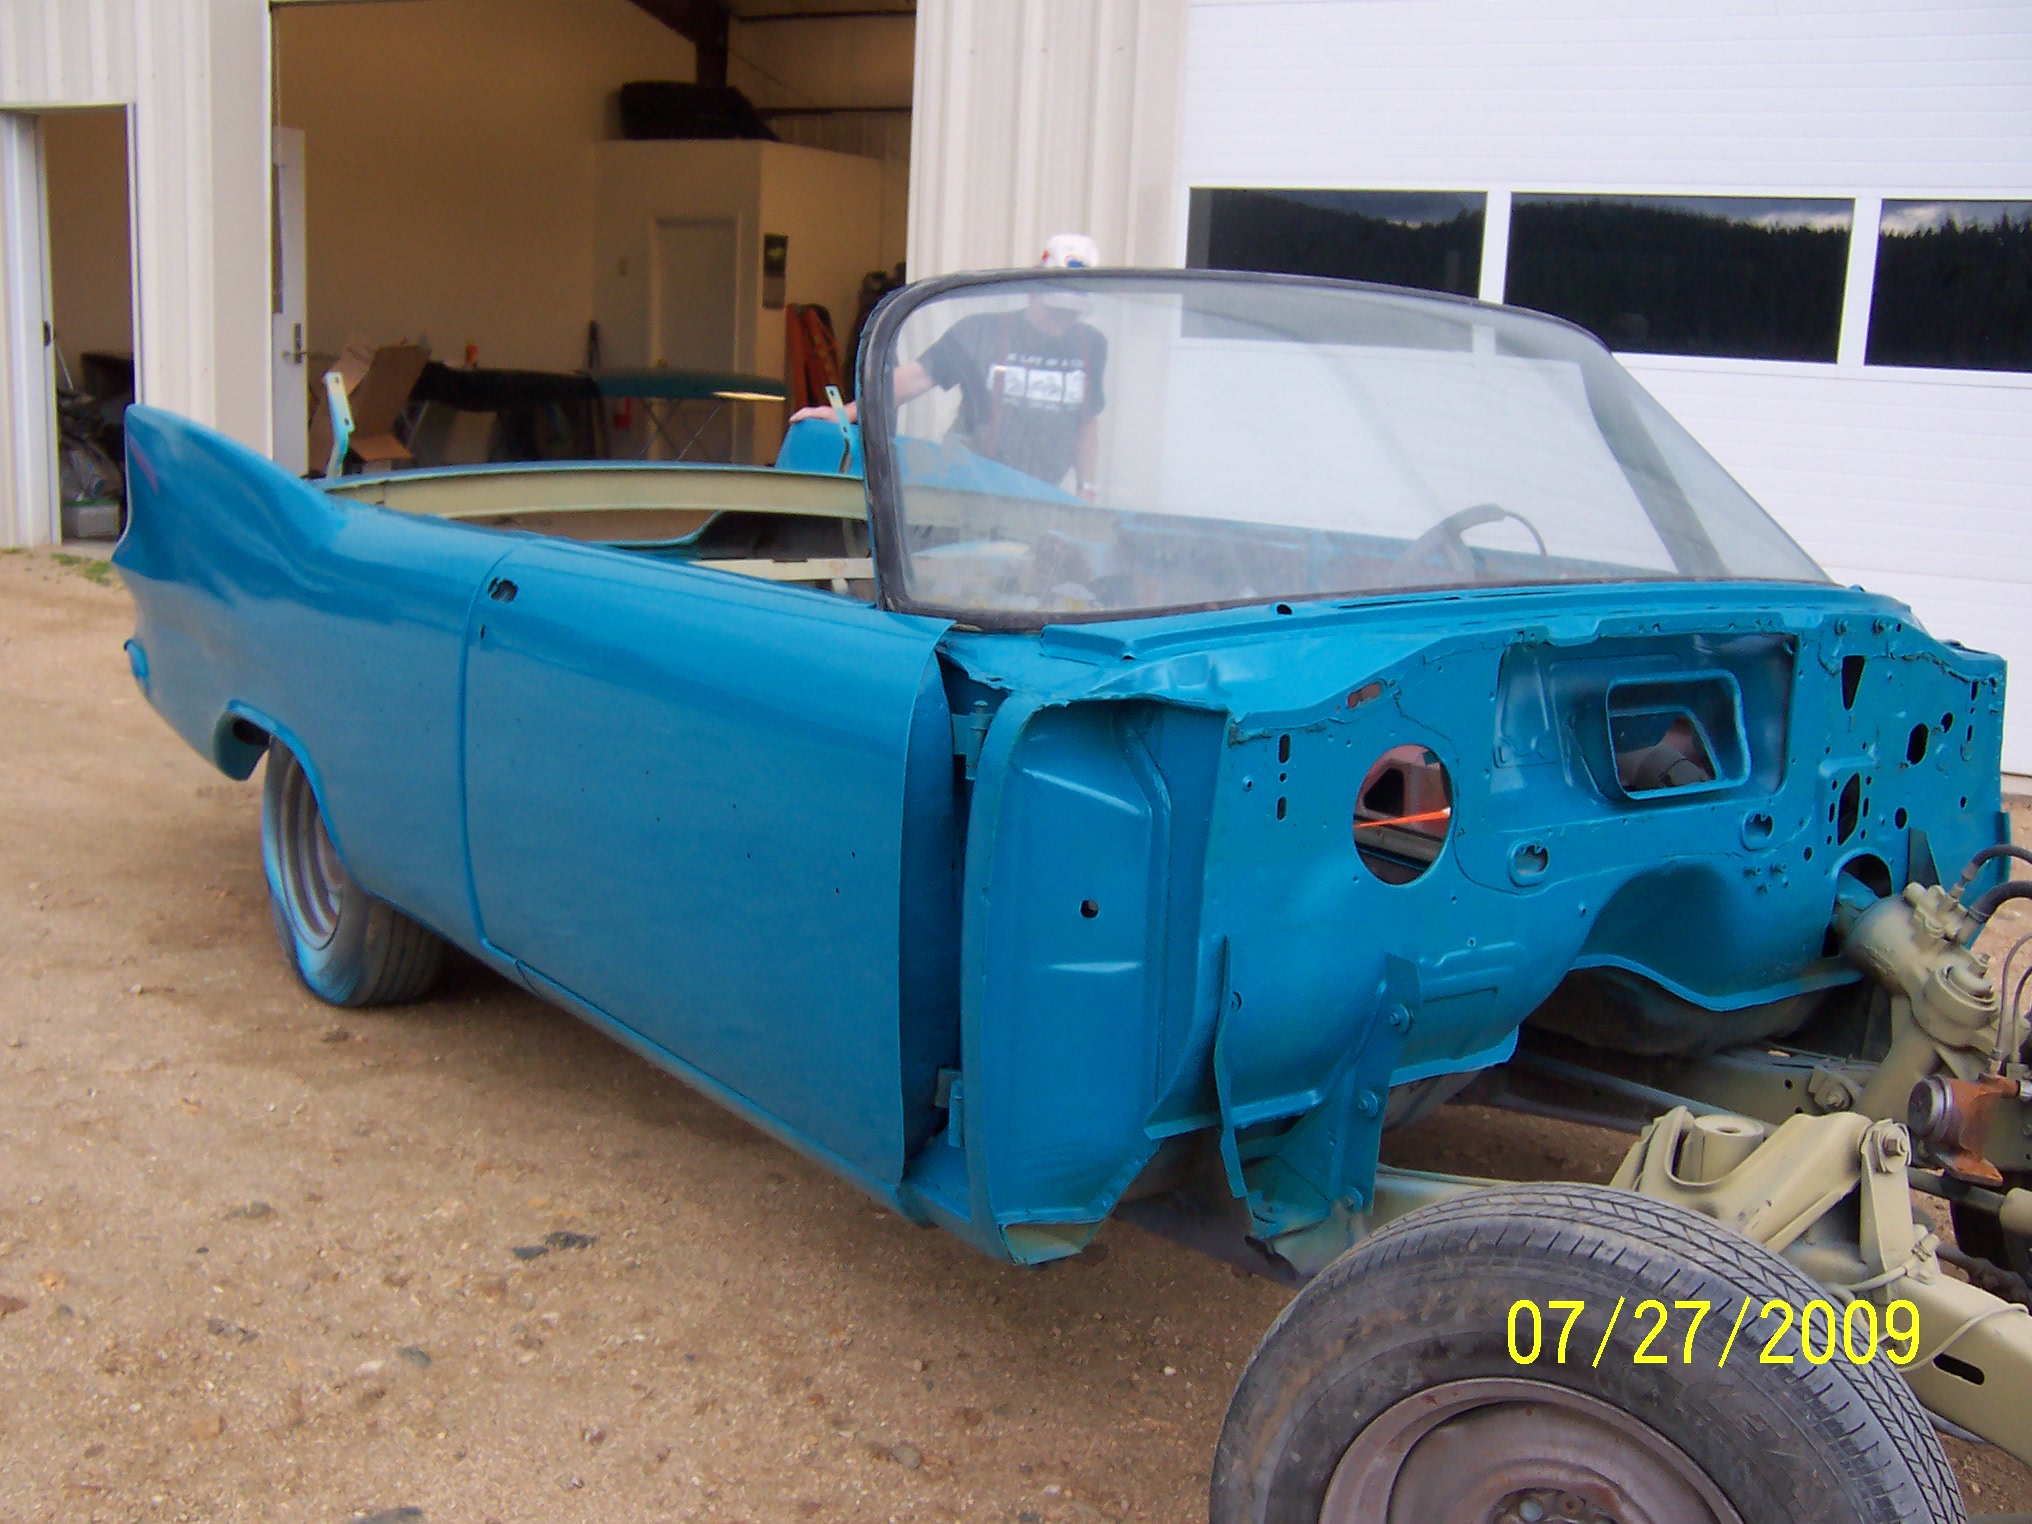
Well, I have not been posting any pictures of my progress on the 59 Belvedere I picked up 4 years ago due to my less then stellar speed at doing this car. I have lots of pictures of the journey but I thought I would cut do the chase, and show the car painted but still unassembled. Paint color is a true 1959 Turquoise color to replace the Black color it came with. My wife and I wanted a more 50’s shade to go with the car.My wife Pam plans to be the primary driver of this one, but I have secret plans to take the car out more then she does.
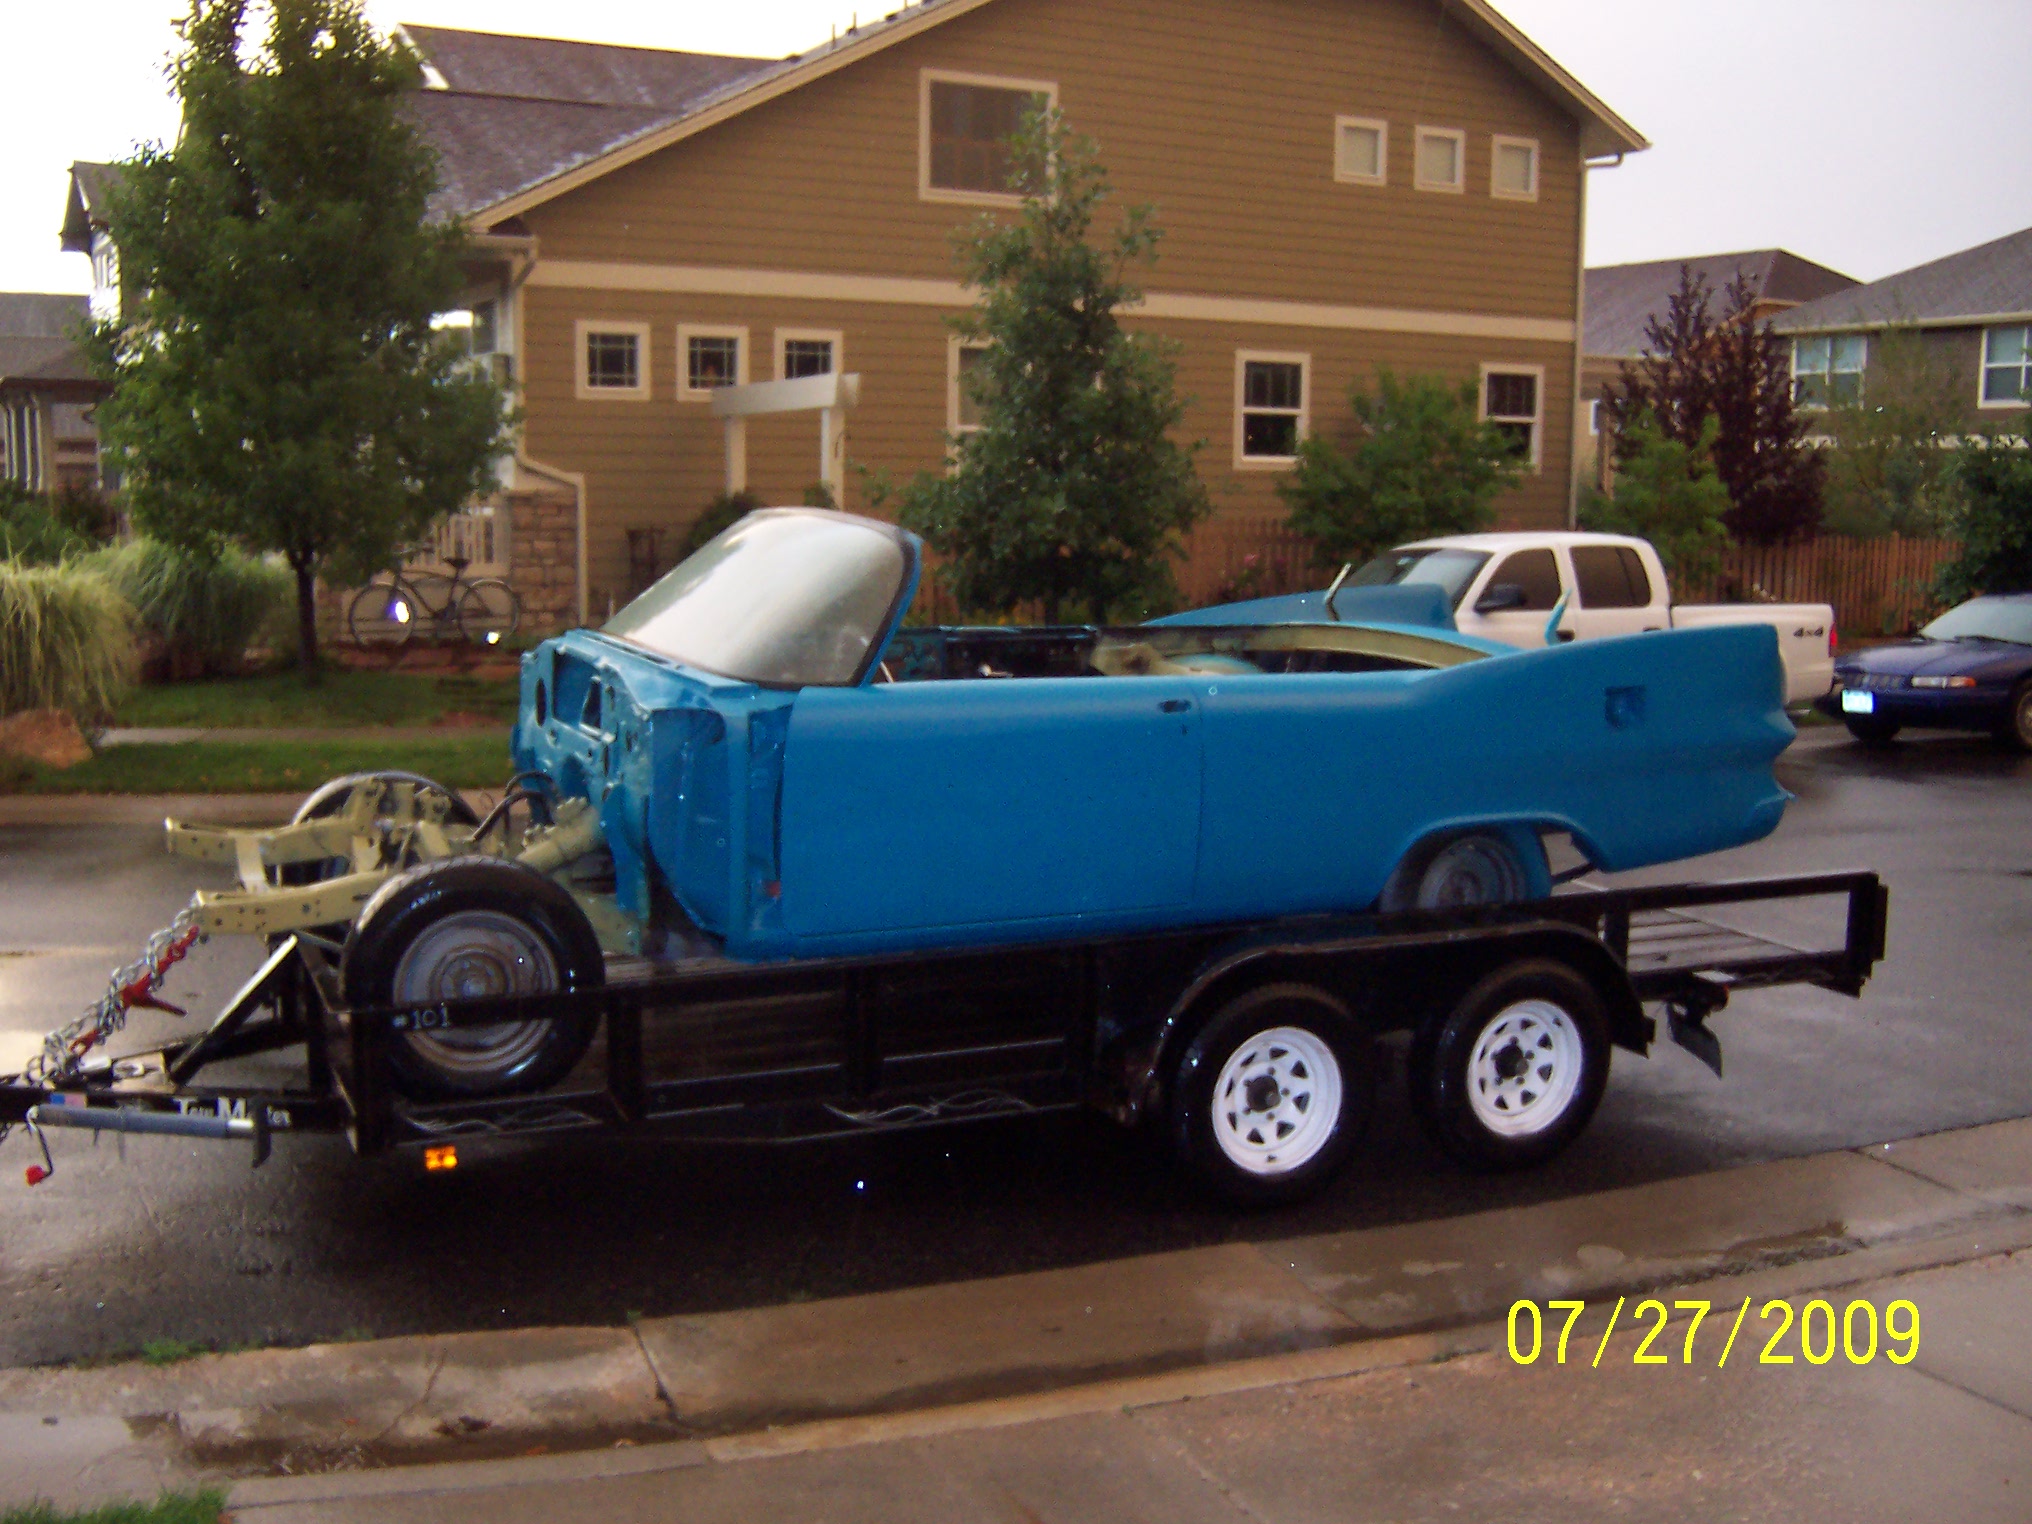
I picked the car up last Tuesday, just up the hills behind Golden, Colorado where my Paint guy lives. He had the car for a year and we finally got him motivated enough to put 3 base coats down and 3 coats of clear. I traded him another car for the work and final smoothing, so hard to get him going when no money changes hands.
The car was a little dusty from being in the shop but the 45 mins drive to my house from the mountains in a driving rain and Electrical storm pretty much clean all the dust and debris out of the car for me.
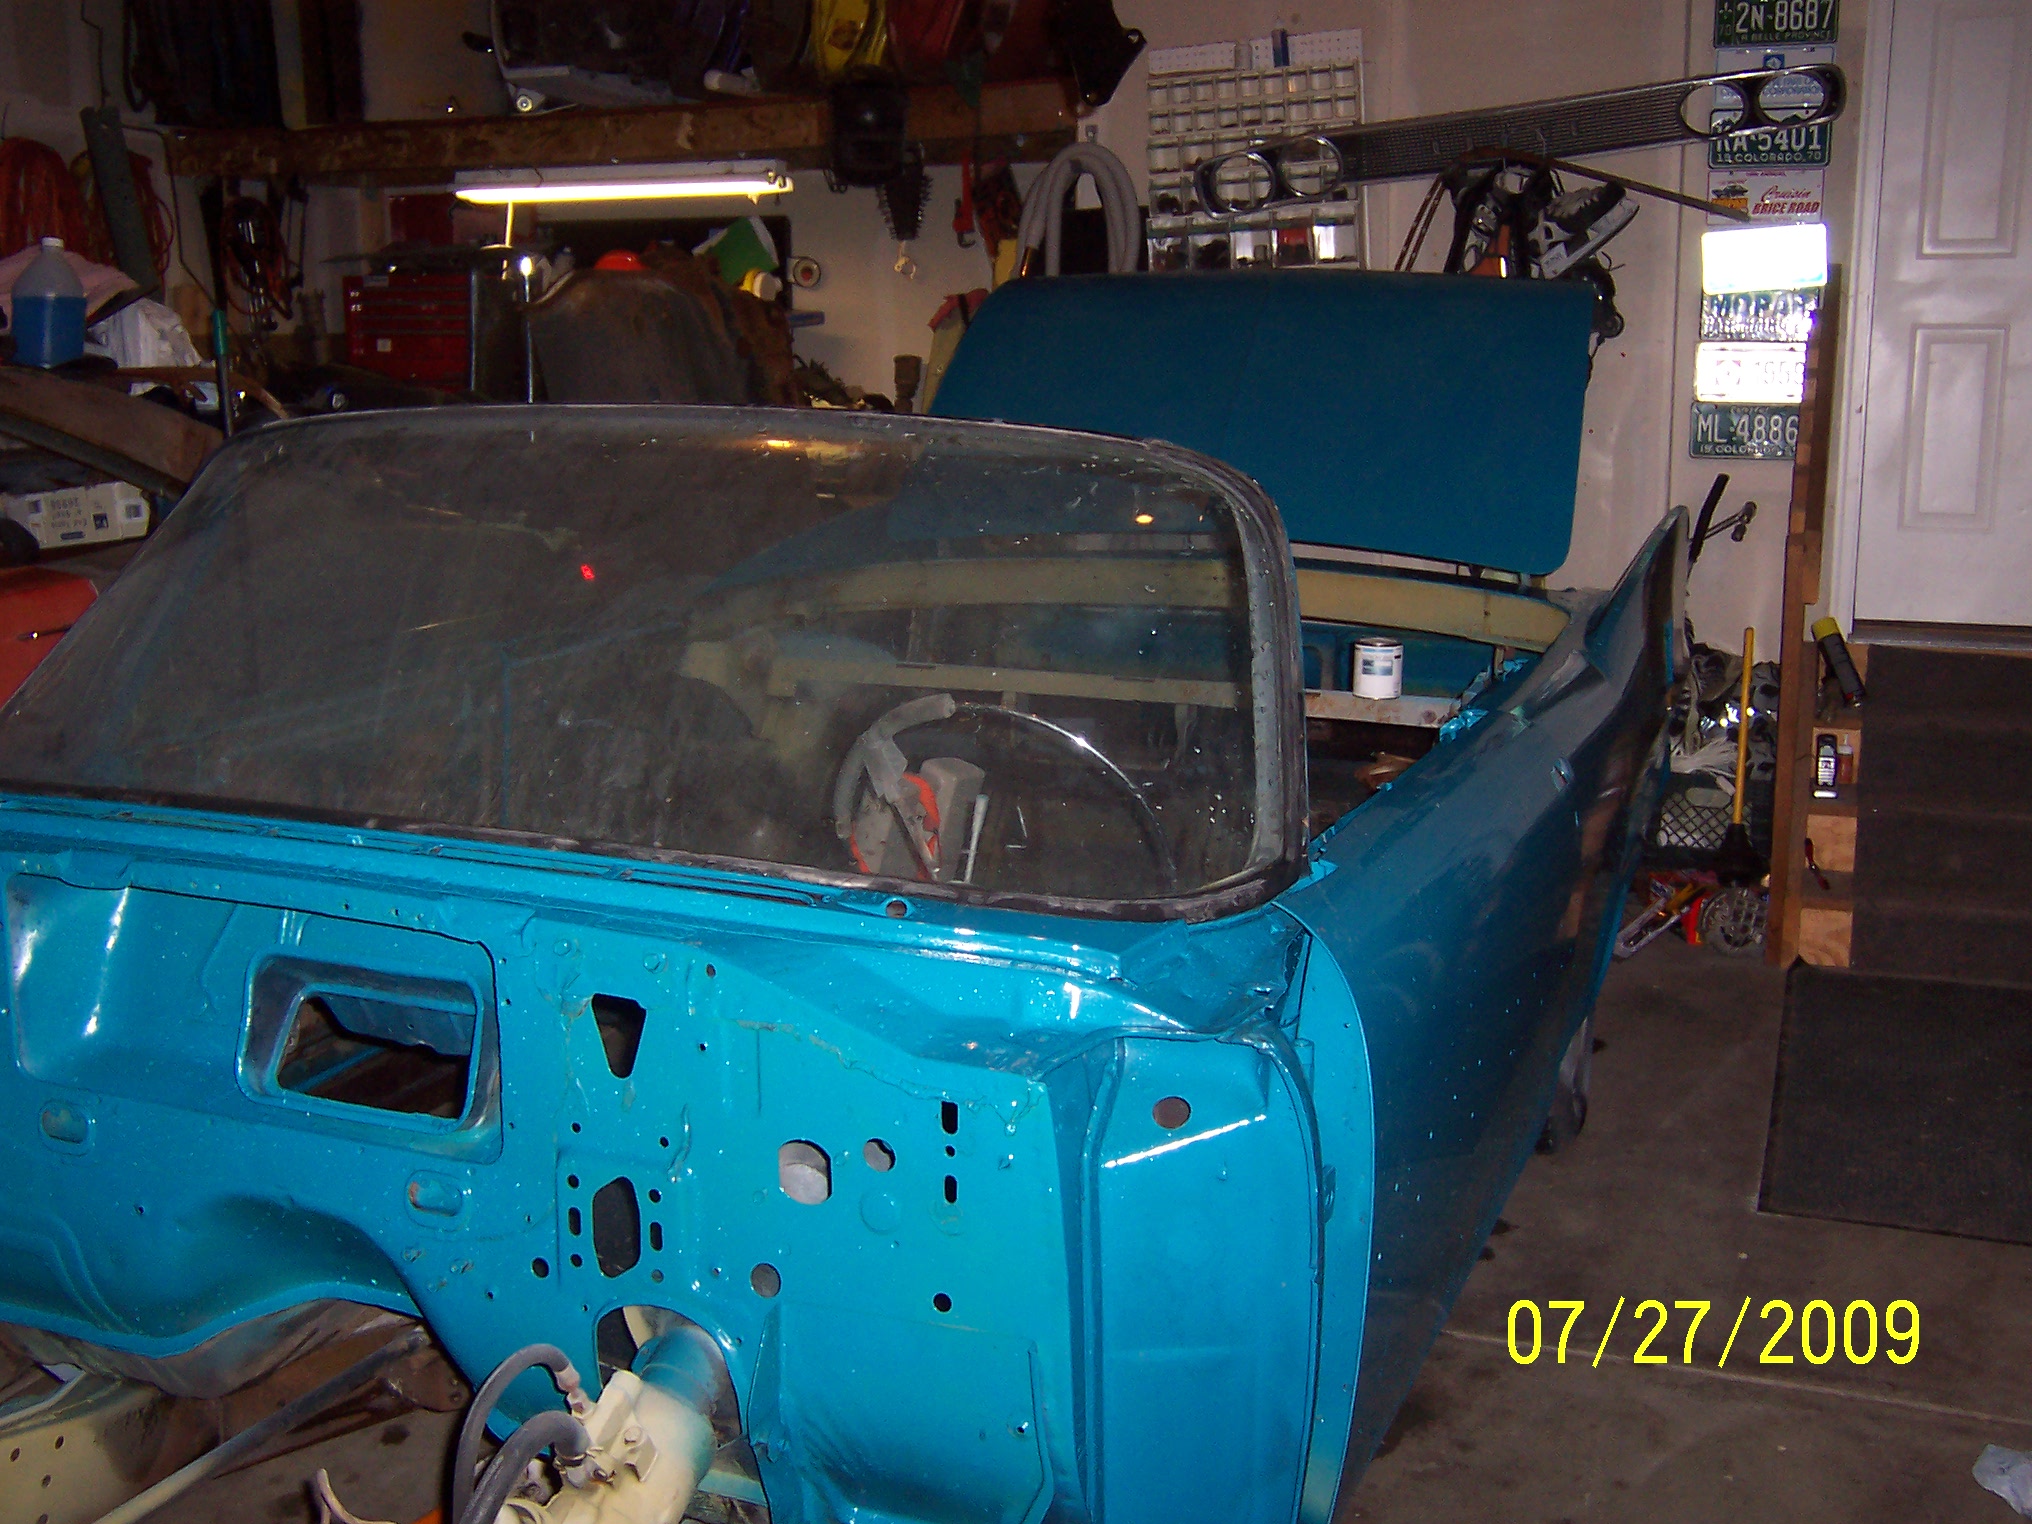
The hood, fenders and truck lid were already done and in my basement. (Ron Keij saw them when he was here several weeks back)
I will try to keep a more current picture log from here on of the assembly process. I will also post some of the events that led up to the repairs and work that was done before the paint went on.
Hey John!
Thnak you for posting the update and photos. It really makes it “Real” for us observers.
I was just in your state July 30-Aug 2… WOW! HUGE, vast empty plains and soaring mountains.. we drove past Fairplay (no sign of Ragtop’s source of his cvt), and Buena Vista. Seeing your progress pictures kind of takes my breath away..sure, it costs an arm and both legs, but the end result is WORTH it, especially after seeing the roads you can drive!
Certainly looking good John, if the whole car is done as good as the fenders I saw it will be a stunning car! And now we want to see real progress after waiting for the painter for such a long time. How about getting the car ready before next summer and then show it at Chryslers@Carlisle 2010?
Thanks for the kind comments, Roger, I am glad you enjoyed Colorado during your trip to Crestted Butte. You visited one of the best spots in the state. I will need a lot of your’s and Tom Fox’s knowledge to get all the pieces back together again.STeve, I may pick your brain too on this!
Ron, I wish I had the car down here from Rollinsville when you and Marjo stopped by last month, I am talking to my wife about a possible East Coast trip next year to encompass Carlisle, and the down to North Carolina to visit the Parental units to show off the car.Dad, started work for Chrysler in 1959 in Detroit. So this should bring back some memories for him.
Steve, If I can weld up the Belvedere trim holes, maybe I can still make it the Top of the Line Gem SF. I had to weld up both of the holes in the donor doors that had the Fury trim holes in it and redrill for the Belvedere locations. Glad I had a laser level for that! Thanks to Tom Fox for locating the door and some of my missing door trim. I think it would be easier just to hunt down another SF Convert since it took me 4 years to get to this far.
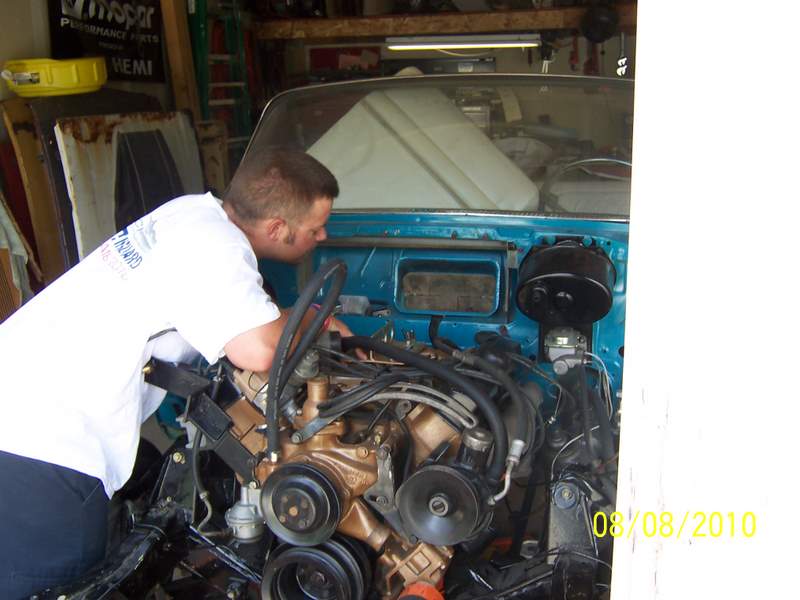
Roger, I will keep it a Belvedere trim level. I am putting in a 1960 Chrysler 413 RB-4bbl Red Lion for two reasons, One there was no motor in the car when I bought it. So anything was possible and second is that my wife and I hope to pull a vintage Airstream behind it someday. We don’t have one now, but its on list someday. Or maybe a vintage Chris Craft Run about would look good too. Again, we don’t have that either. Lots of items on the wish list.
And I guess thirdly, my wife has a lead foot and wants some vroooom in it. Still going to run the Push Button Tranny in it. I have a 1960 Cast Iron TF to go behing the 413. my car did come with the original 59 vintage TF.
I did pick up a swivel seat a couple years ago, but will wait a bit before doing the interior on it.
John, Wow, I do know how much work you have going on for yourself. Just keep up the good work and don’t get discouraged. Believe me the 413 in the place of the 361 is a great improvement in torque/ horsepower and not bad fuel economy. especially at the 5000 foot plus elevation in Colorado. Let me know what camshaft you decided on and I can help you. Remember I have the diagnostic and tune-up machines, I just passed the emission test with 10% of the allowed with my wifes old truck. These machines really help in diagnostics as well as in setting up for economy.
It’s nice to meet you through the 59 Plymouth forum. Some really nice helpful people.
Remember Colorado Mopars on Friday, the Super Cruise next Saturday. The Colfax Cruise is also coming up, let’s get together. I almost missed this summer, only had the last two weeks for serious activities.
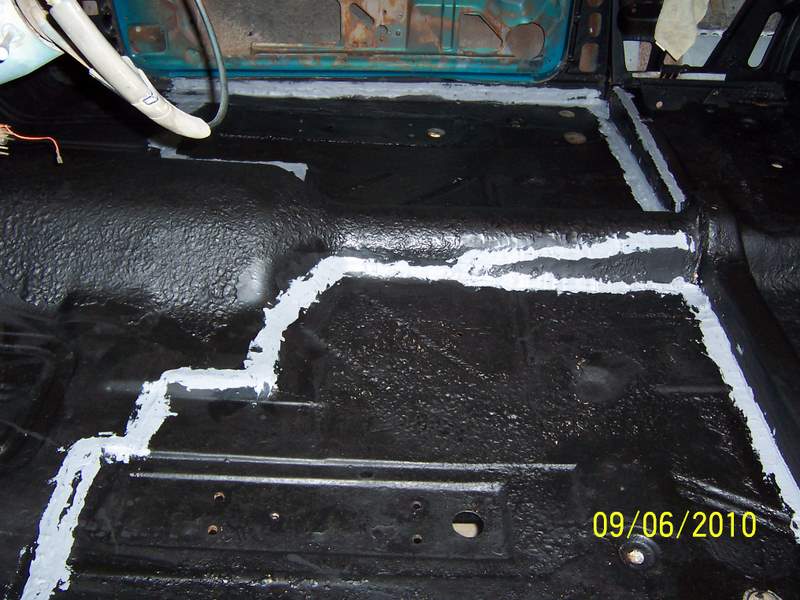
Thanks Ricky, appreciate the kind comments, I am still working on the 59’s floors and the inner sill ledge, more rust then I thought. Might as well do it right so I don’t have to revisit the same repair area again. I have missed the Colorado car show circuit this year but hope to get a little late cruising in in October if all goes well. There is always next year…
Hopefully your 61 300G will be hitting the road in the near future. I will look you up for your tuning skilss when it is time to tune the Golden Lion 413RB to past the Colorado Front Range emission test to get licensed. See you hopefully at the Cruise this Saturday!
Well, it has been a long time (again) in updating my snails pace process of getting this car on the road. I am about to leave on a 6 day trip Four of them to see my parents in NC and the two days in MN on Business.
I finally went out and bought and USB adapter to transfer the pictures from my digital camera to the main computor in my house. So here area some current updated pictures of where I am in with this rejuvenation of an old Belvedere Convert of mine.
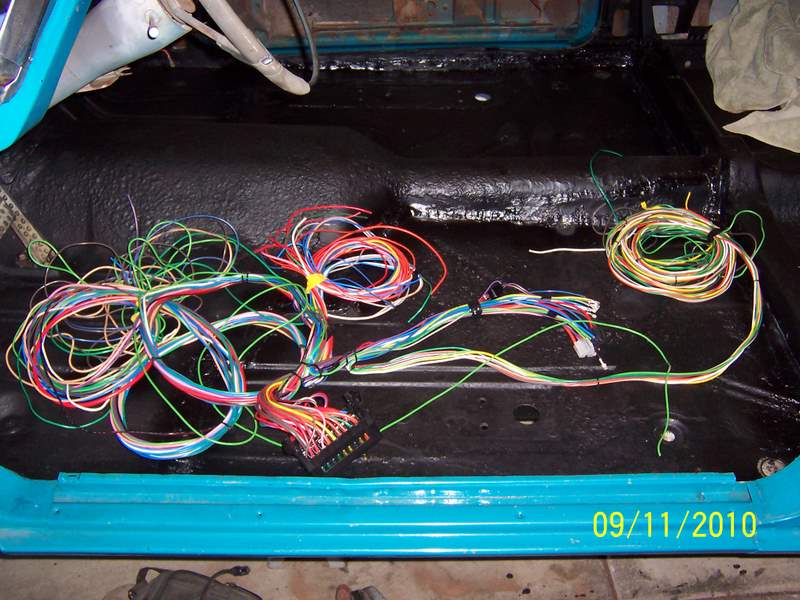
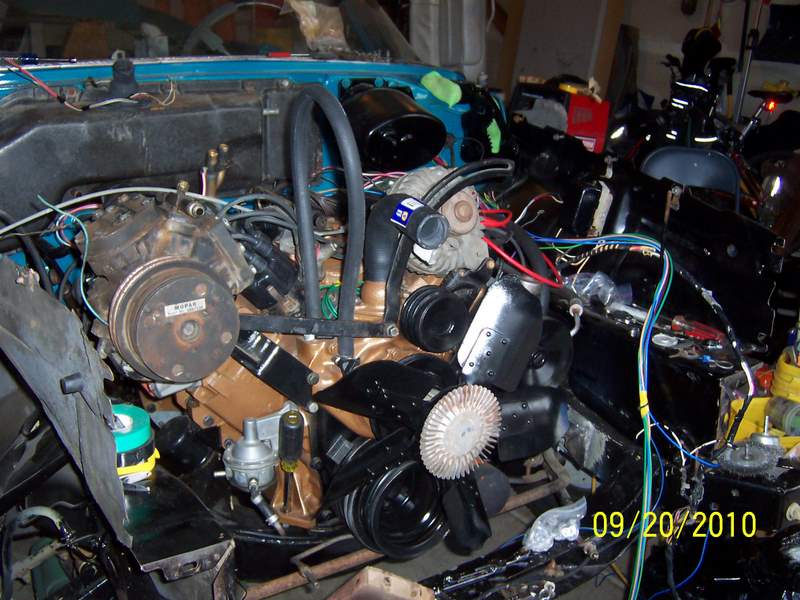
After-market wiring harness starting to go in. Wires are marked well with where they go. Now I have a modern fuseblock under the dash that no one can see! I am splicing in at some points to the different harness connectors of the old harness for ease of connections,moslty at the steering column and the rear brake lights. I still ahve to fab a rear alternator support bracket but have already created a template for it and will cut up an old Alternator bracket from a Dodge Charger to make it work as a rear support. Heat and twist and drill!
Put the AC compressor and Clutch drive fan blade on for clearance check and to measure for what belts I need in length and width for what pulley the populate on.
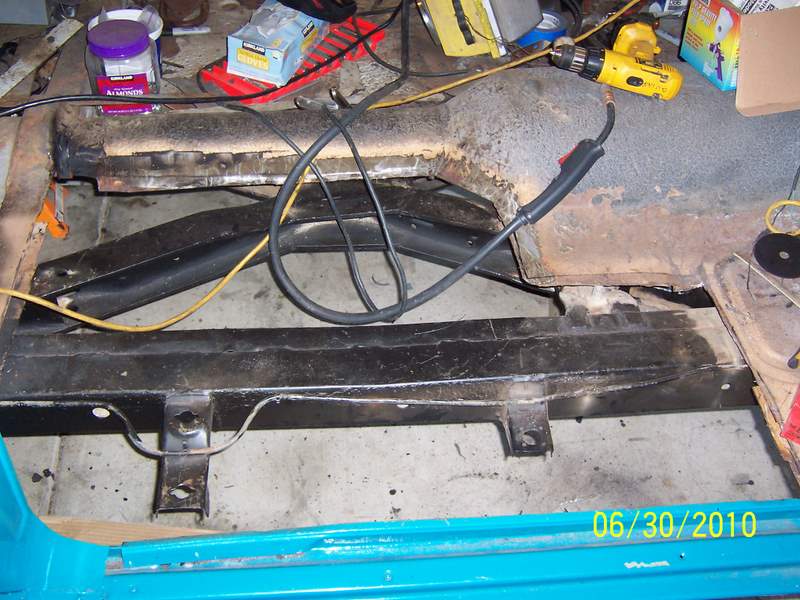
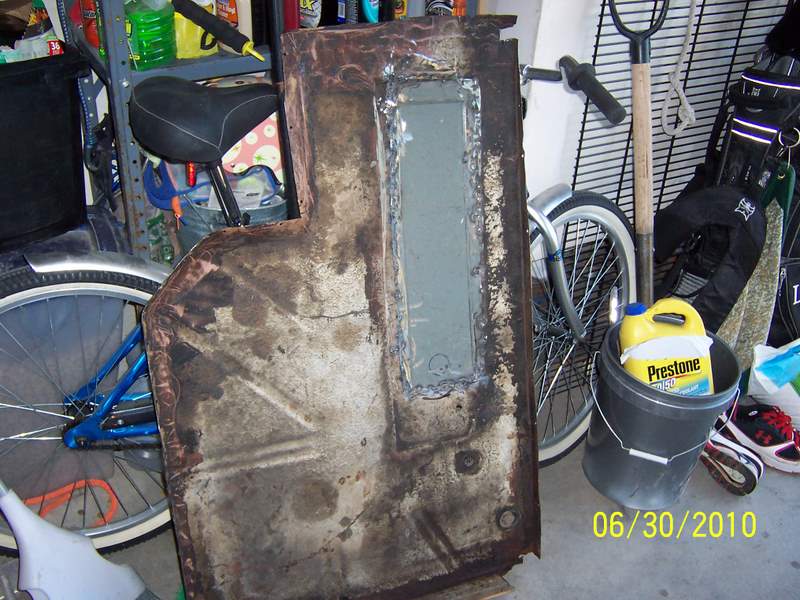
Here is some more pics, the first is the floor that was cut out of a local 59 SF (All that was left was the floor on it the car was crushed after the floor was cut out) I had to essentially patch the patch panel. The floor was good except for the seat area insert. Had one fabbed locally and plug welded it in.
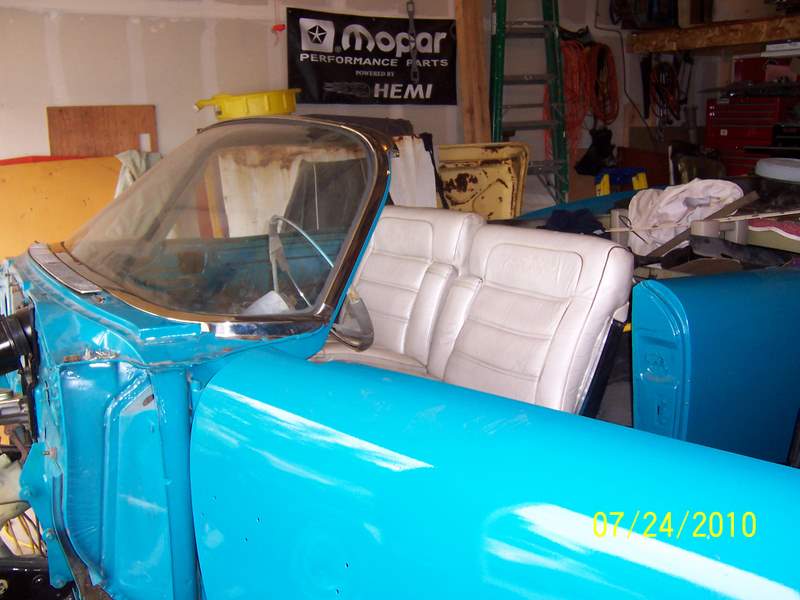
The second pictures is of the trial fit of the 1968 New Yorker White leather power bucket seats that will do until I save up for the dineros to cover the swivel seat I have in the basement grotto. I have the matching rear seats too that I will massage in there in place of the regular convert seats.
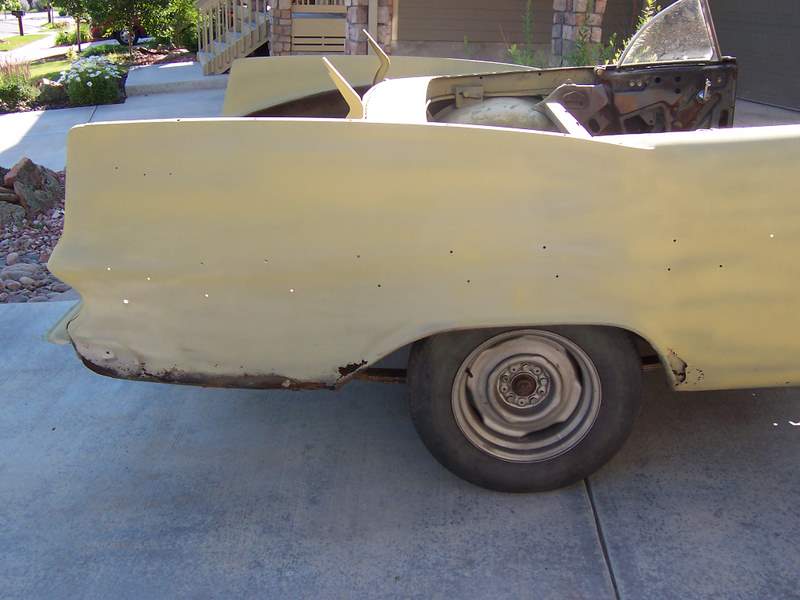
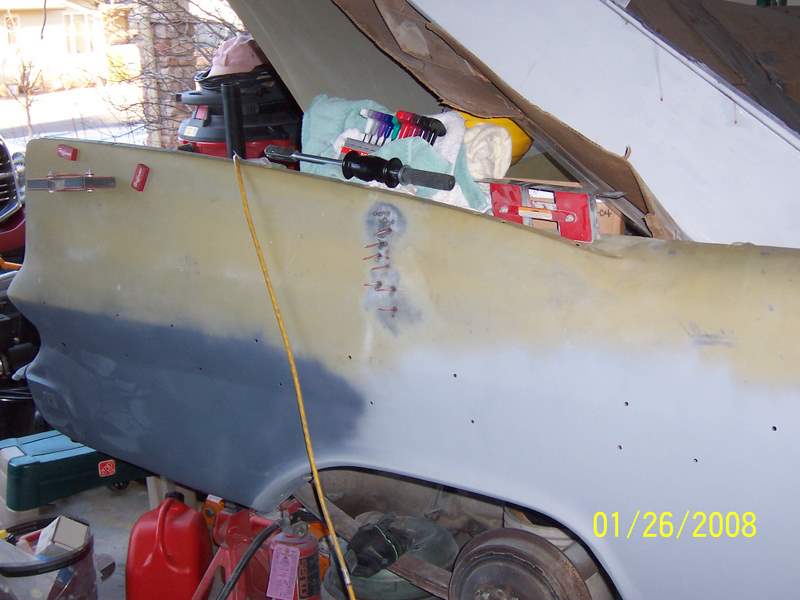
In these pictures above you can see the 59 Plymouth Spring Turquoise color better, it is pretty sharp to see in the daylight. Much better then the black it use to be in my opionion…
Thanks for the pictures, John. We all enjoy viewing them and admire the progress you are making!
The wiring looks confusing and chaotic, but we know you’ll get it done right!
John - Looking good, I’ve got nothing on you man, exceptional work, love the color, black is for herses anyway. Even though I’ll have two fours I’m sure that 413 would clean my clock in a drag contest.
Dick.
POR 15 on the floor pans - good move. Been using that stuff for years on anything I can. I found the best way to reseal can is put a piece of the usual plastic (baggy) between lid and can, but more importantly, use a quick clamp to secure lid to can tightly to keep it air tight, otherwise the remainder hardens pretty fast and that stuff is too $$$$$ for that to happen. (I got a son named Jack too, looks about same age as your Jack). Nice work btw.
Dick, I pale in comparison to your efforts but thanks for comments. I bet you will come out a head at the gas pump myself, but with two fours… Maybe it will be similar in cost on fill-ups with the same fuel being consumed. (To Heck with my carbon footprint) It is actually bored out to a 426 but will still say Golden Lion 413 on valve covers, I know not correct but since Tom Fox created the car Chrysler should have built, I am in good company! Just running a 4 BBL instead of Long Rams.
Fins59, my Jack turns 21 next month (10-17) and he can’t wait to do so. He is a John also, but my grandfather was a John who went by Jack, so in honor of him, I named my son Jack.
Thanks for tip on the plastic baggie trick. At $47 a quart at my local auto paint store it does get pricey, I am on my third can but hopefully will be done with this quart.
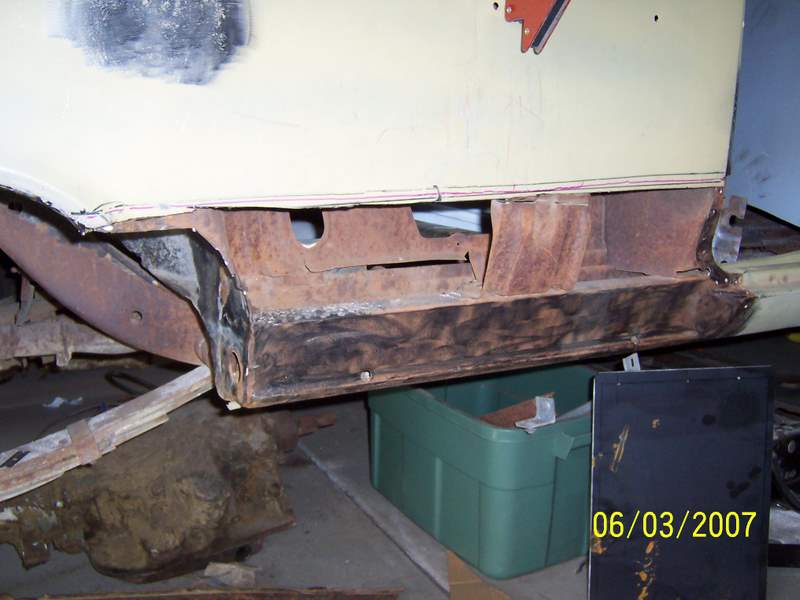
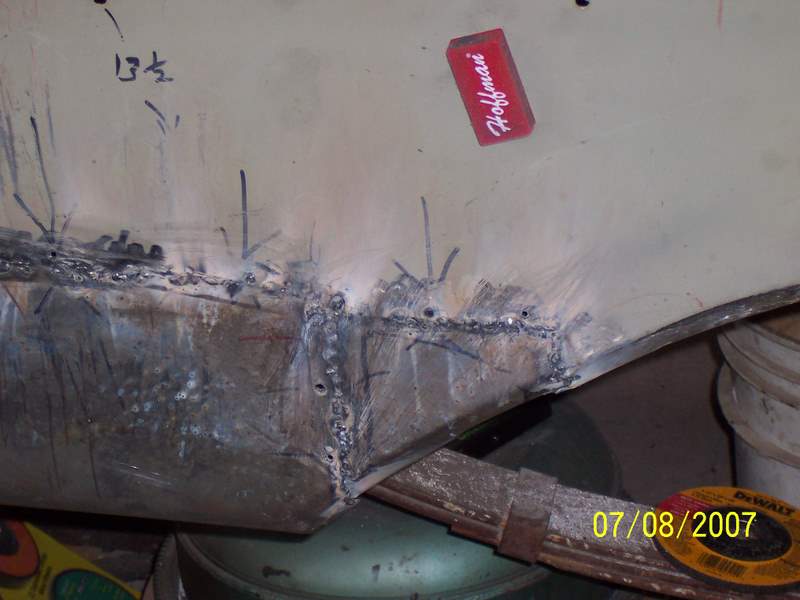
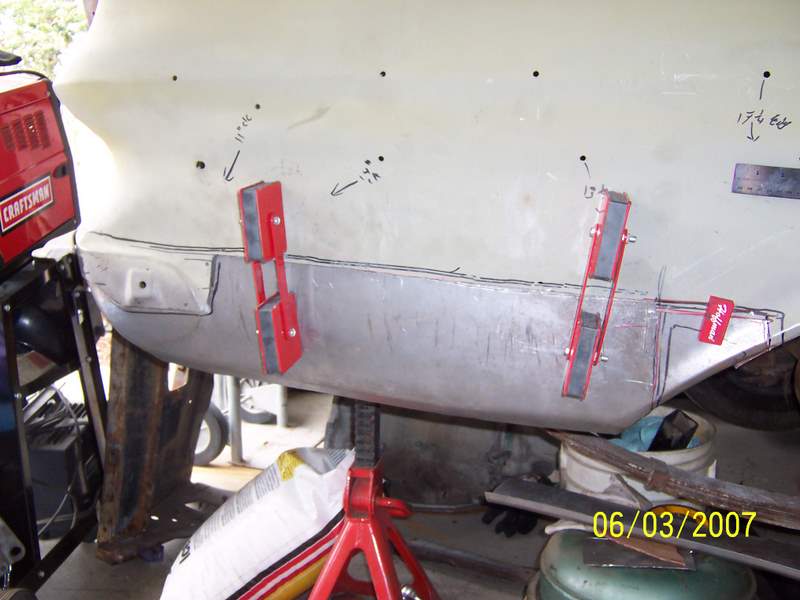
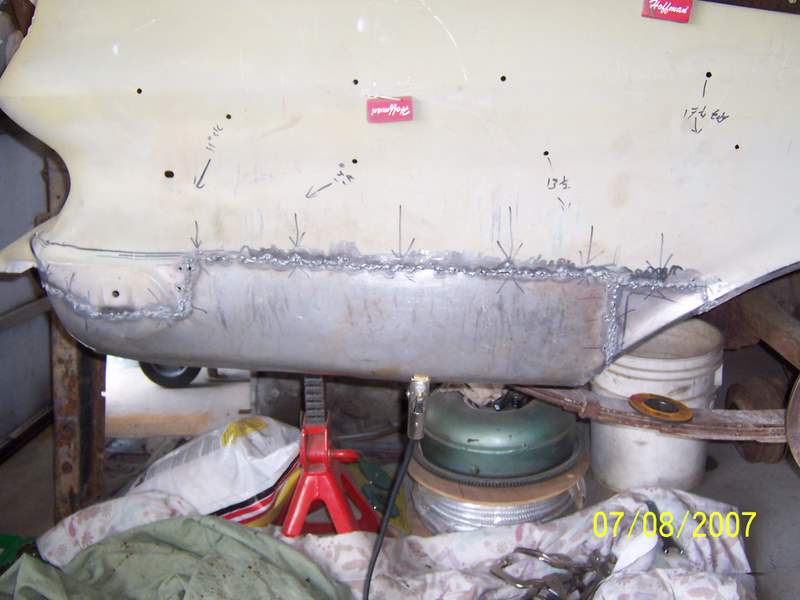
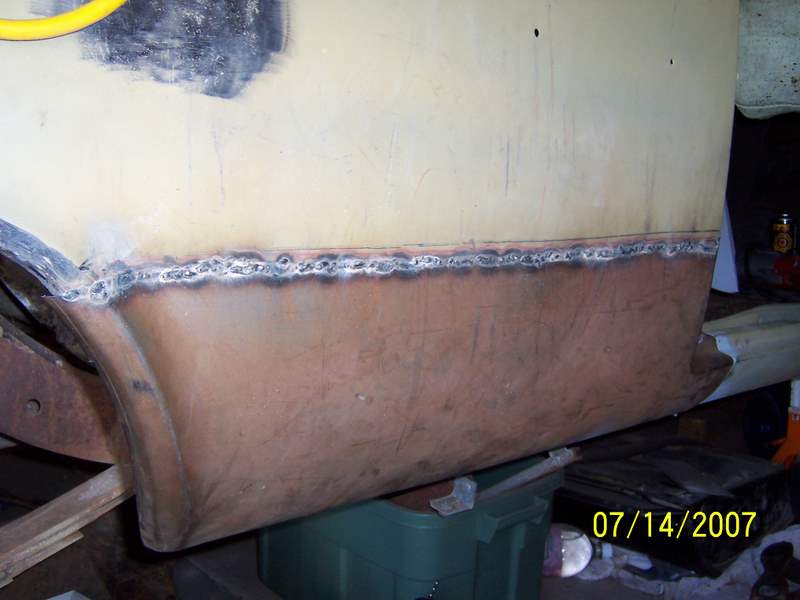
Since it is a slow Sunday morning, I thought I would post some pictures of the work I had done on the convert before it had been painted.
I am not a good welder but anyone can start with a wire-fed Mig welder, a good grinder to clean up bumpy welds and a litlle metal impregnated body fill like Metal-Fill, you can do a decent job.
Finshed grinding, applied Metal Fill to smooth joint and applied some primer to see if I how it looked. Started work on high dent near top of quarter that needed a welding stud gun to pull out dents. This gun is not expensive and was around $80 at Harbor Freight. Pulled this dent out and used Metal fill to smooth contour.