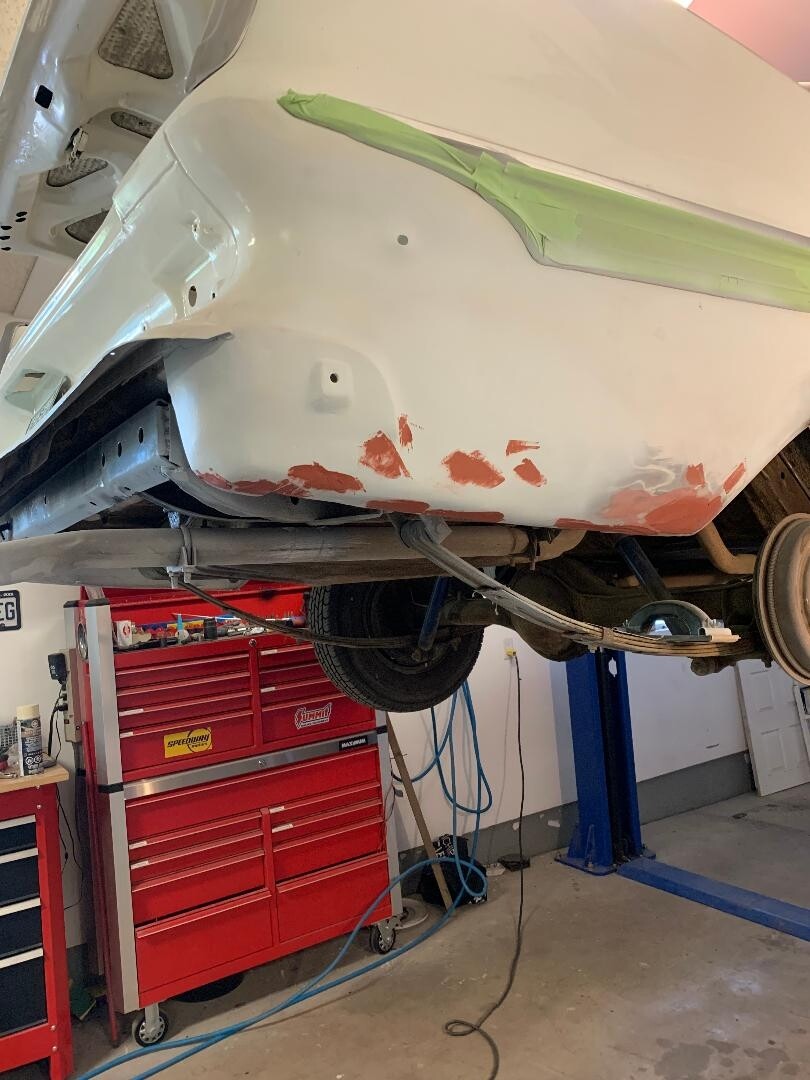
More '59 Plodge progress. Rt. rear quarter almost done and the trunk drop repaired. I had to replace the bottom 3 inches of metal front and back. Previous repair stuffed 5 pounds of bondo in the bottom of the quarter and called it fixed! Found a ton of road dirt packed in a cross support above the rear frame. (between the taillights) No wonder these cars disintegrated so quickly! So many places to collect dirt and debris that stays wet and rots out the car.


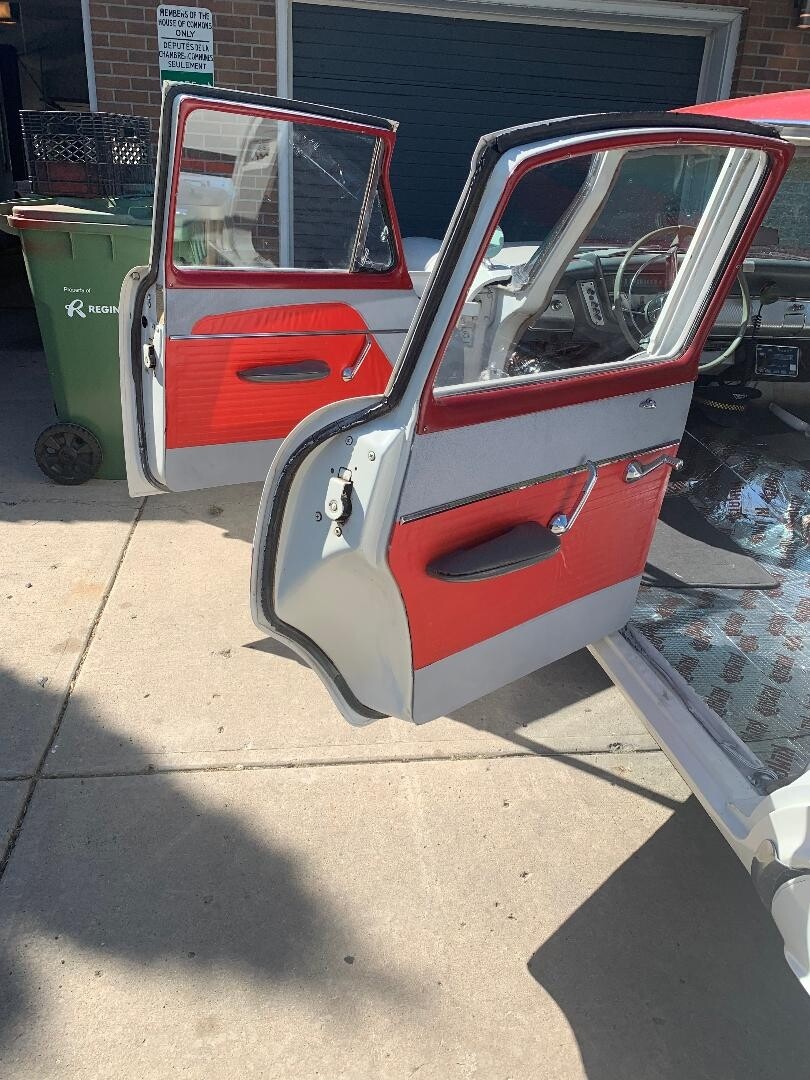
Painted both passenger door surrounds and painted and installed the rt. rear door. Car finally has 4 doors again.


Back to the Plodge Quarterpanel from hell. Got all the steel welded in place and closed up the inner fender from behind and welded in a patch for the back of the dog leg. Less than a third of a quart of bondo. 60 % there, still needs check coat and lots of touch ups, but there is a light at the end of the tunnel!

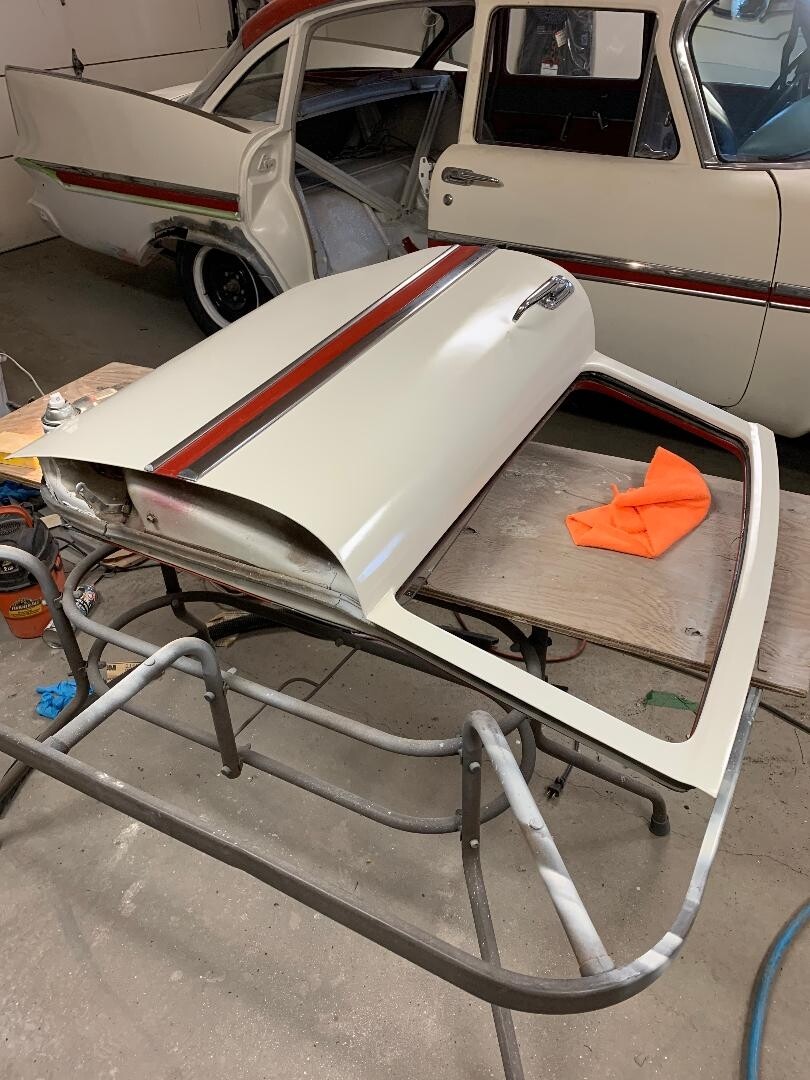
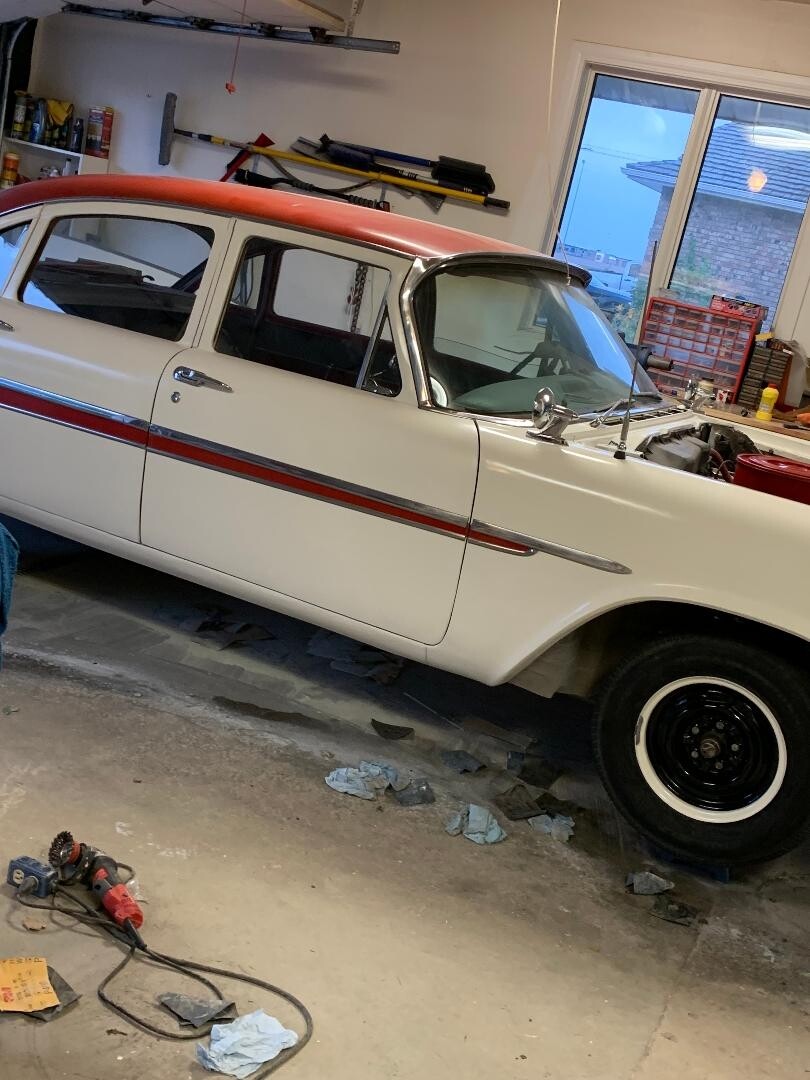
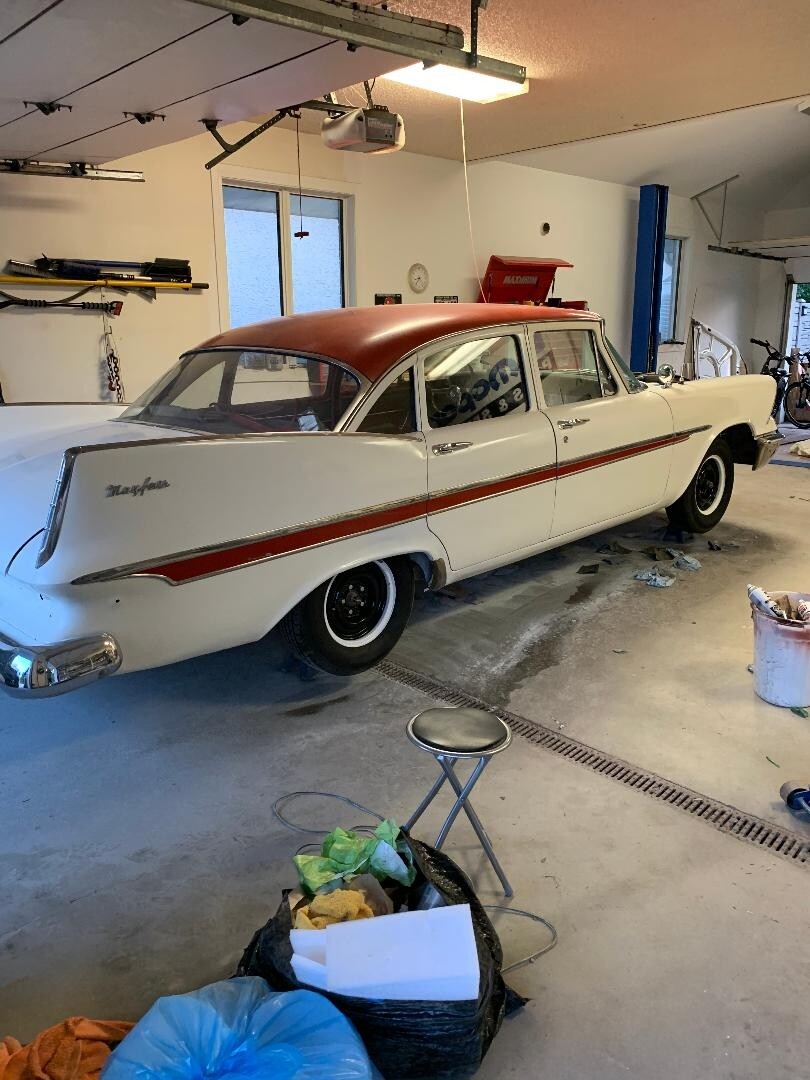
Major progress on the Prairie Plodge! Got most of the rocker done in primer and both rt. doors in paint. Area above rear wheel only roughed in place pending the arrival of the fender skirts. Still needs wet sand and clay bar etc. Rt. Fr. fender and hood to go and no rust repair needed there, only sand and prime.. I’m hoping another week if my body hangs together.
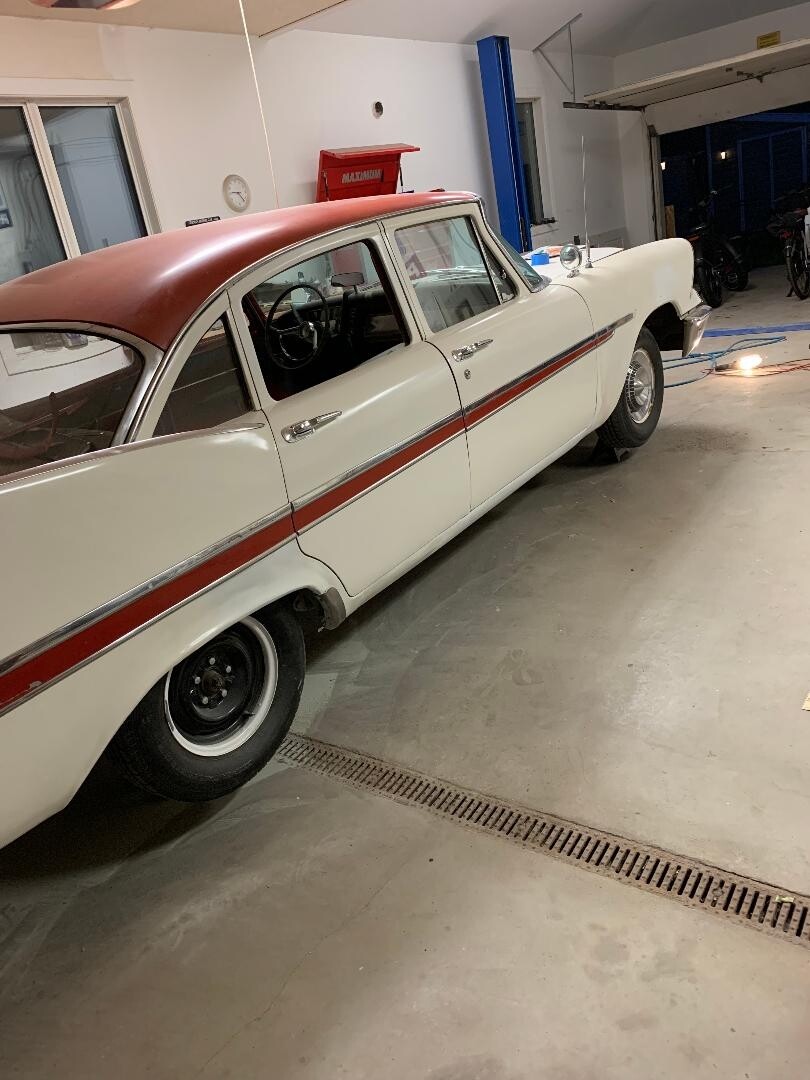

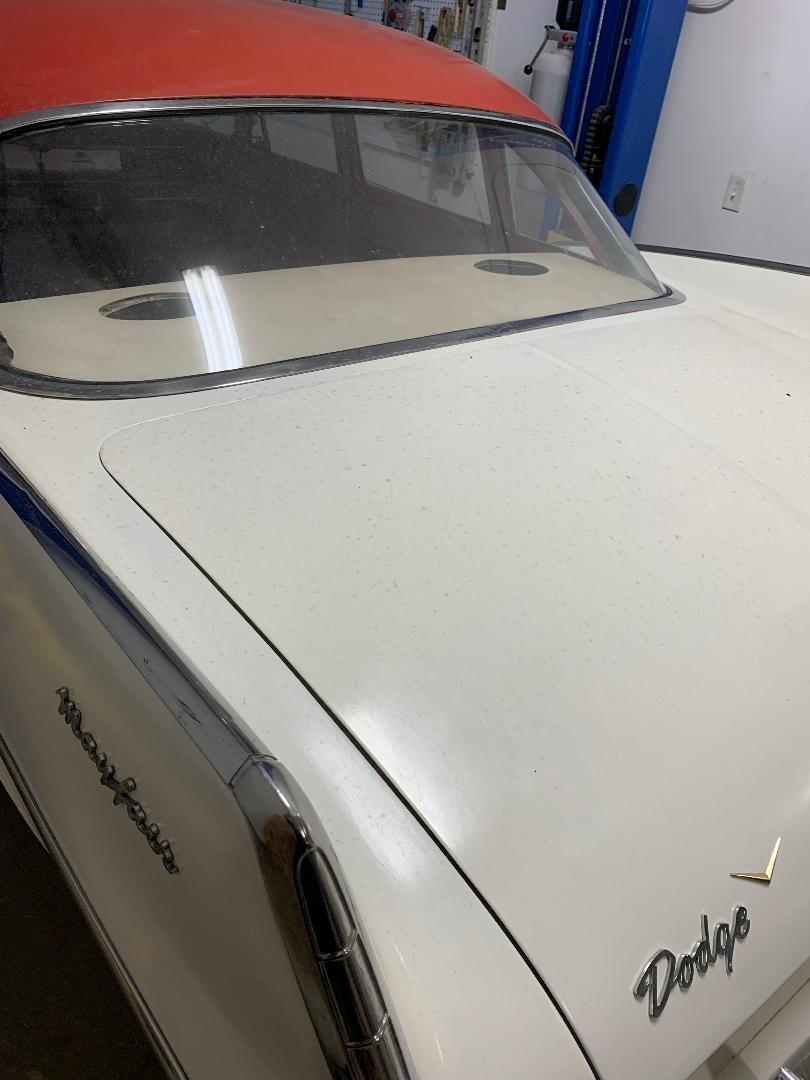
Finished the right side. only the hood to go and the body is done. (except for the rt. rear wheel well.)


I’m convinced the red hood springs power the car. the engine is a prop;)
Seats are still 2-3 weeks away! Hood is up next and fender skirts due this week!
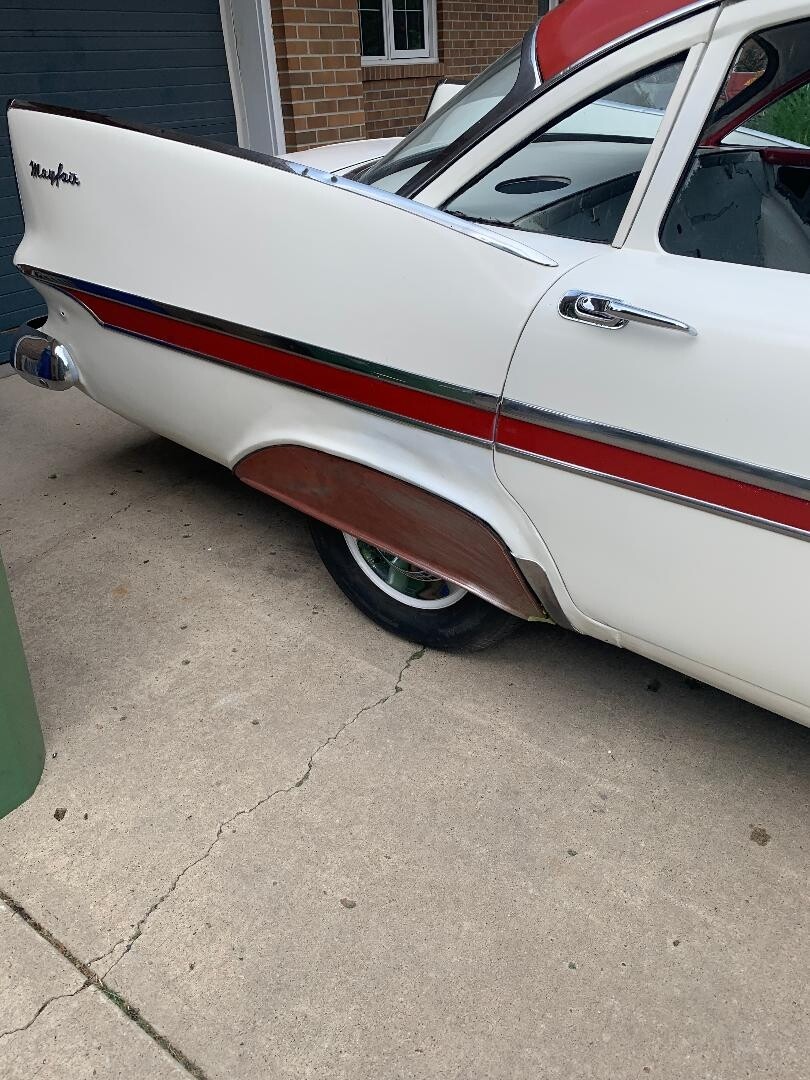
…and the skirts are in! Considering that I re did my pass rear wheel well using a piece of cardboard for the shape from the other side, I’m happy how close I got. The NEW rear skirts fit better than I thought they would and will help me fine tune the shape.
I was working on the replacement for the withered cardboard package shelf and when I test fitted it (waiting for the acoustic cloth covering) I realized if I painted it car color (It’s a very light maple finished wood), it would “float” the rear window. I think it could look cool.


Decided to paint the package shelf. Put 2 sheets of paper to hide the speakers until the covers come. 20 mins with cloth and a stapler if it doesn’t work out. There is a bit of tint in the window, but it’s the same color. I like it like this!
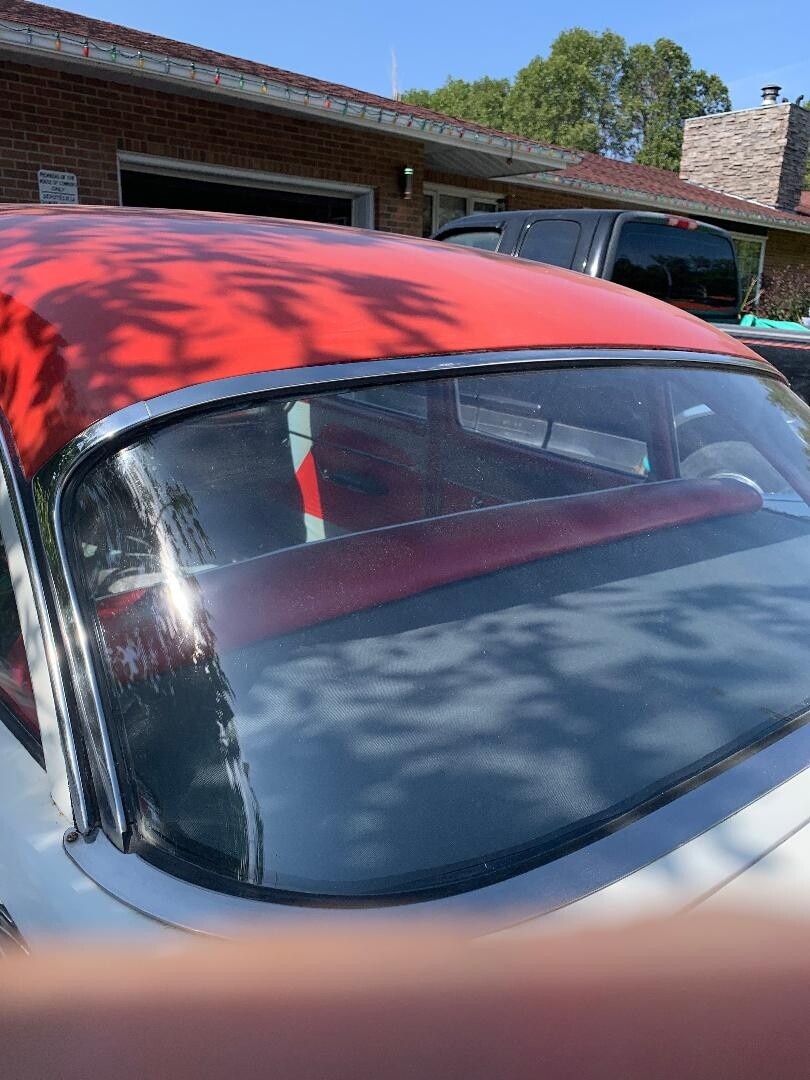
While checking the car for water leaks before doing the carpet, I found several. The quarter window, drivers side had a significant leak. It had been removed in the past and stuffed with silicone. 2 solid hours of cleaning out every groove in the seal, sanding and painting the opening, I’m ready to go back once the paint dries.
There was some black stuff all around the glass where it fits in the rubber groove. A real bugger to remove not to mention the silicone! The rubber is in great shape for it’s age and very pliable.
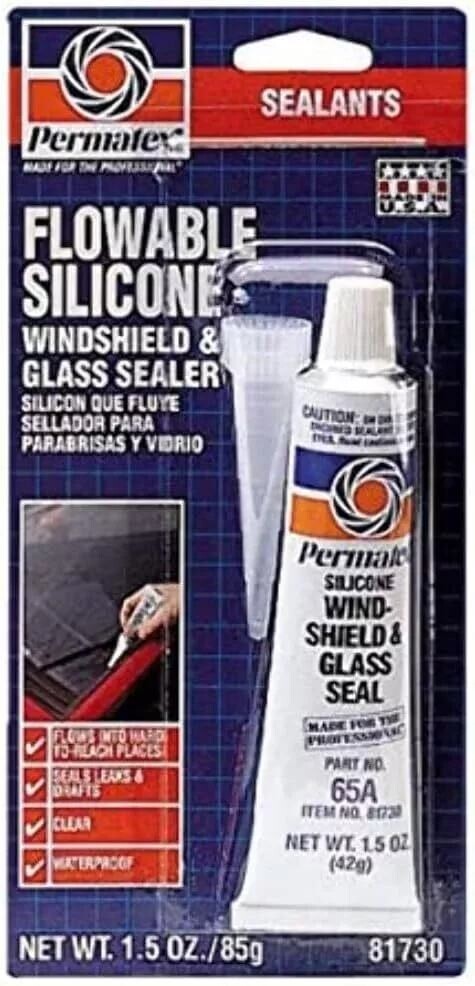
Flowable silicone is our friend. That’s the stuff I used. The old stuff certainly was rock hard. Steel brush and patience was the only way to save the seal.
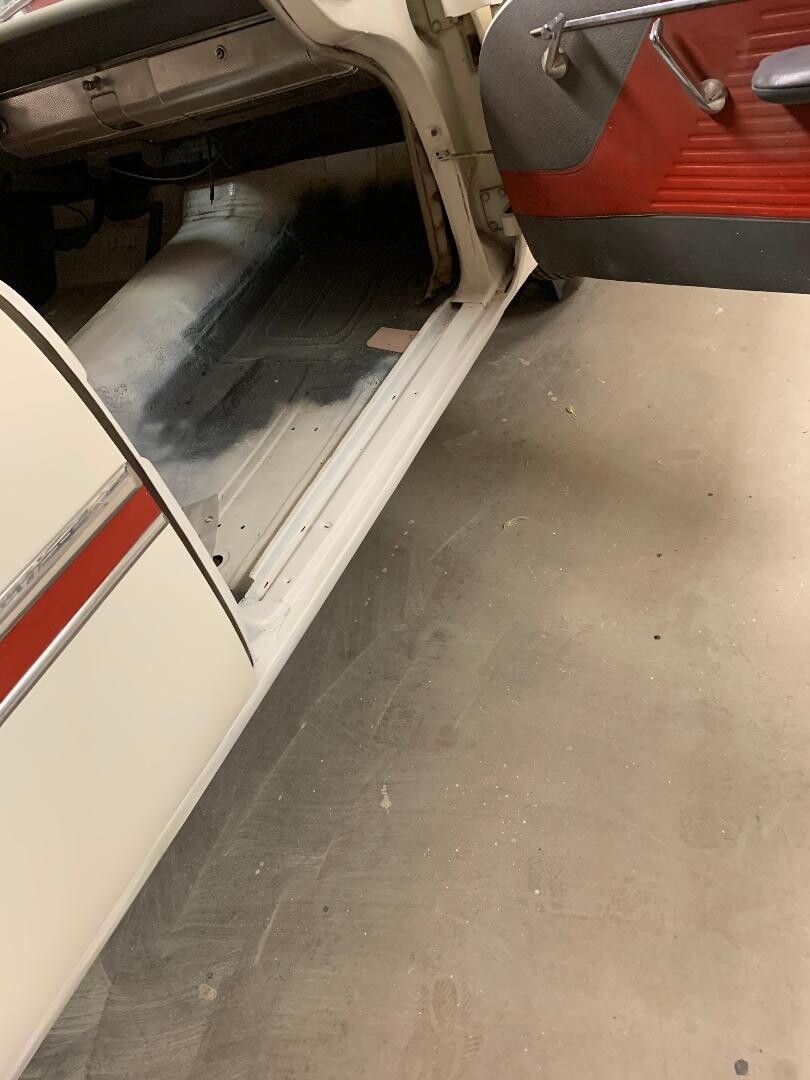
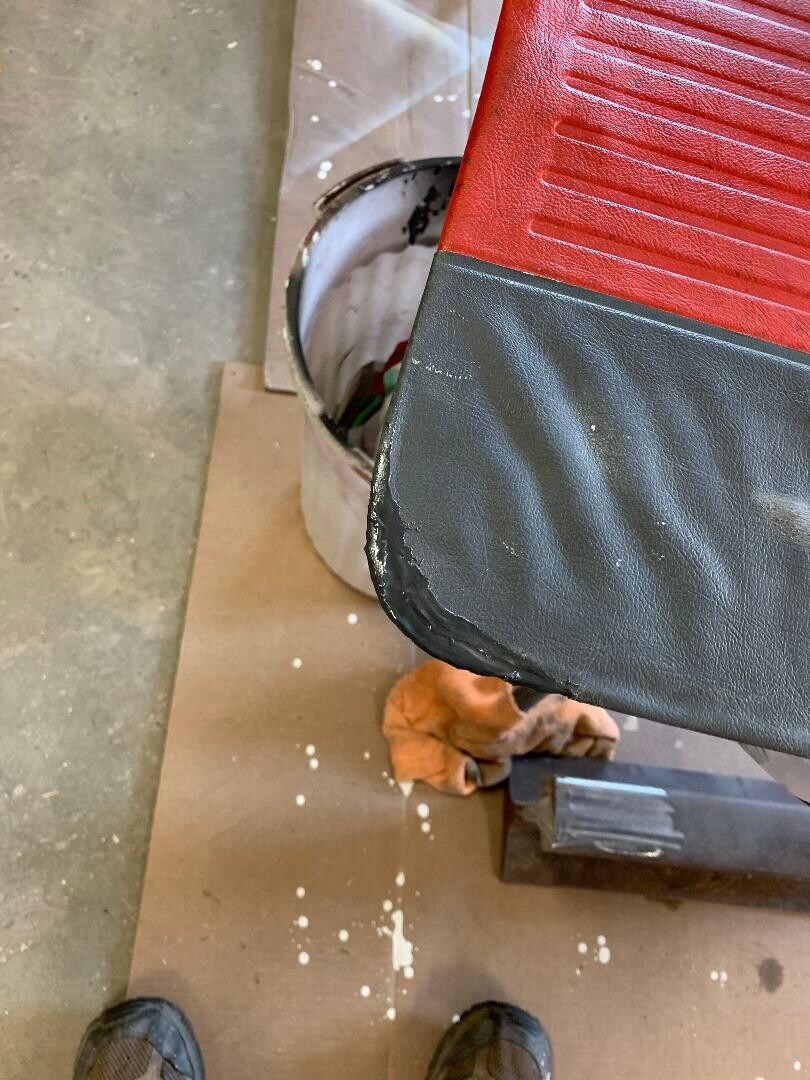
Drains were plugged in two of the doors causing them to overflow water into the car. Removed all four panels, stripped the chrome and clips and carefully peeled off the padded vinyl. The vinyl is discolored and has damage at the bottom, but I’m sure I can rehab it. once I washed the crud out of the doors, I was surprised how intact they were!
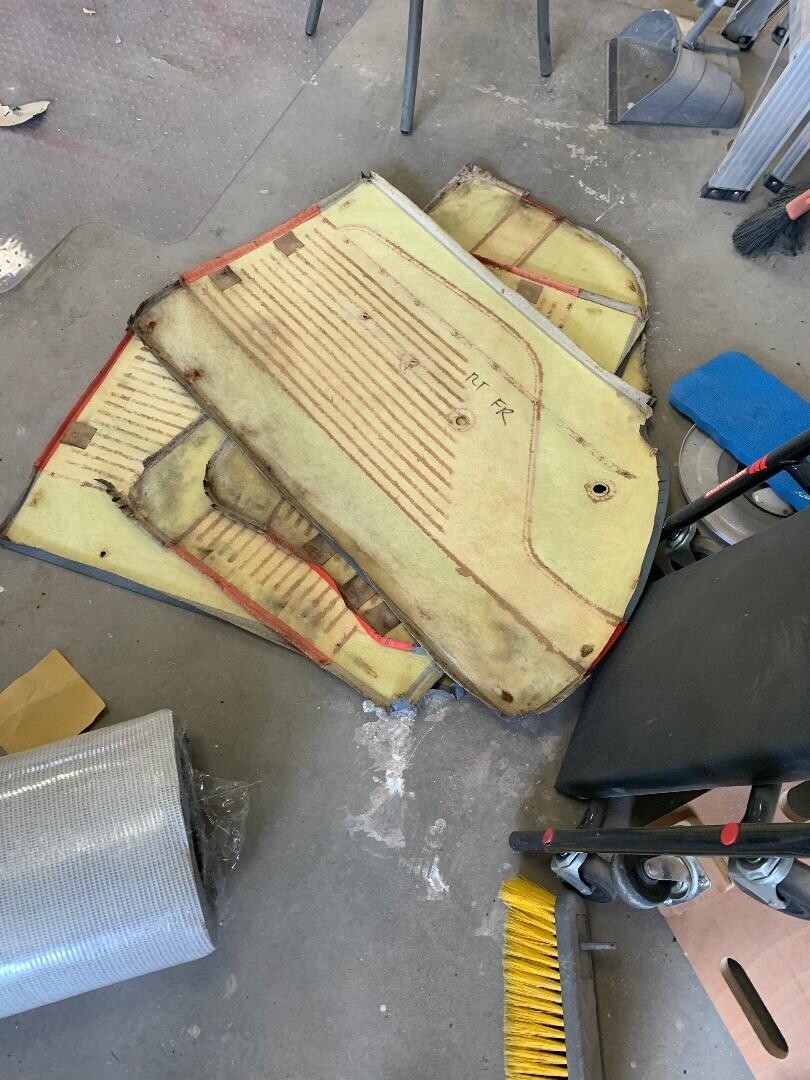
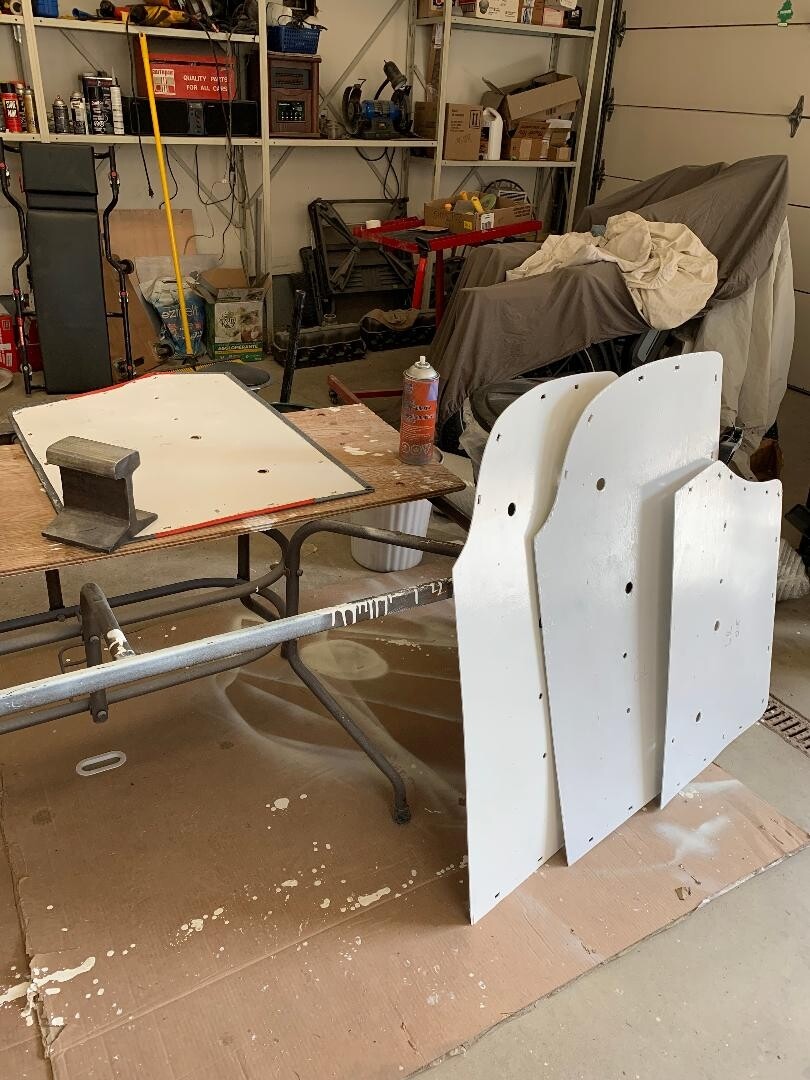
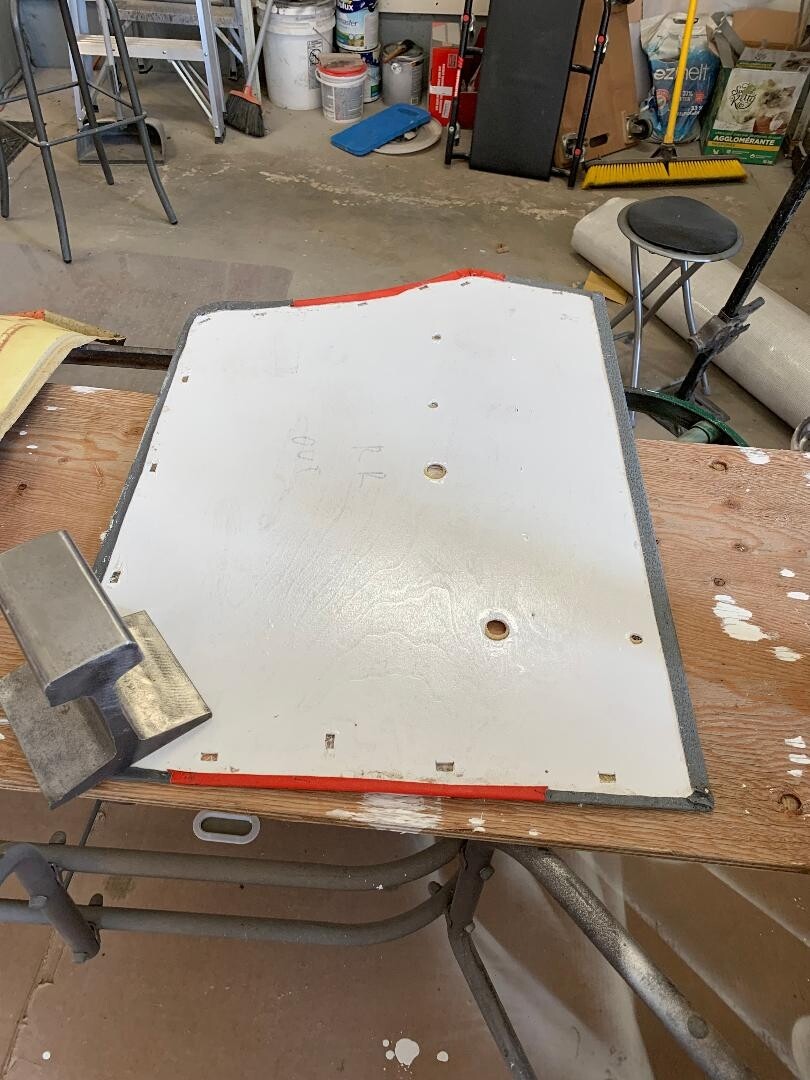
Washed out the doors and rustproofed them, lubricated the window winders and lock/door handle mechanisms and installed vapor barriers. My good buddy Leif, (using the old ones as templates), replicated the 4 door cards in 1/8 ply right down to every clip slot and chrome trim mounting! Waiting for the marine paint to dry and then the vinyl covers will be reinstalled and repairs to the thrashed areas can commence. The small leaking quarter glass is back in and at least that leak is fixed.


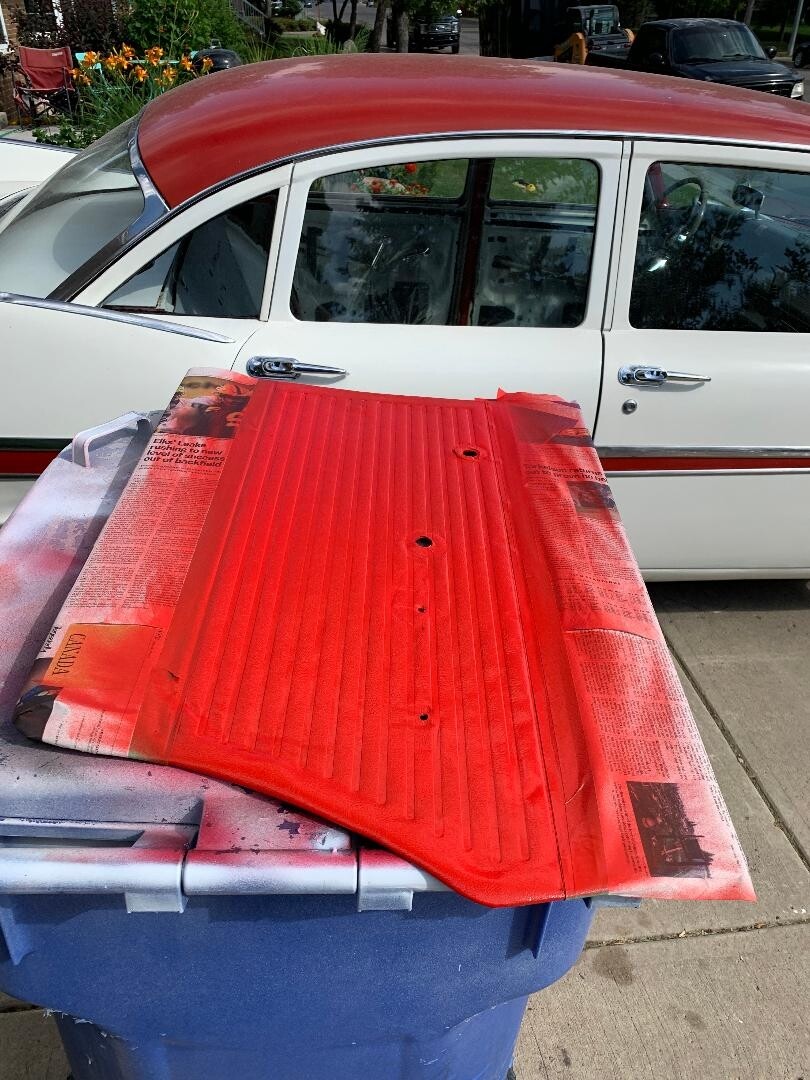
Plodge Mayfair Door panels refurb almost done. Have done leather restos on old Benz’s, but never tackled vinyl. Vibed the clips in my wife’s jewelry cleaner and repainted the clips. Treated the vinyl like bodywork ,but used JB Quik instead of bondo. Found good matching paints and dulled it back down with a matt clear final coat. Because the panels were home made, all in under $150. So far, still under my budget. Pass front to do once I find more clips. 10 at the bottom of the panels were rusted away. Seats expected to be done in 1 1/2 weeks!!


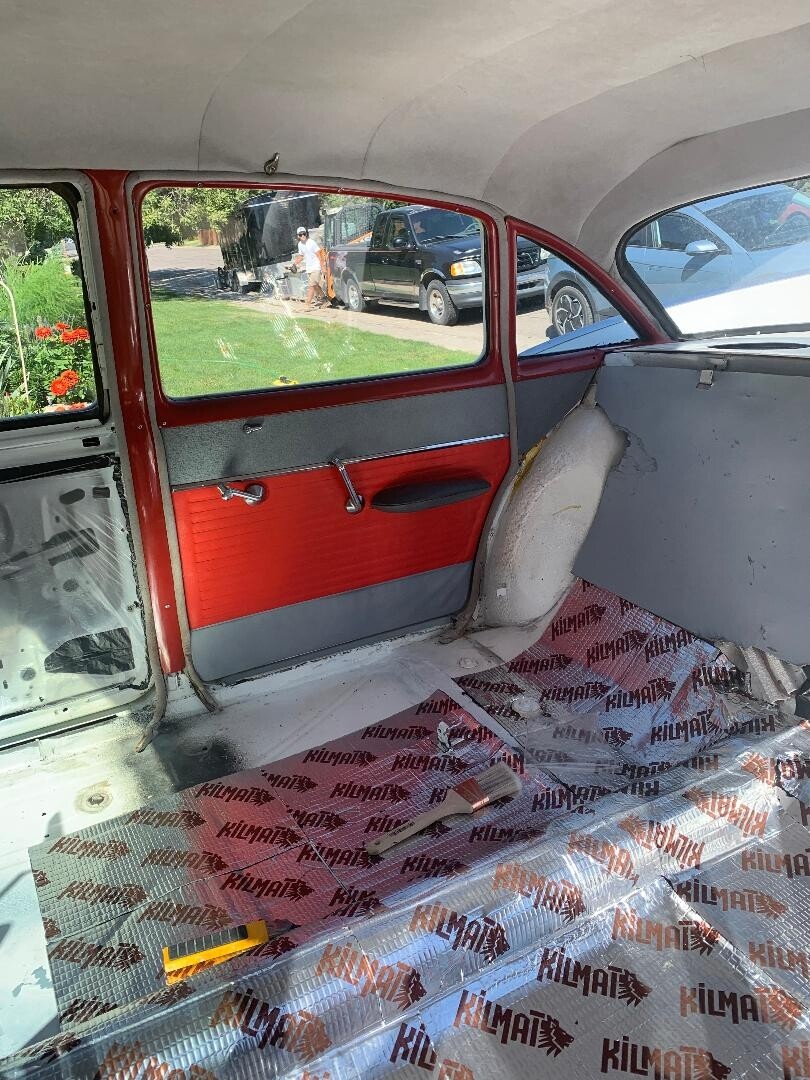
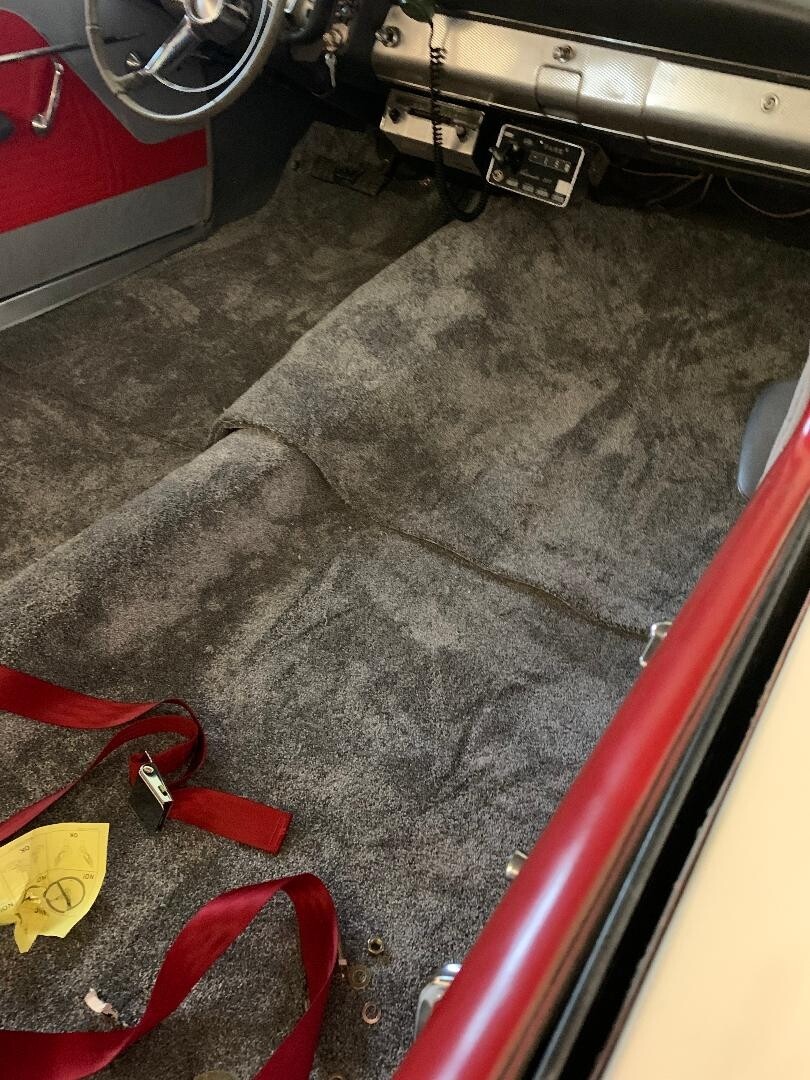
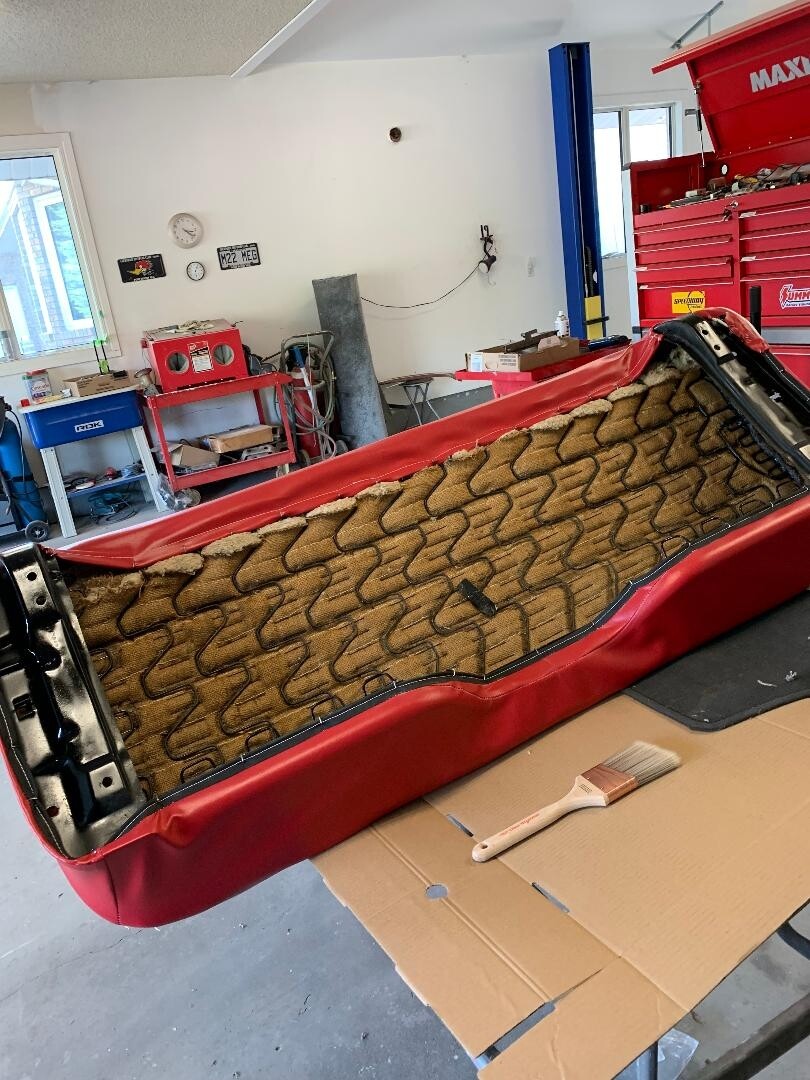
Finished insulating the floor and installed carpeting. Repaired the corroded rocker covers and installed hidden speakers up high on the kick panels. Seat belts tomorrow and seats hopefully in the next week! Tired of sitting on a Sealtest case… Have not driven the car once all year.

.
Finished up the package shelf with concealed speakers…
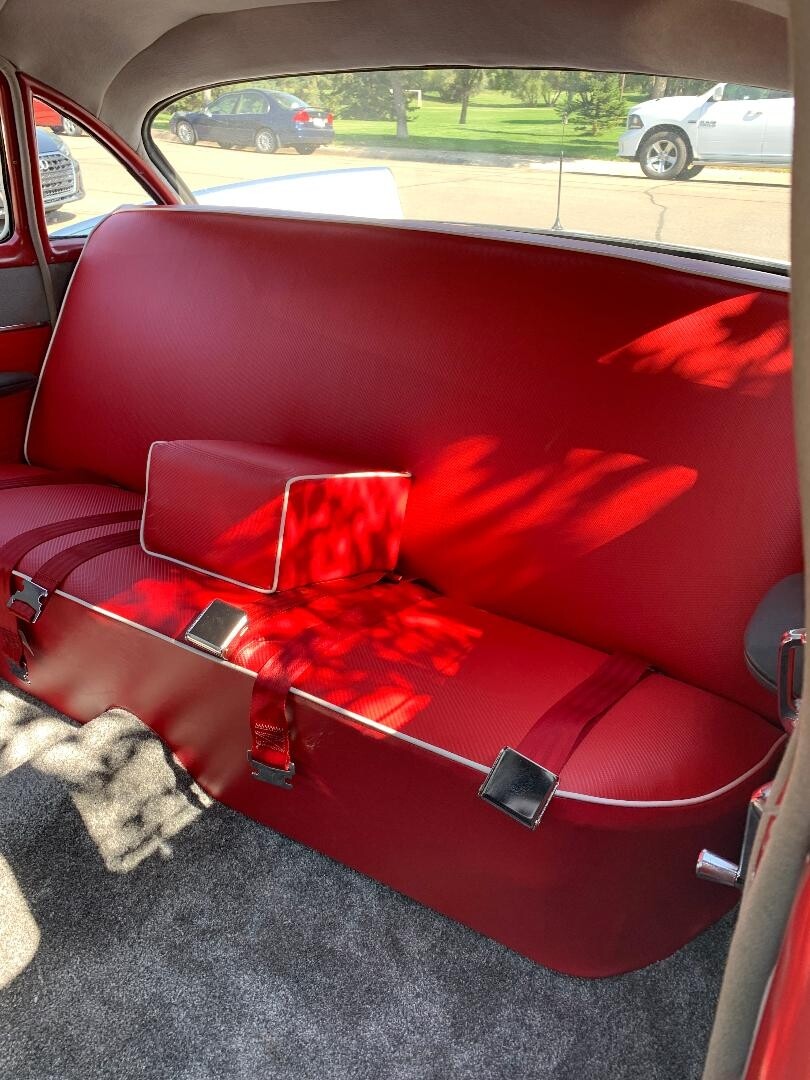
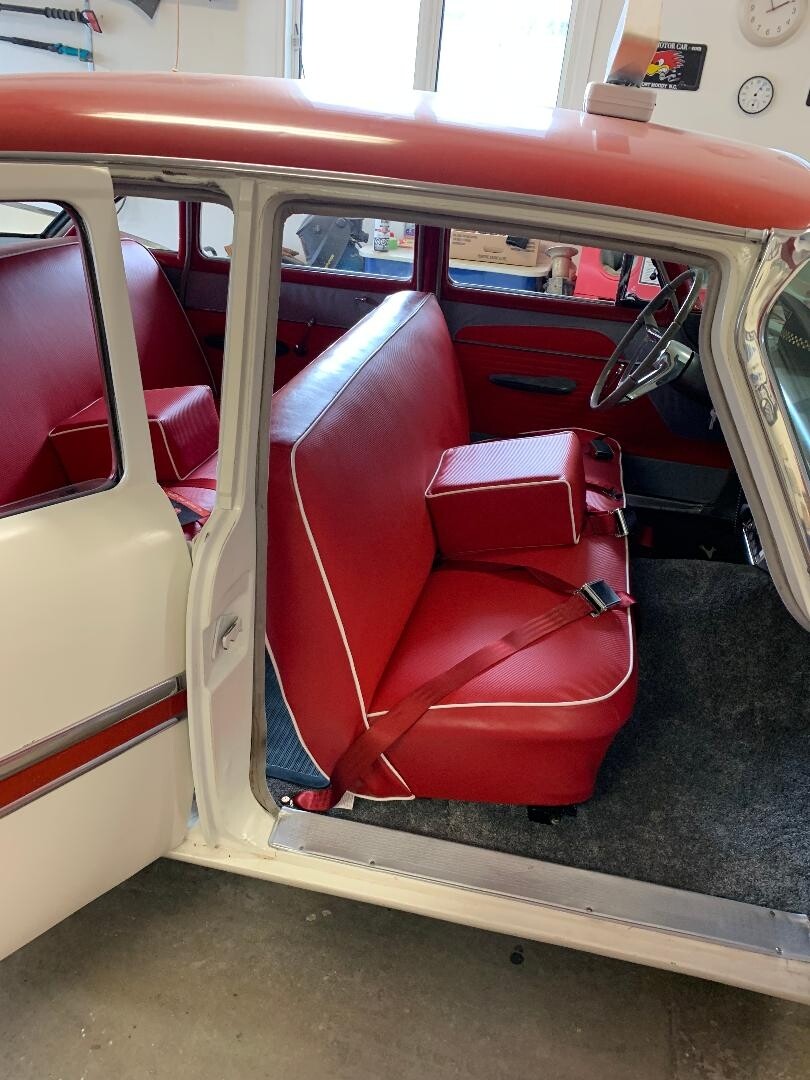
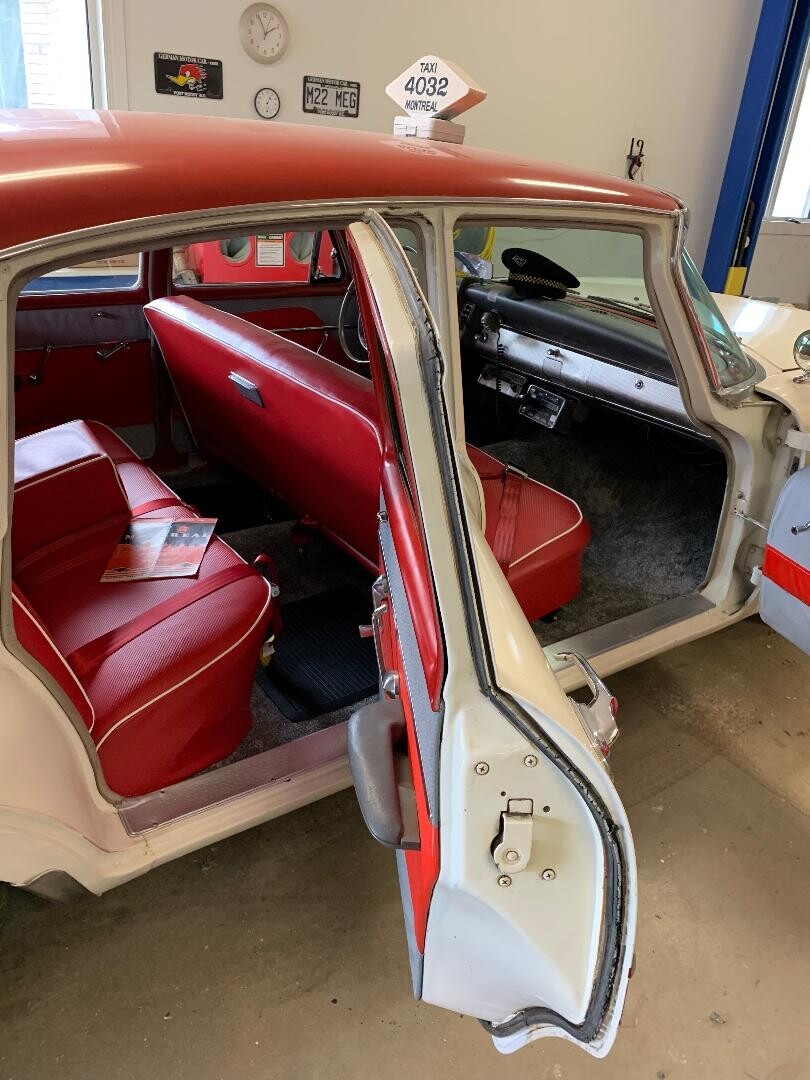
…and put the back seat in. it’s a red carbon fiber vinyl weave kinda look. Arm rest is removable for 3 passengers front and back.

How I installed the rear belts without a helper! 8^)
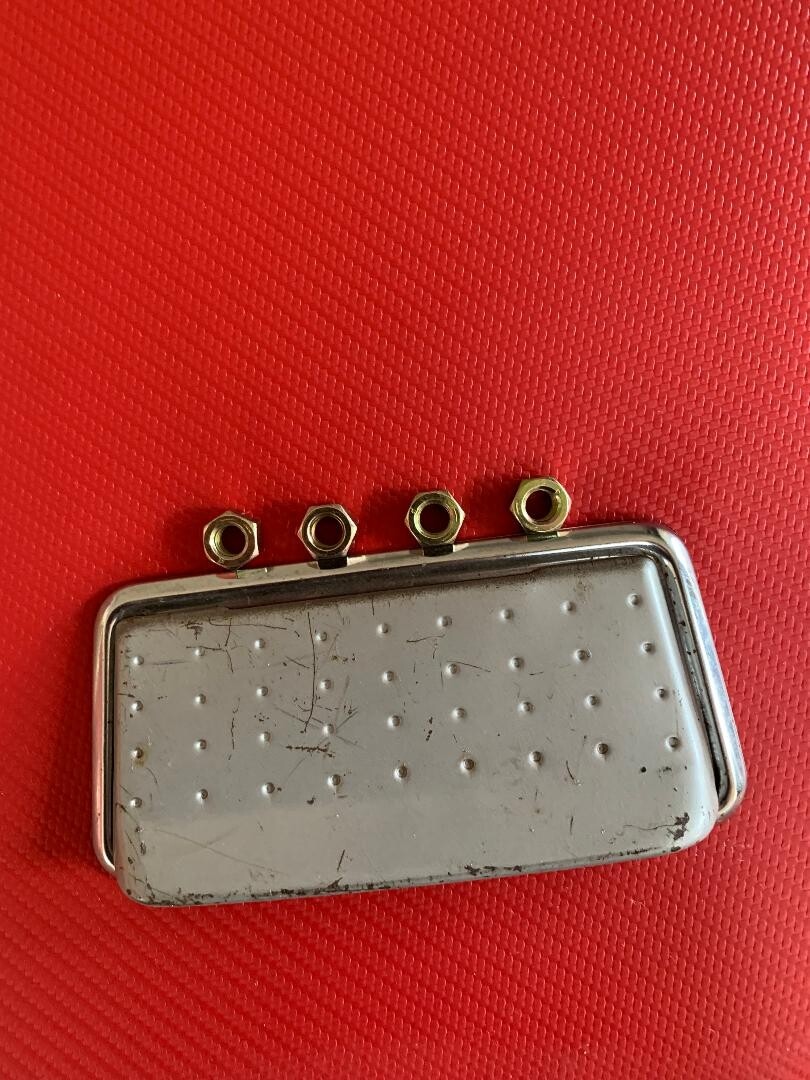
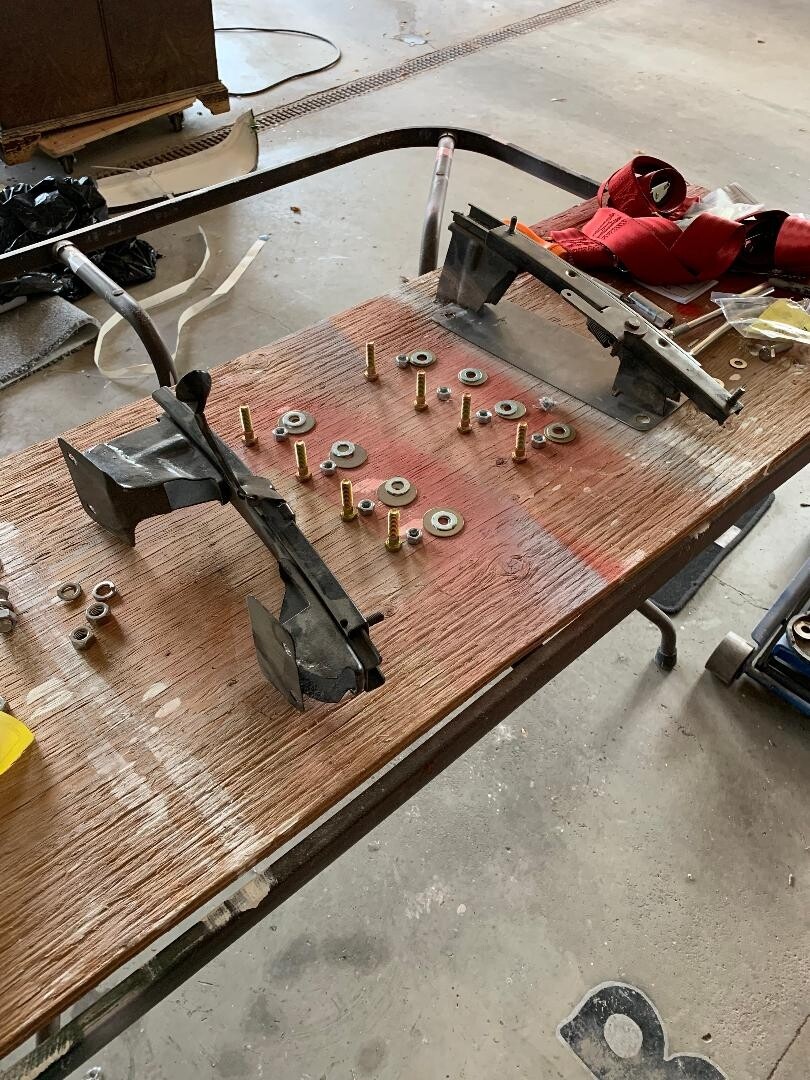
I’m amazed the only thing holding the front seat in the car is 4 5/16 fine thread nuts!
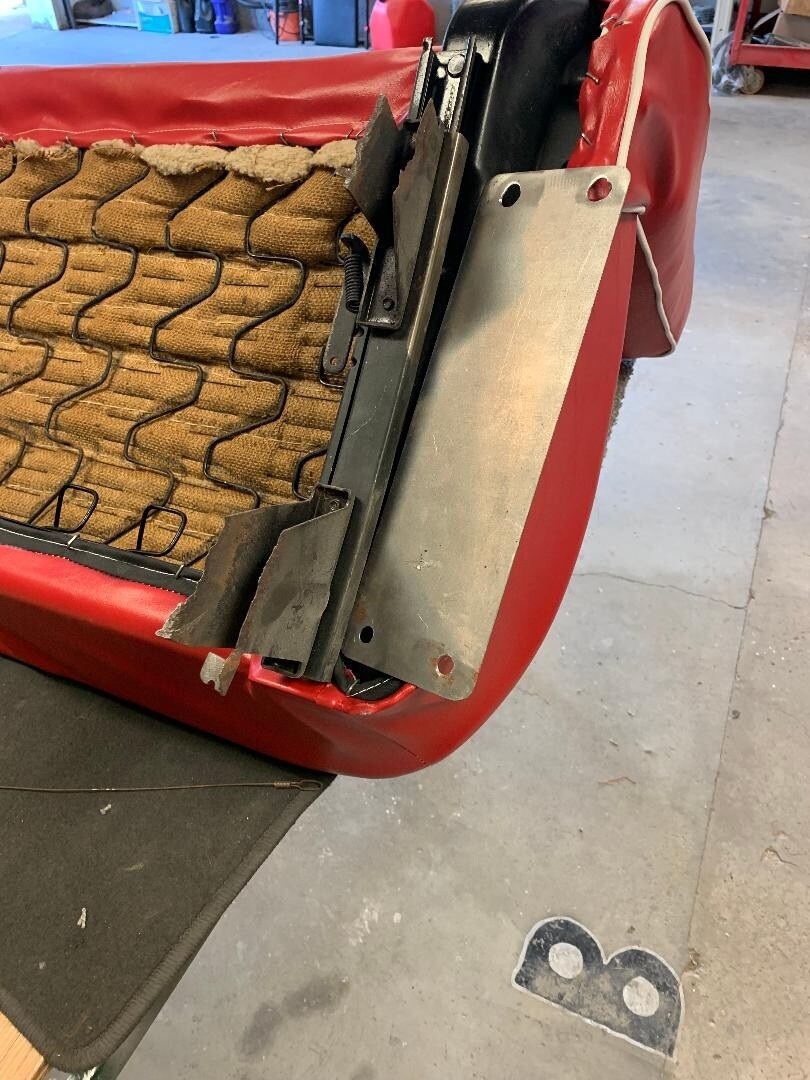
Couldn’t finish fabricating the pass front seat bracket without installing the seat in place and tacking the rt. bracket before removing and finishing it up.
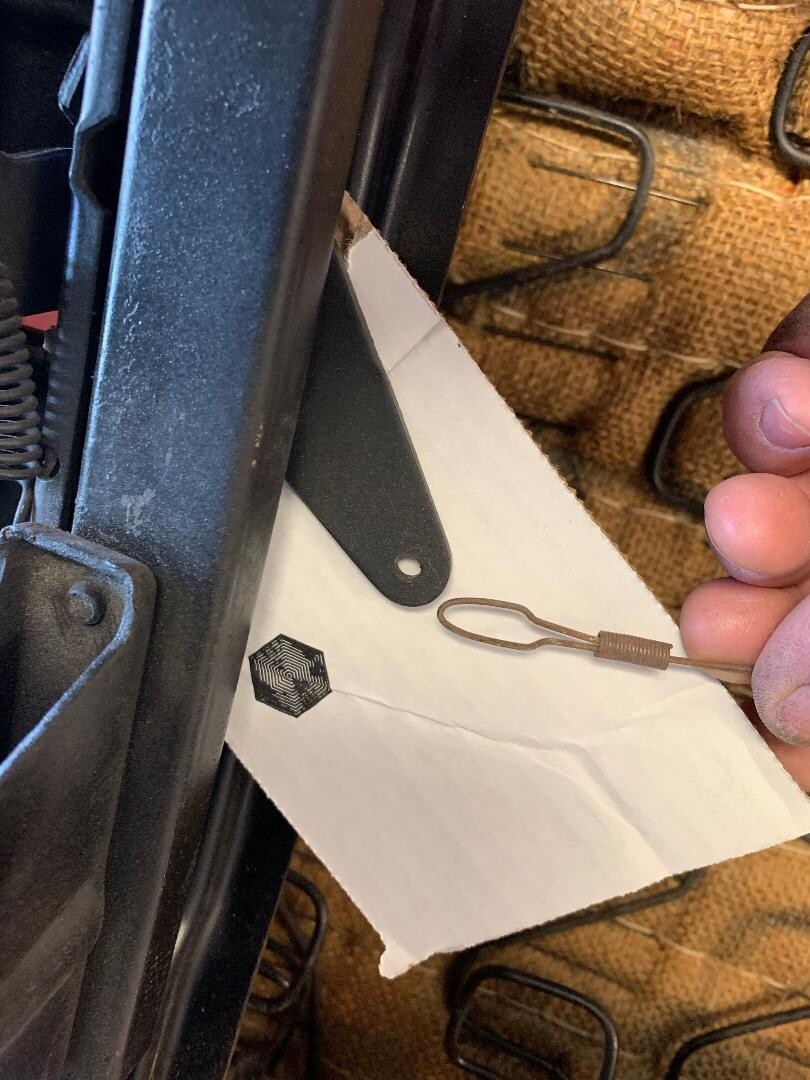
I can’t find a Ziploc bag labeled front seat, so have no idea how the cable for fore and aft adjustment attaches.
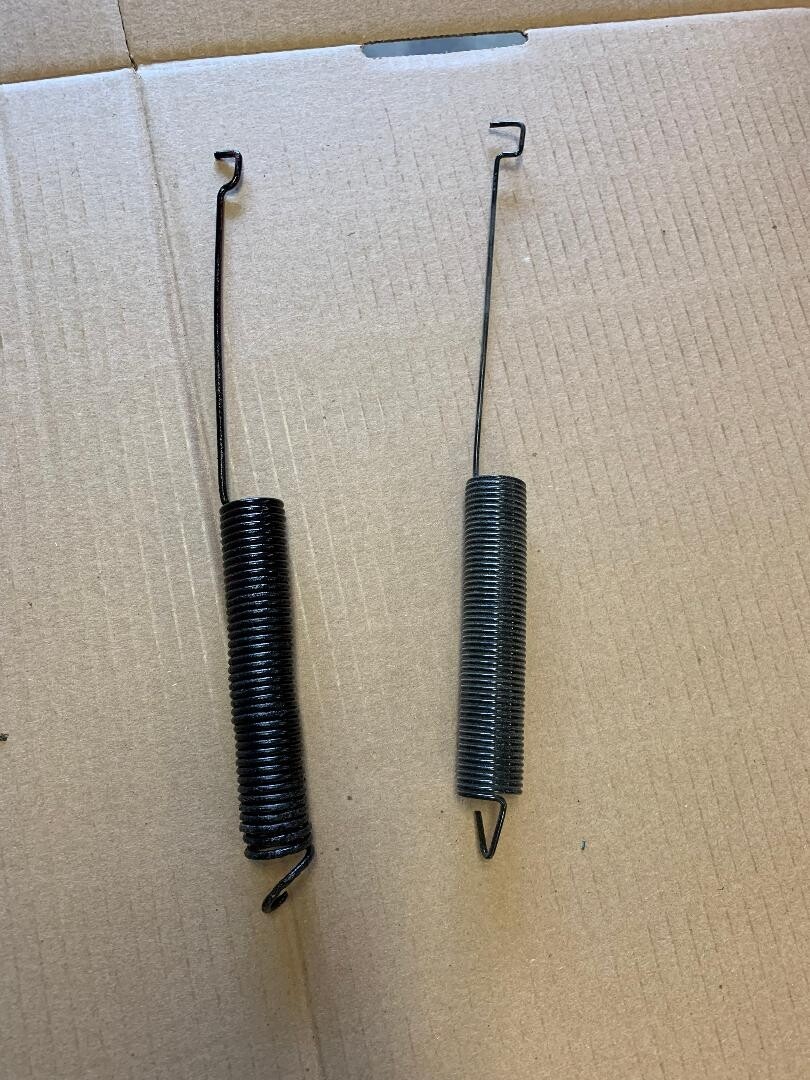
…and I have these 2 large mystery springs. One was way overextended and I had to heat it up and collapse it back in shape. Where do they go?
[I weighed in at this point: "[Here’s where the springs go](Faulkner gets a Redo - #707 by Faulkner Gary. The cable for the seat adjustment threads through that black clip in your second pic; I don’t have a pic to show where it attaches on the passenger side, but I’m sure you’ll figure that out.) -Dan]
Done with the seats and seat belts. Going to take a break before tackling the disc brake conversion.
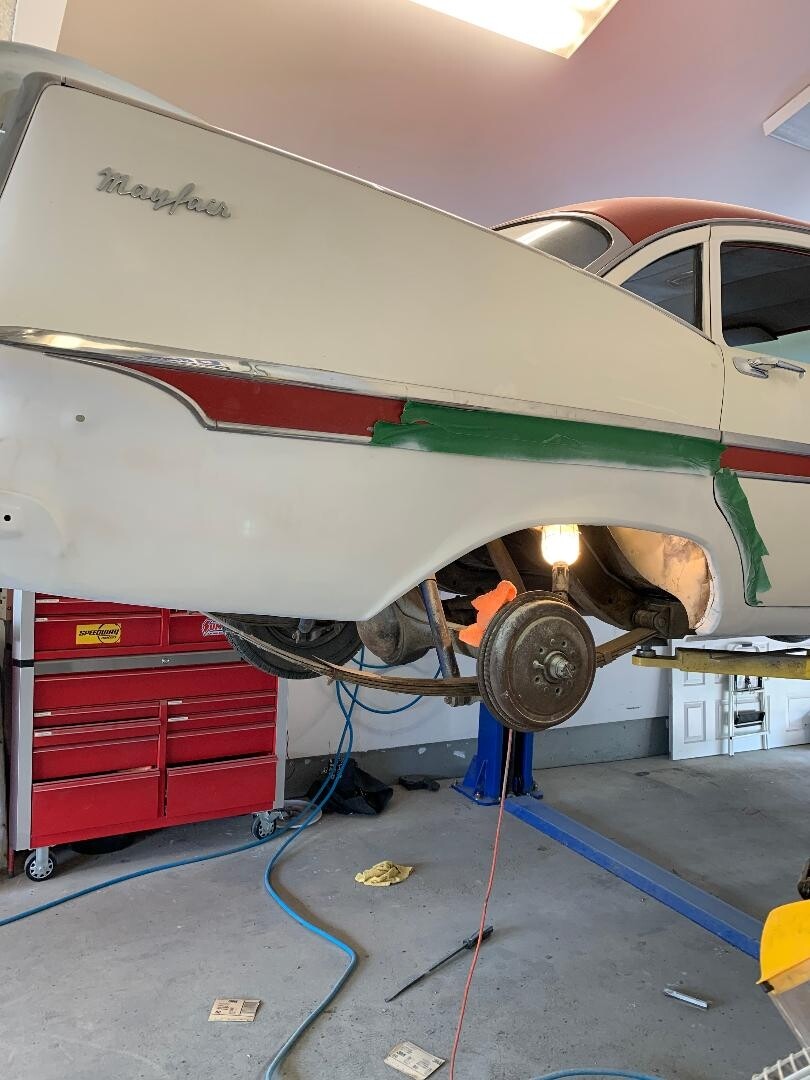
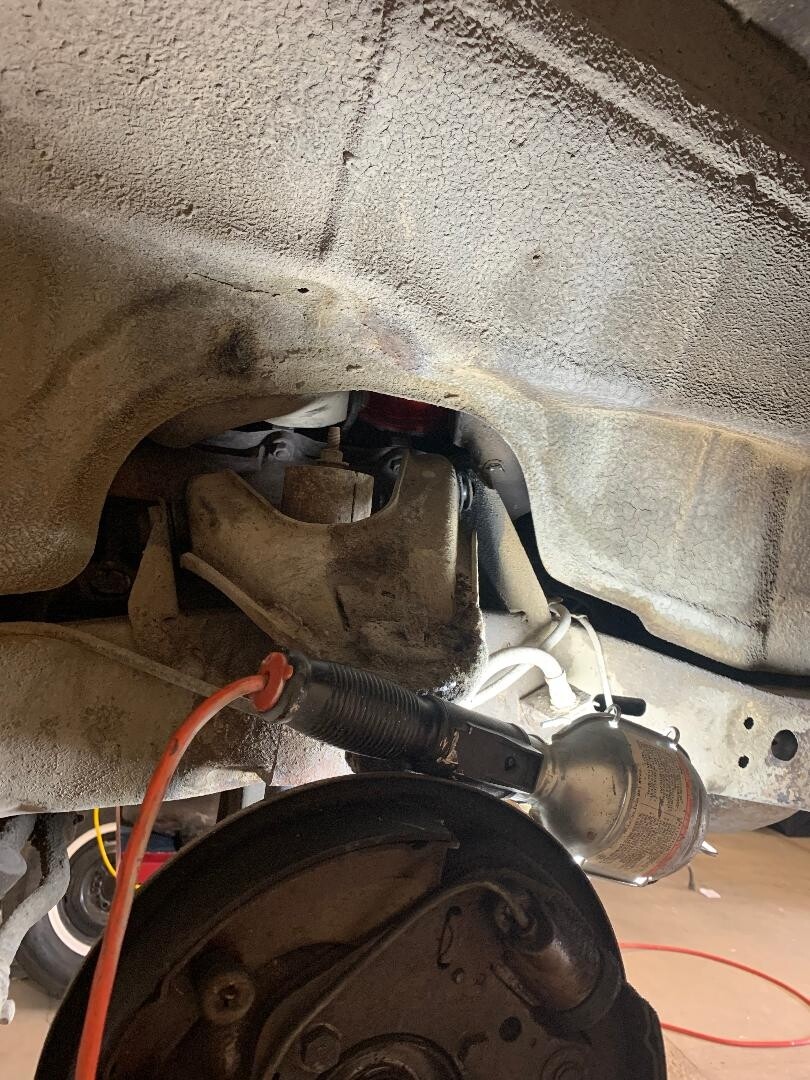
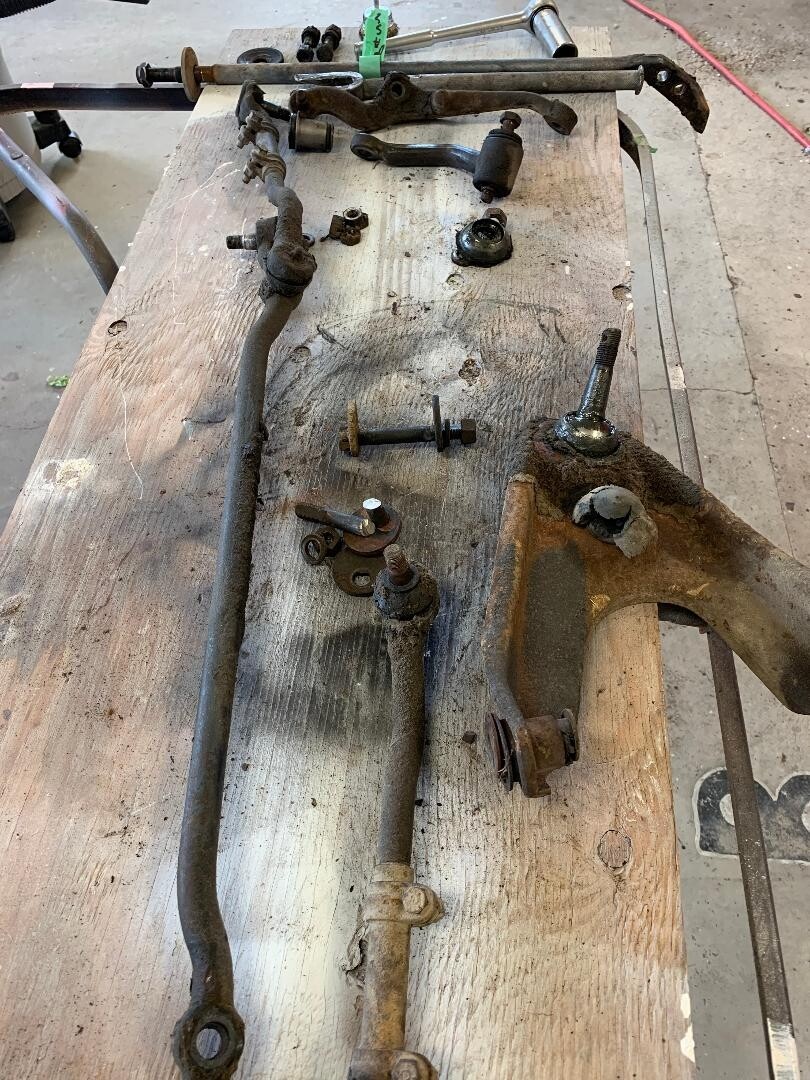
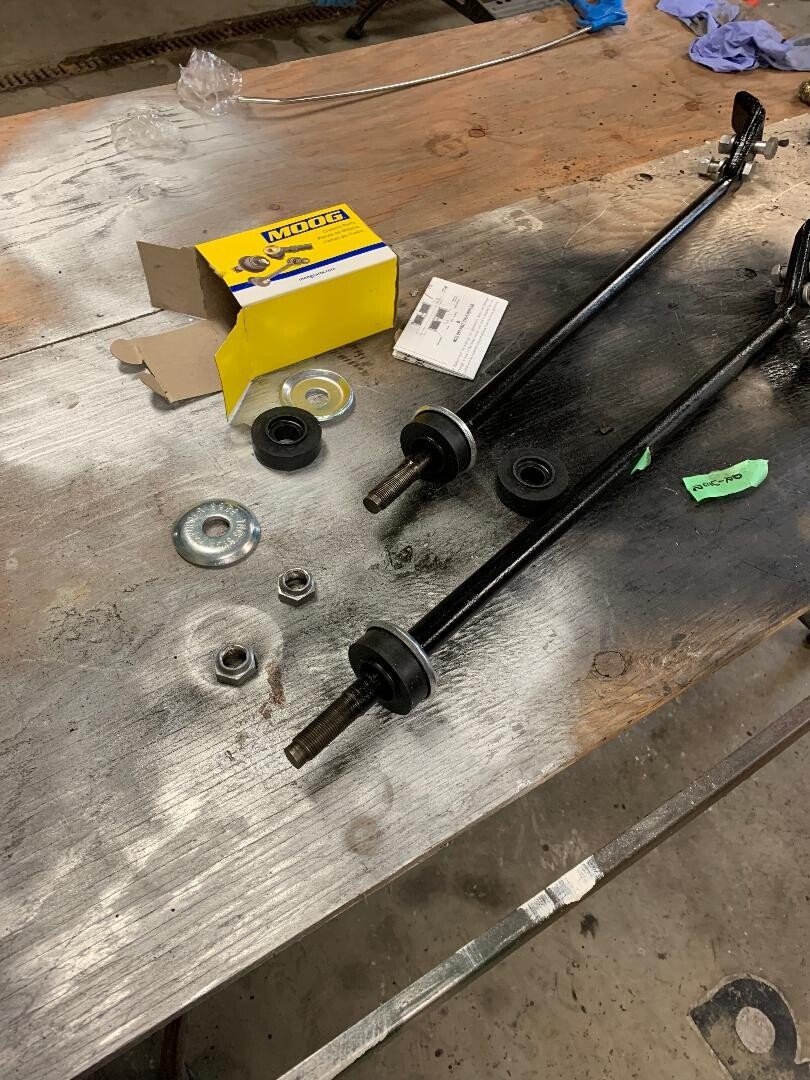
About to tackle the front disc brake conversion (from an '80 Cordoba) and the upper control arm bushings and the 4 ball joints on the 59 Dodge Mayfair… Have the manual, shouldn’t be a problem, but is it worthwhile to remove the inner fenders? Would certainly make working on the upper control arms easier, but if bolts start snapping, it could be a bad idea. Anyone done these control arm bushings?
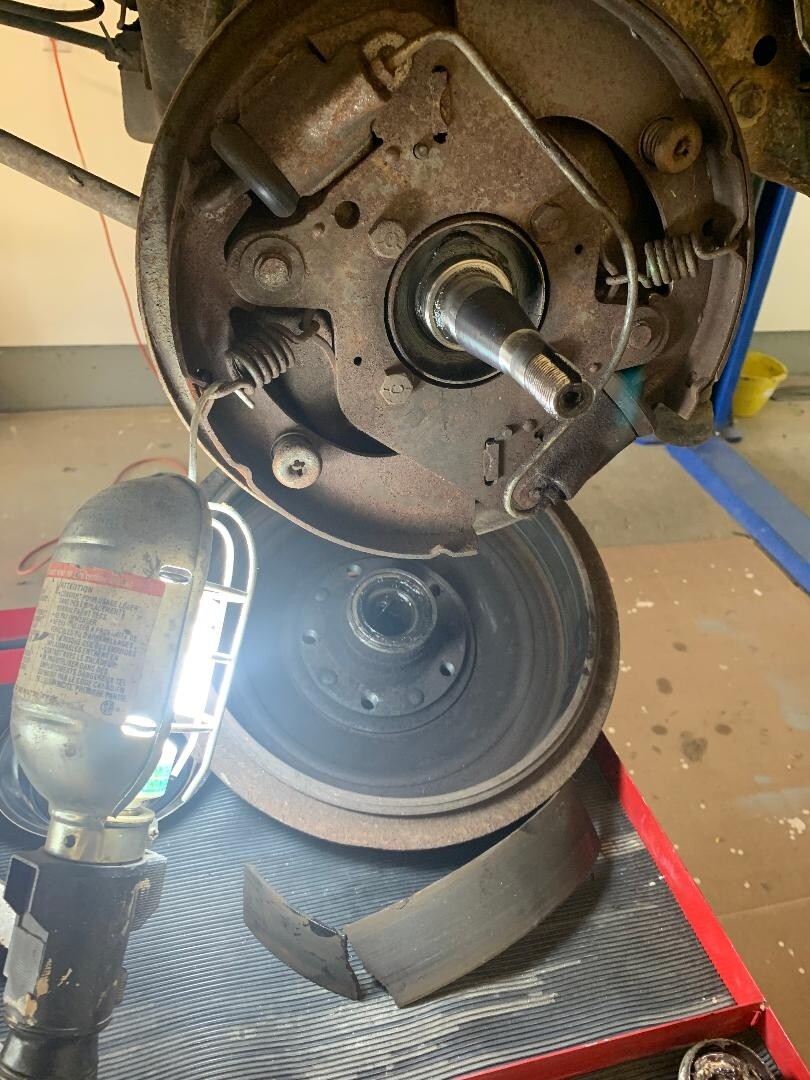

Doing the upper control arm bushings and ran into an issue with the back bushing on the drivers side. can’t remove it without removing the steering box, so I thought! My trusty cut off wheel just fit in enough to cut 1/2 the eccentric bolt. After rotating the bolt, it cut thru. Put the new bolt back in from the inside, no more problems. Will need a bump stop on the drivers side upper control arm as it is smushed.


Got the front end almost finished and the disc conversion done. Actually have a brake pedal on the hoist. will see how they feel once they bed in. Wheel alignment, next stop.
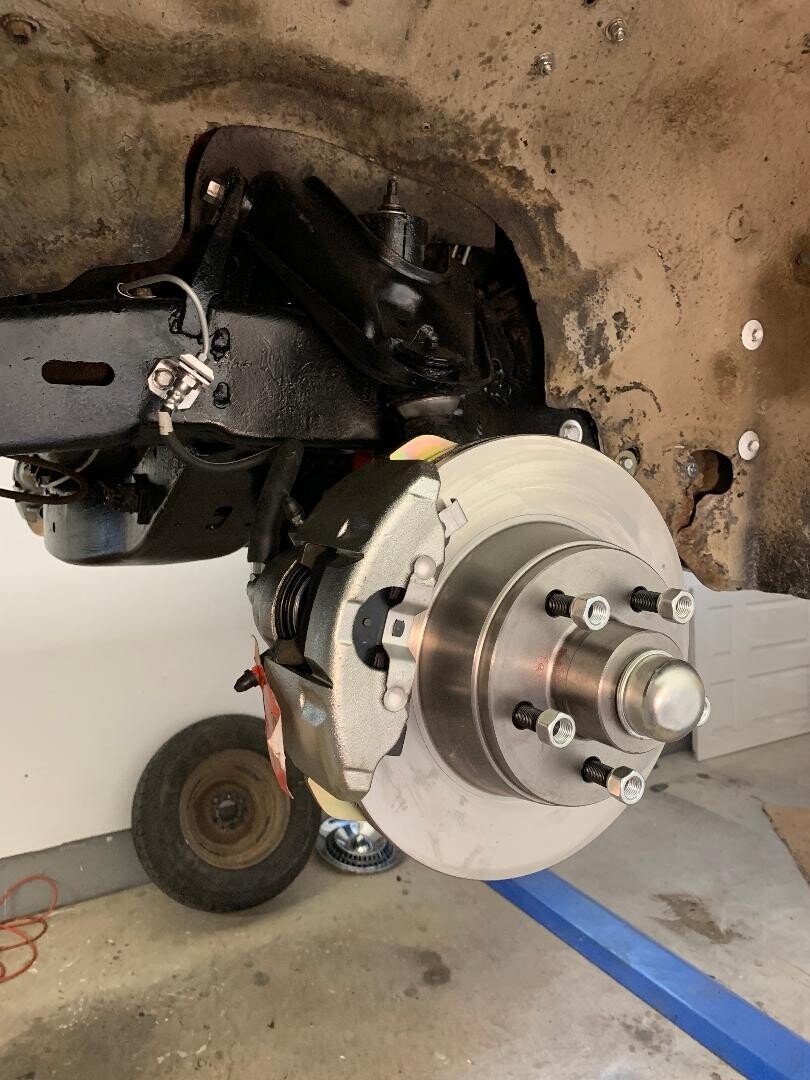
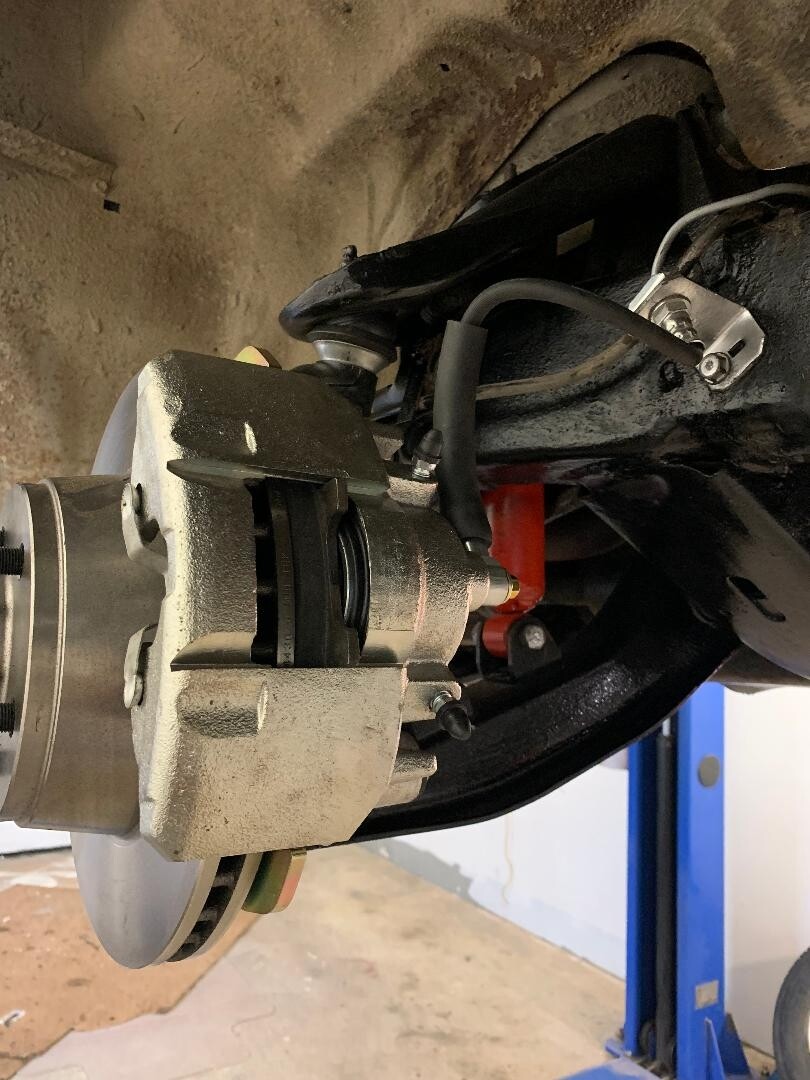
After resetting the torsion bars to the correct height, I went out for fresh gas for the first time in a year. (has stabil in it). The fresh 91 octane (no alcohol) fixed the sticking accelerator pump and she runs great! The Disc brakes are amazingly progressive and a huge improvement! The alignment is very close considering it was all apart. I will toe in the rt. fr. a bit for now. Steering wheel is almost straight. A proper alignment is coming. Have to find an old fart with an old alignment machine. My local shop won’t align it. ![]()
UPDATE! Found a local guy that does these alignments. Problem solved. Thanks Wade! ![]()
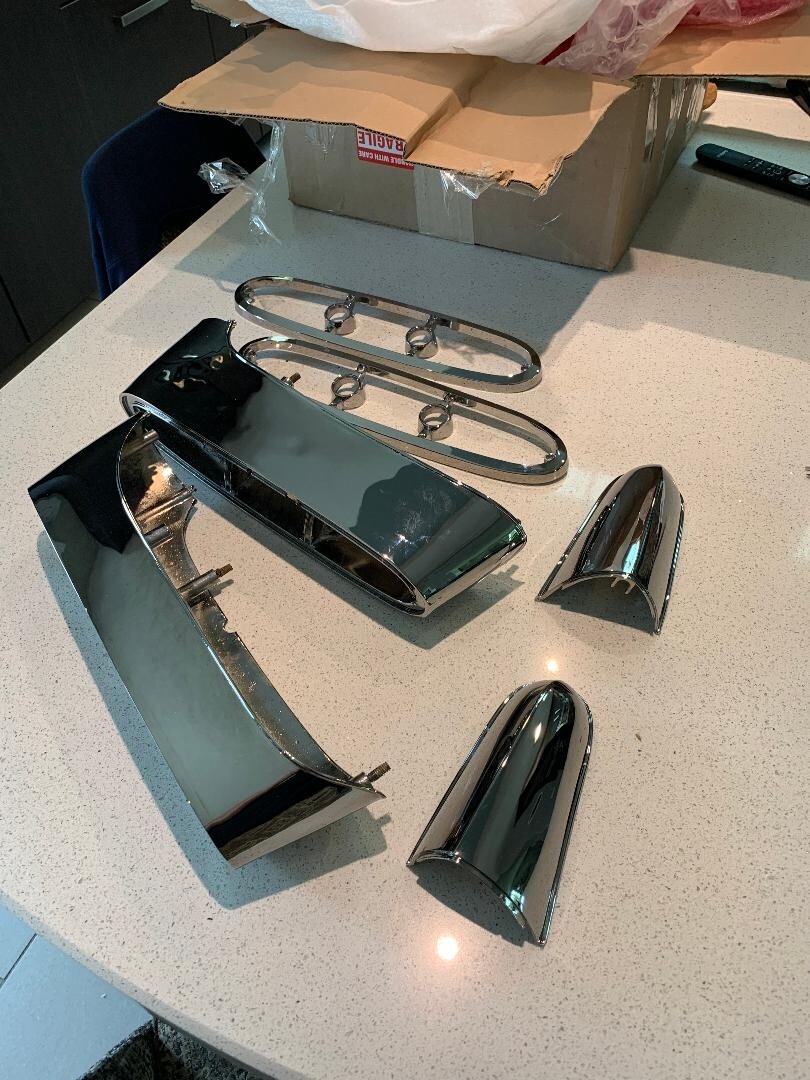
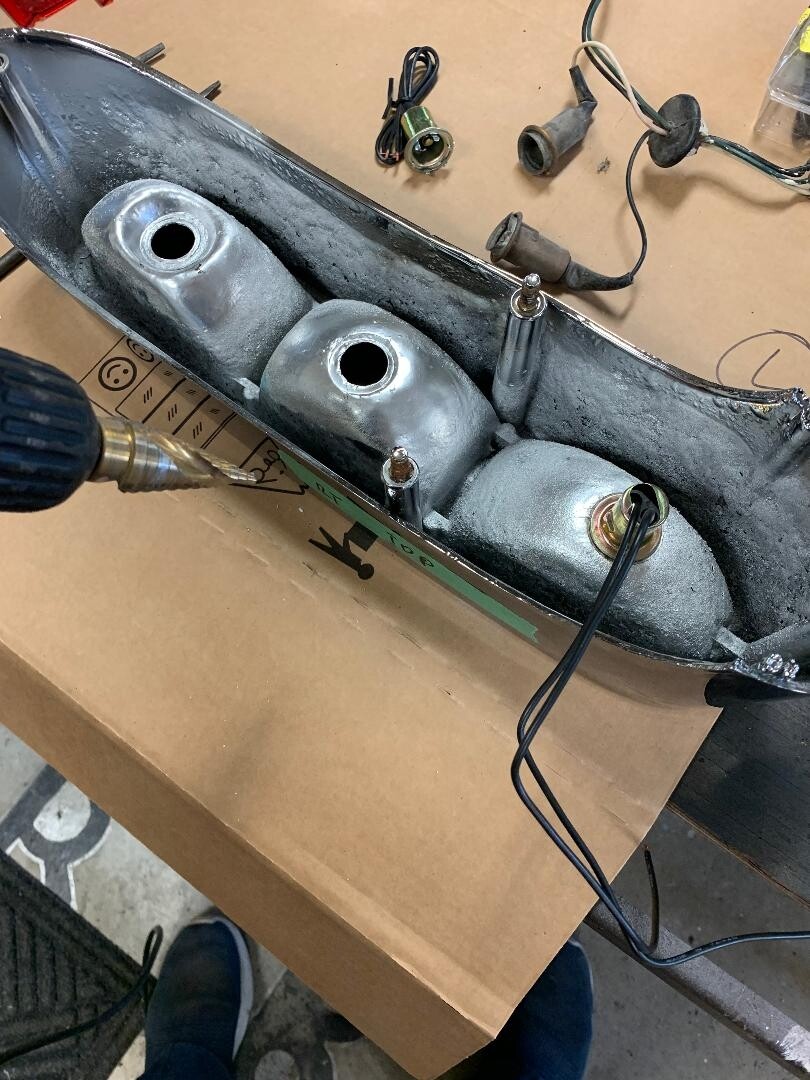
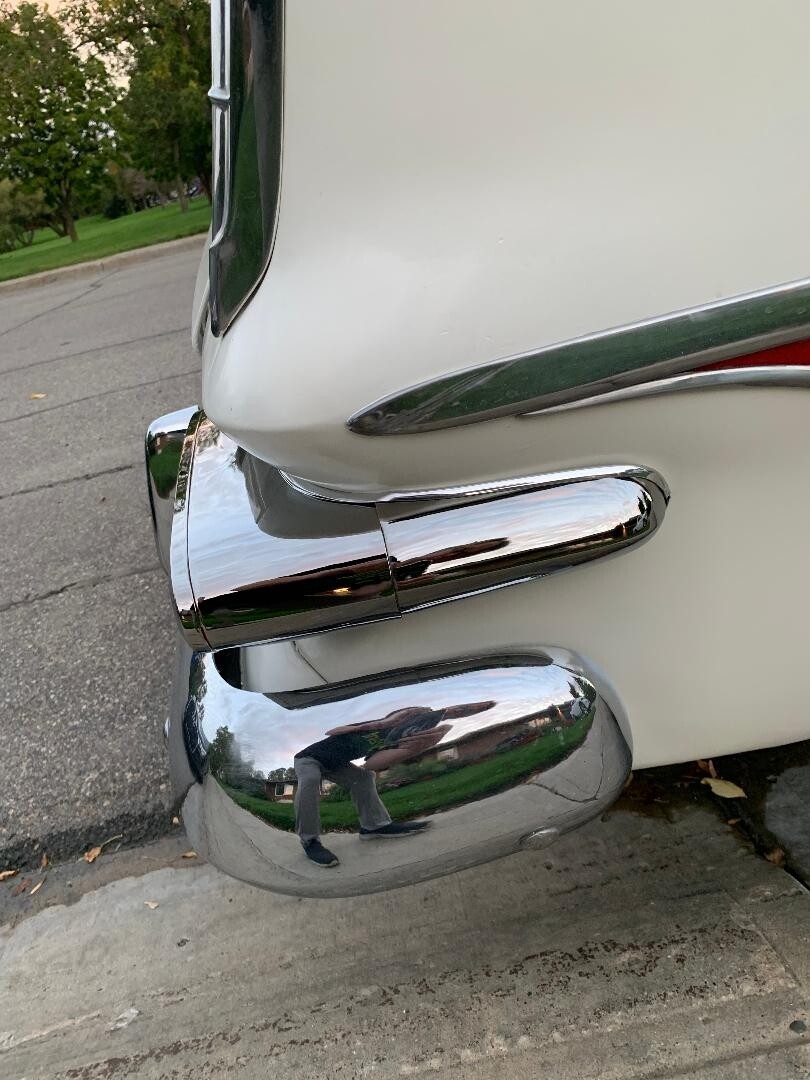
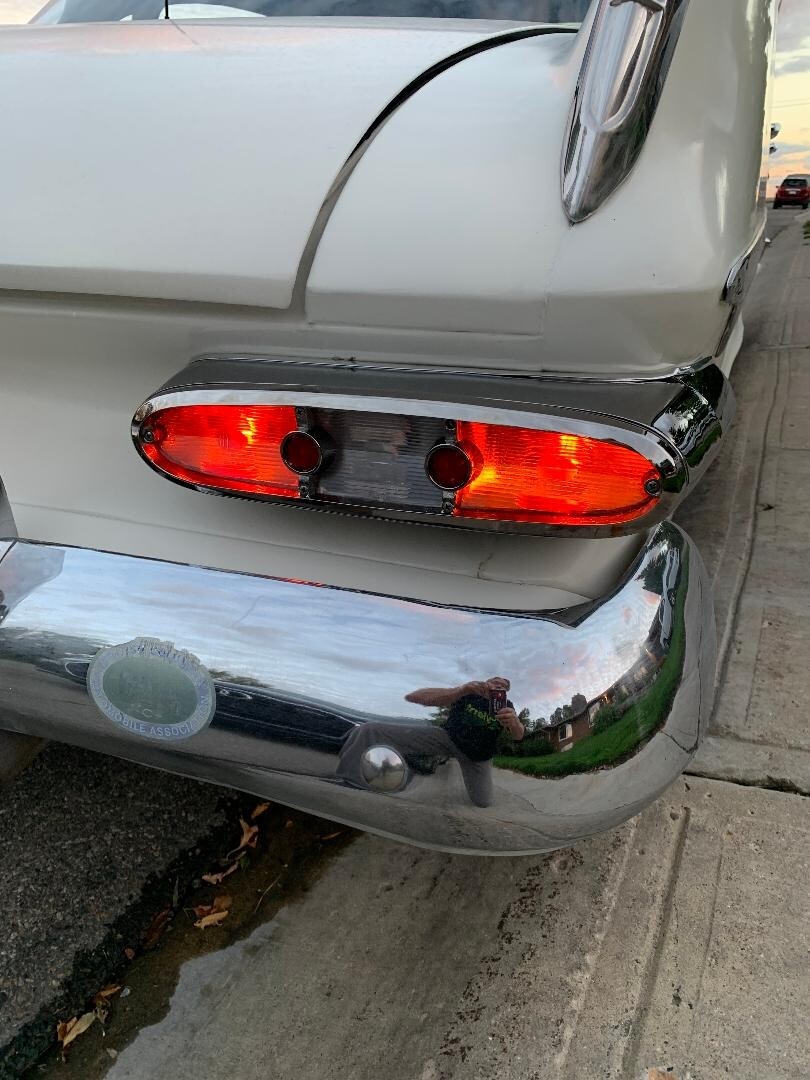
'59 Plodge Mayfair Tail lights have arrived after only 5 months! took all afternoon to assemble, replace sockets and re-install just the rt. tail light. had to re-tap the 6 tiny screw holes for the lens retainer as they had copper in them the 3 threaded studs had to have a die run over them as well. The small side piece would not fit and took hours of hit and miss to get it half way decent. probably the extension from the other rt. tail light .Learning to manipulate the chrome edging material with a heat gun was hit and miss, but ended up looking o.k. Waiting for 2 more sockets and LED bulbs for the Lf. side. I did modify the wiring the have both Bulbs on each side as brake and signal lights.

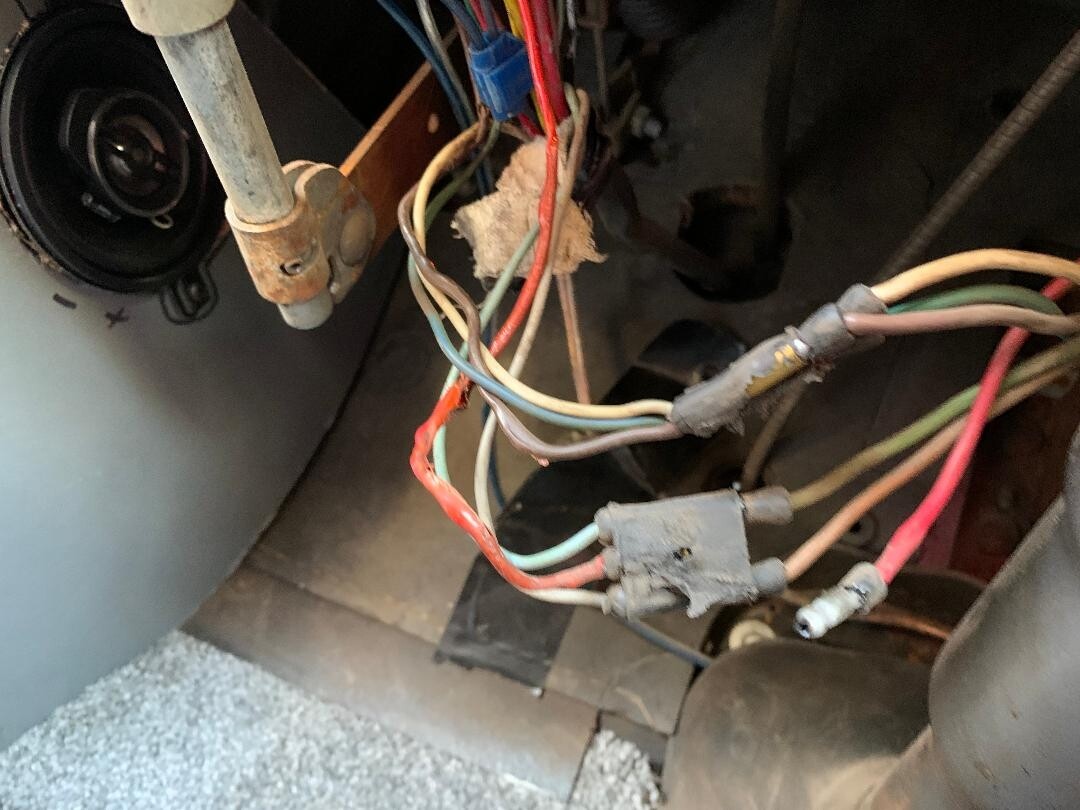
I have been driving the '59 Plodge daily this week and marveling how great it was running! UNTIL! Leaving the grocery store parking lot, I see a wisp of smoke coming from the dash/steering column area accompanied by a burning electrical smell. I cut the ignition immediately, stop as fast as I can, leap out of the car almost getting me and the drivers door removed by a passing car, as fast as I can, open the hood and dive on the battery disconnect. I get back in the car and dive under the dash to try to separate the melting wiring while my legs are sticking out in traffic. The whole thing took less than 30 seconds! Not bad for a 68 year old arthritic fart! Carefully reconnected power and drove home with the flashers disconnected. The flasher switch seemed to short as the damaged harness seems to head that way and they are now inop! I think I basically caught it on time before major damage was done. A few more fuses might have been a good idea on this car! The battery disconnect was the best money I spent on this car!!