2025-11-14 Nothing like pulling an N.O.S. car part out of its factory original box. 1961 Dodge Polara Wagon taillight, future 3rd Brake light. I can’t stop touching it.![]()


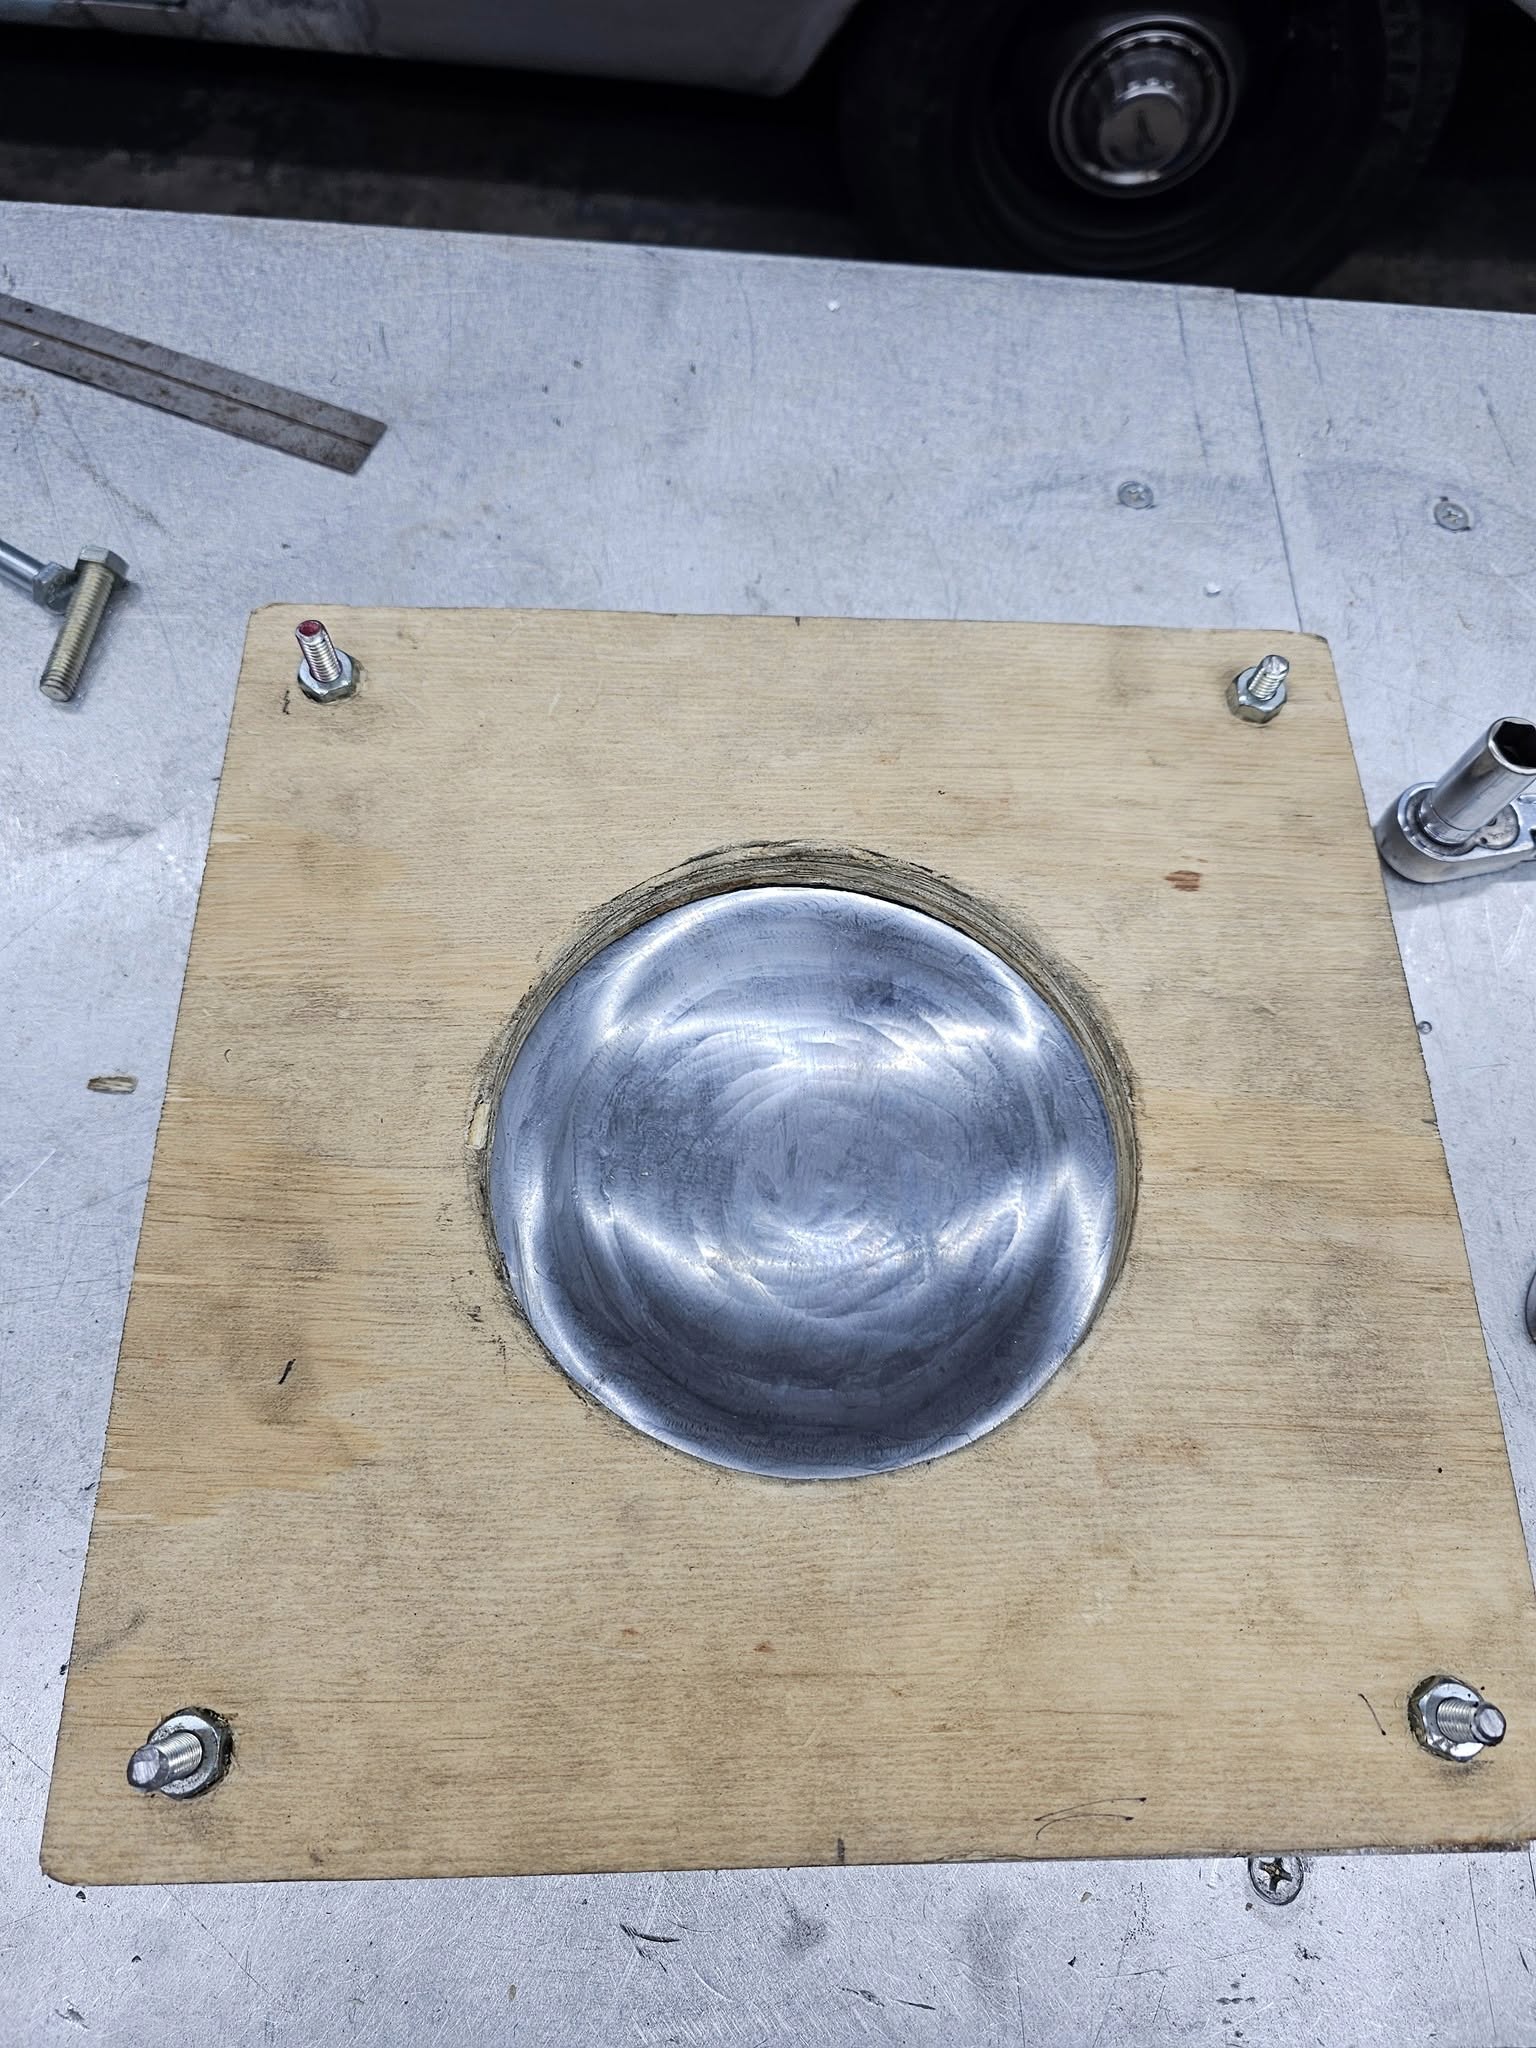
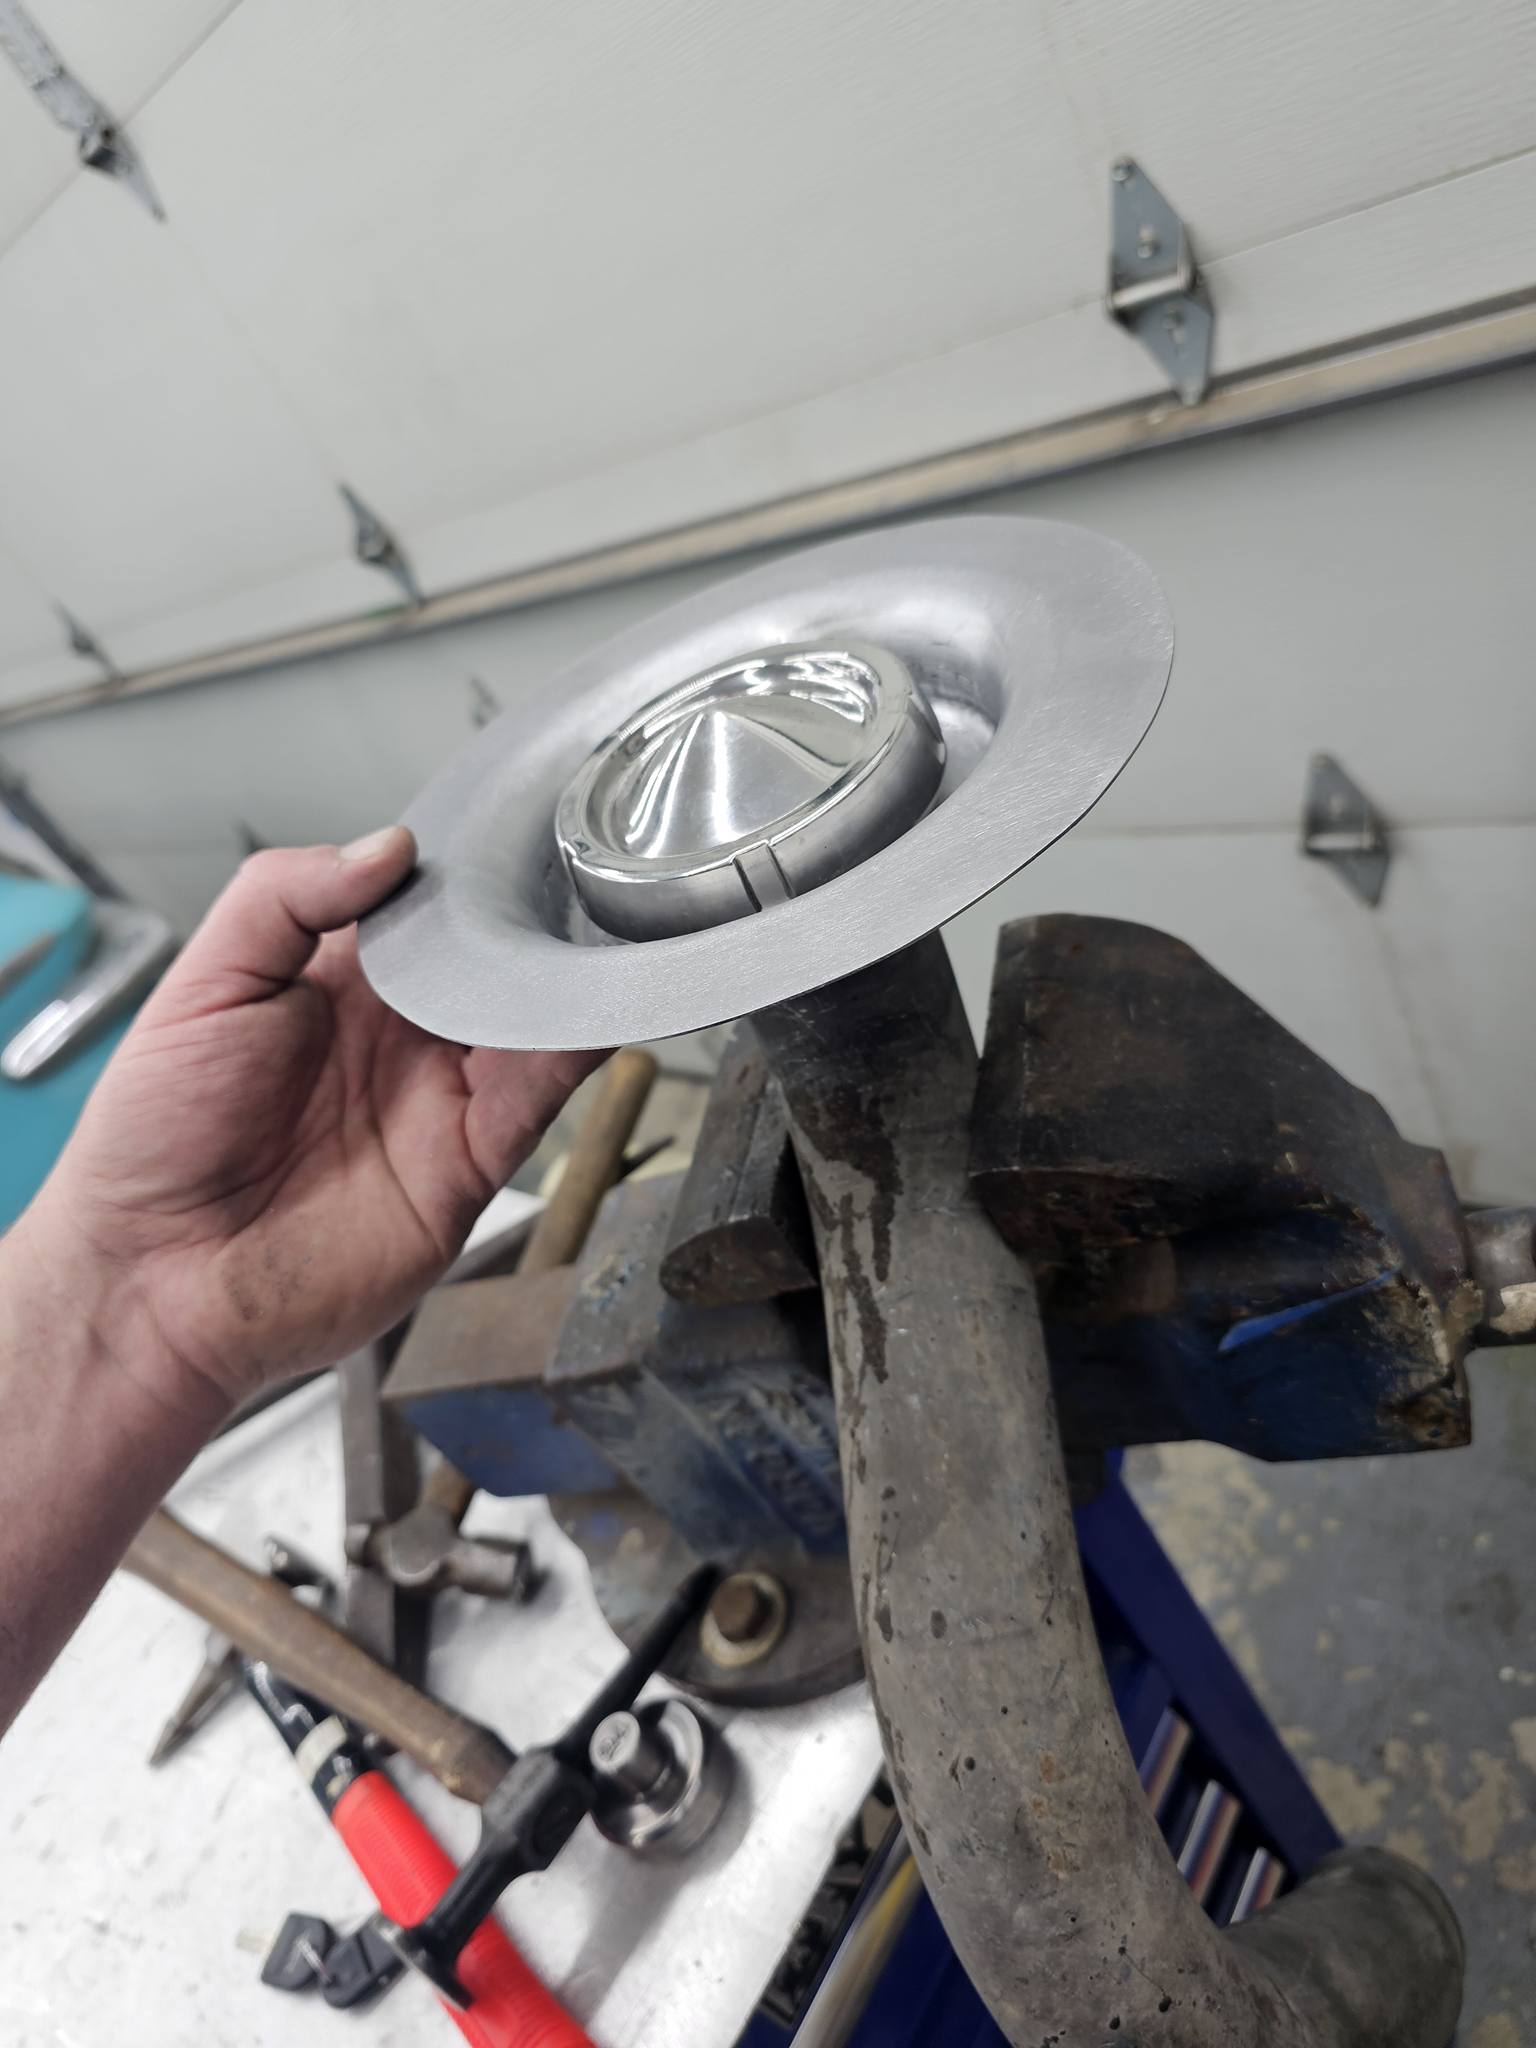
2025-11-18 It’s been so long since I fabricated something for the 59, I find myself enthusiastic to post today’s failure. I am relocating the gas fill neck on the 59 to the drivers side cat walk area using a 53/54 Chrysler gas cap. I want the cap partially countersunk and the profile ring around the cap to mimic something the factory would have done. I fabbed up this weld in gas cap mounting detail on the Pullmax at work today. It’s not deep enough for the gas cap countersink I had envisioned and the outer ring detail is far to large to suite me, so its back to the drawing board… there is very little logic regarding the modifications I have made to this car. I just do what makes me happy. ![]()


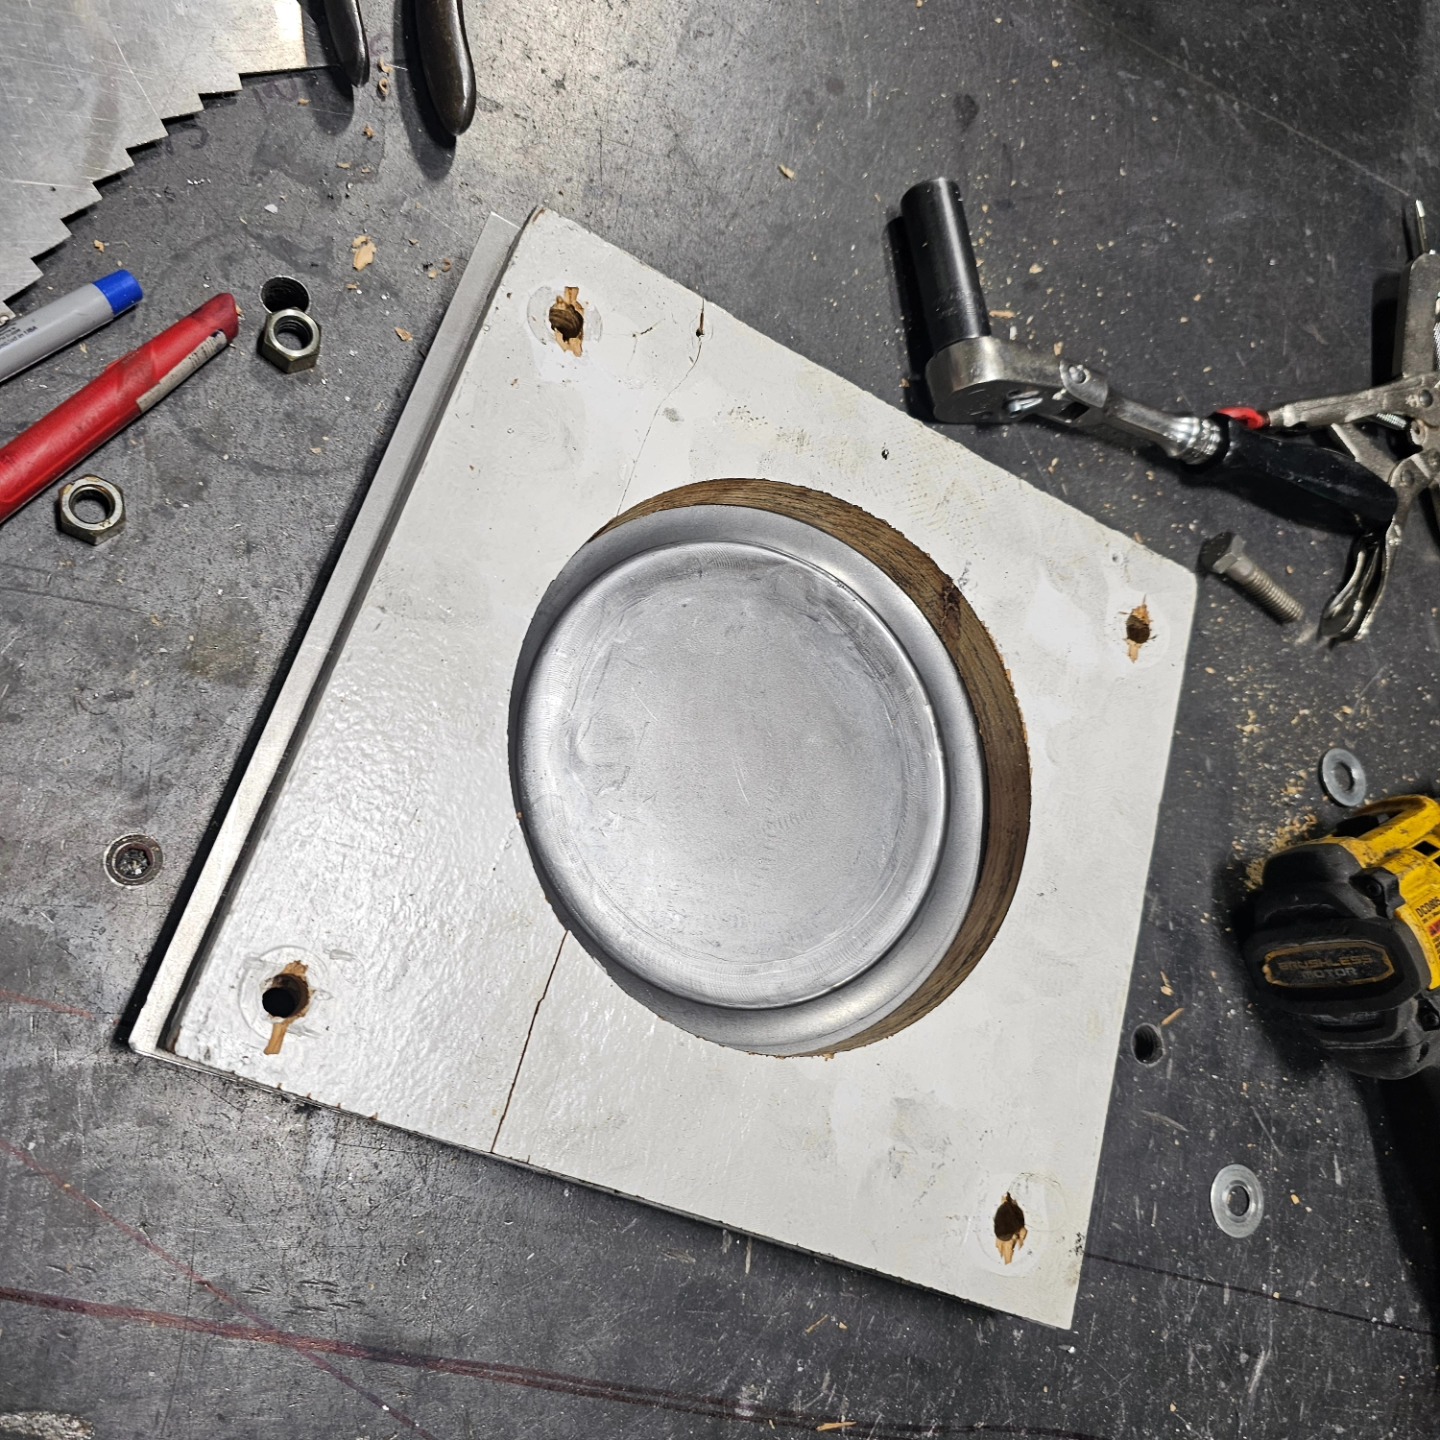

2025-11-28 Third time is the charm as they say for those following along. I finally have a countersunk gas cap surround profile I am happy with. The gas tank filler neck is coming next week. I then can start sorting out the base the neck will attach to in this profile.


2025-11-29 My dad’s Body Shop was on State Street when I was a kid. I don’t want a lot of decor hanging up in this garage, but when I ran across this a few weeks ago it seemed like the right thing to do.


2025-12-04 Set up the @bendpak #Quickjack portable lift this evening. Excellent compact unit for the aging car guy with limited space. ![]()
![]()
![]()

2025-12-18 Hung up my @robertwilliamsartist poster this evening. I bought this copy in the early 80’s at the Newport Hill Climb when I was around 10 years old. It hung in my bedroom as a kid and every garage I have owned since.


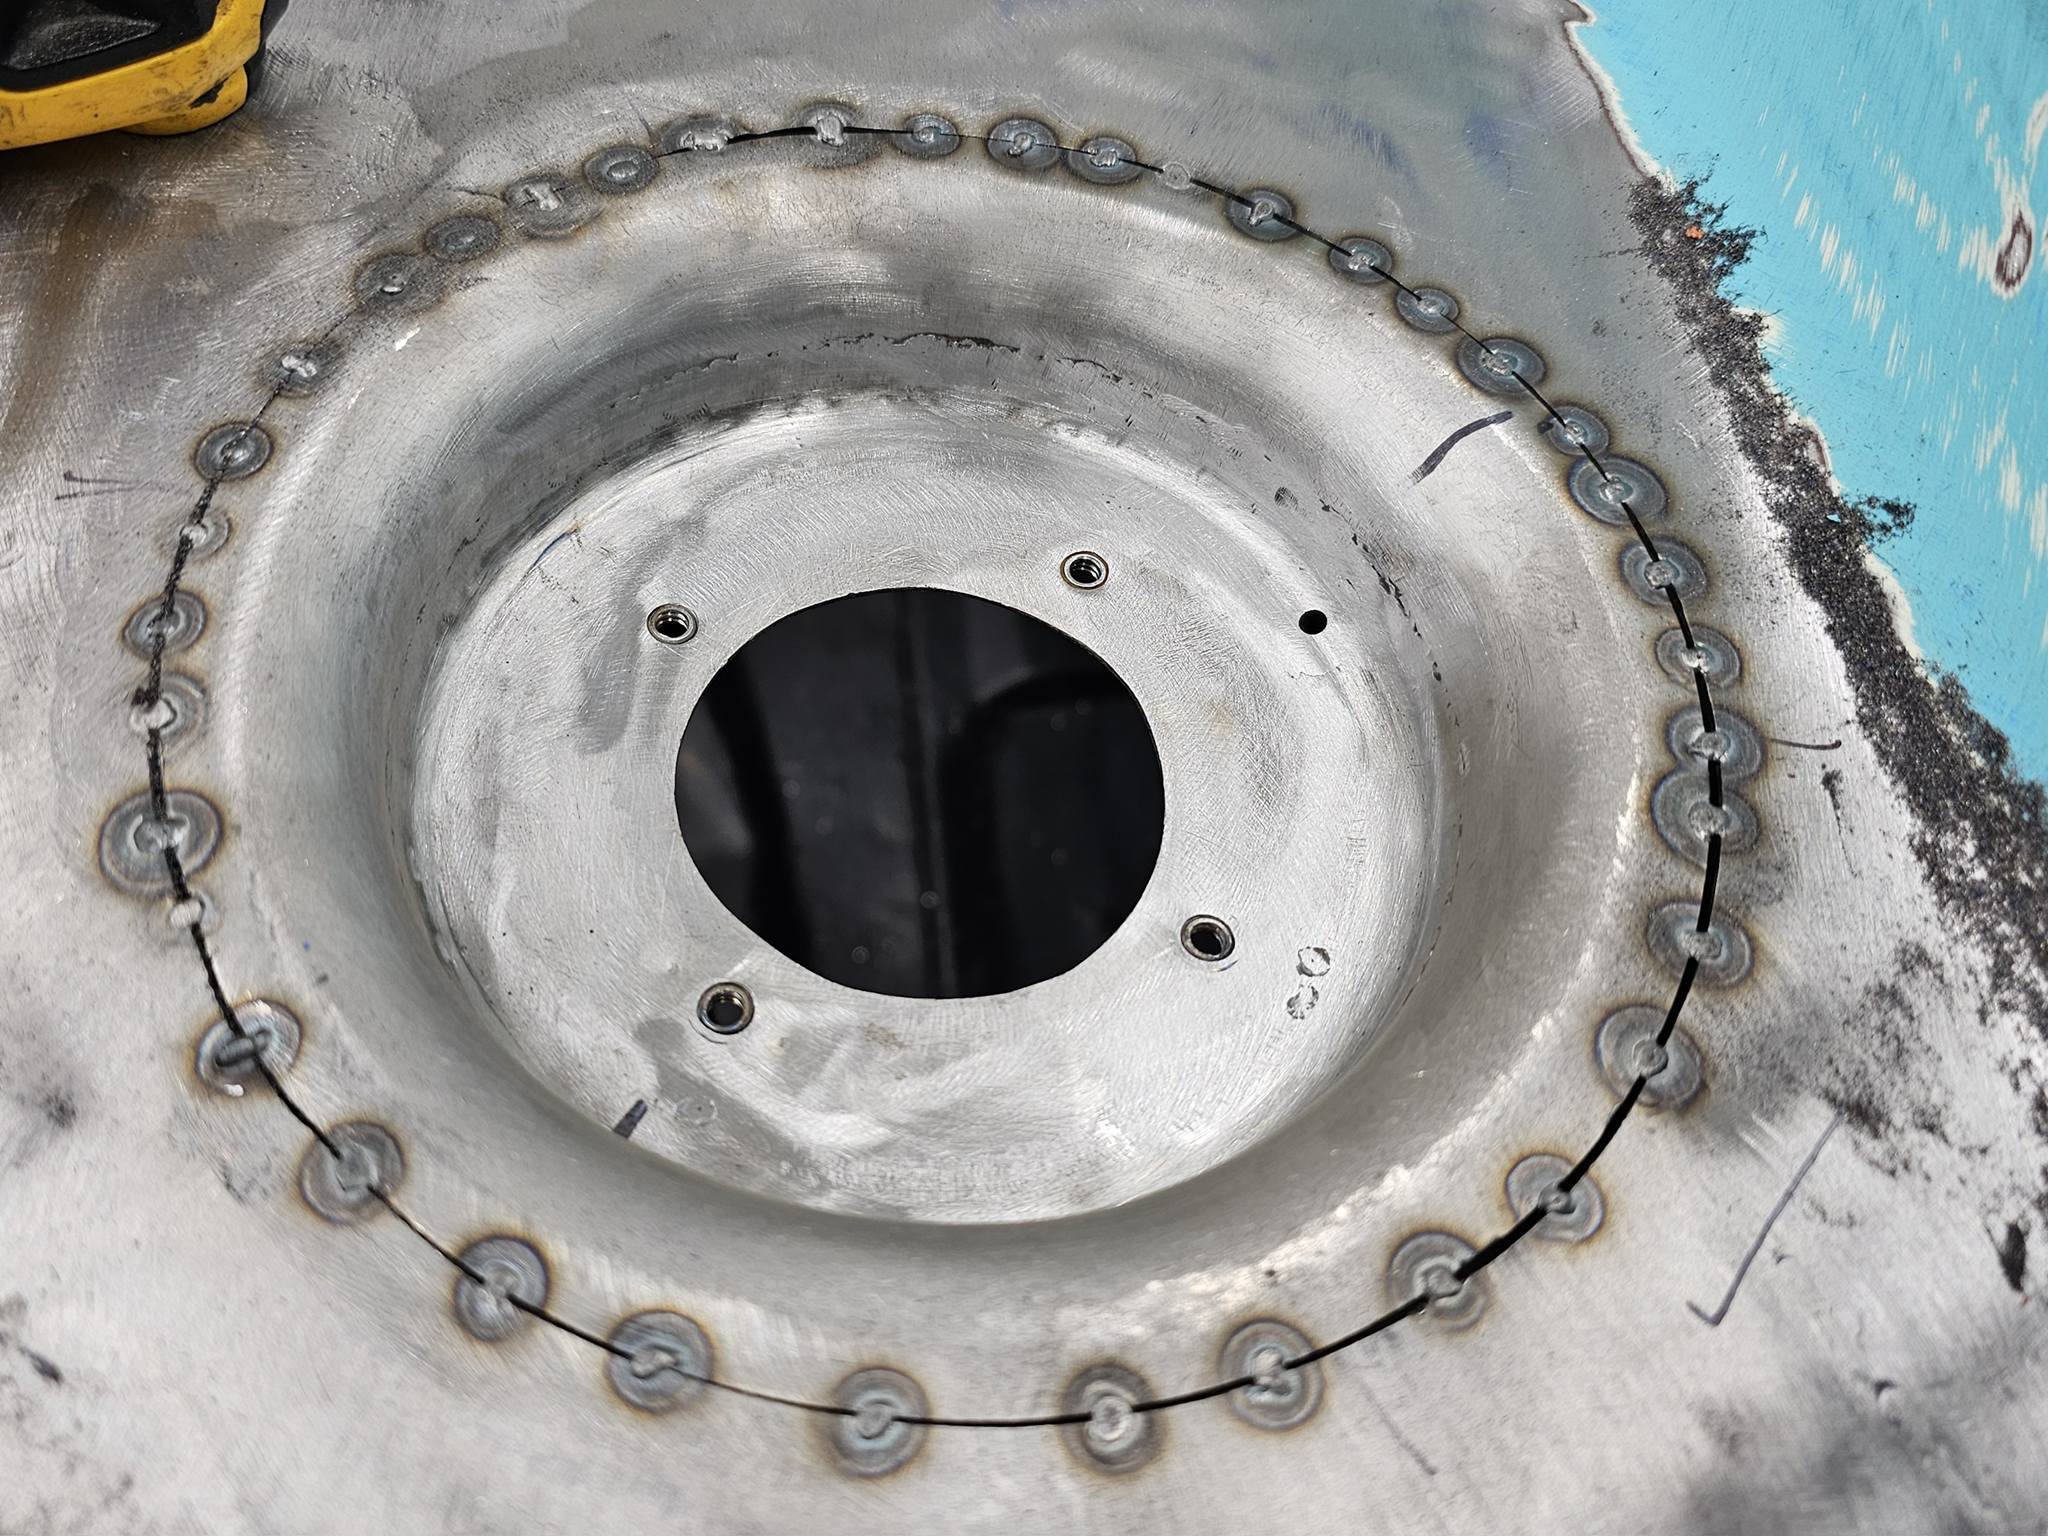
2025-12-21 I made the lower area of the gas cap/gas filler area for the 59 today. I cut out a simple wood buck to form the metal around. Still need to sort out making some brackets to hold the filler neck in place and then I can finally weld this whole assembly into the sail panel.


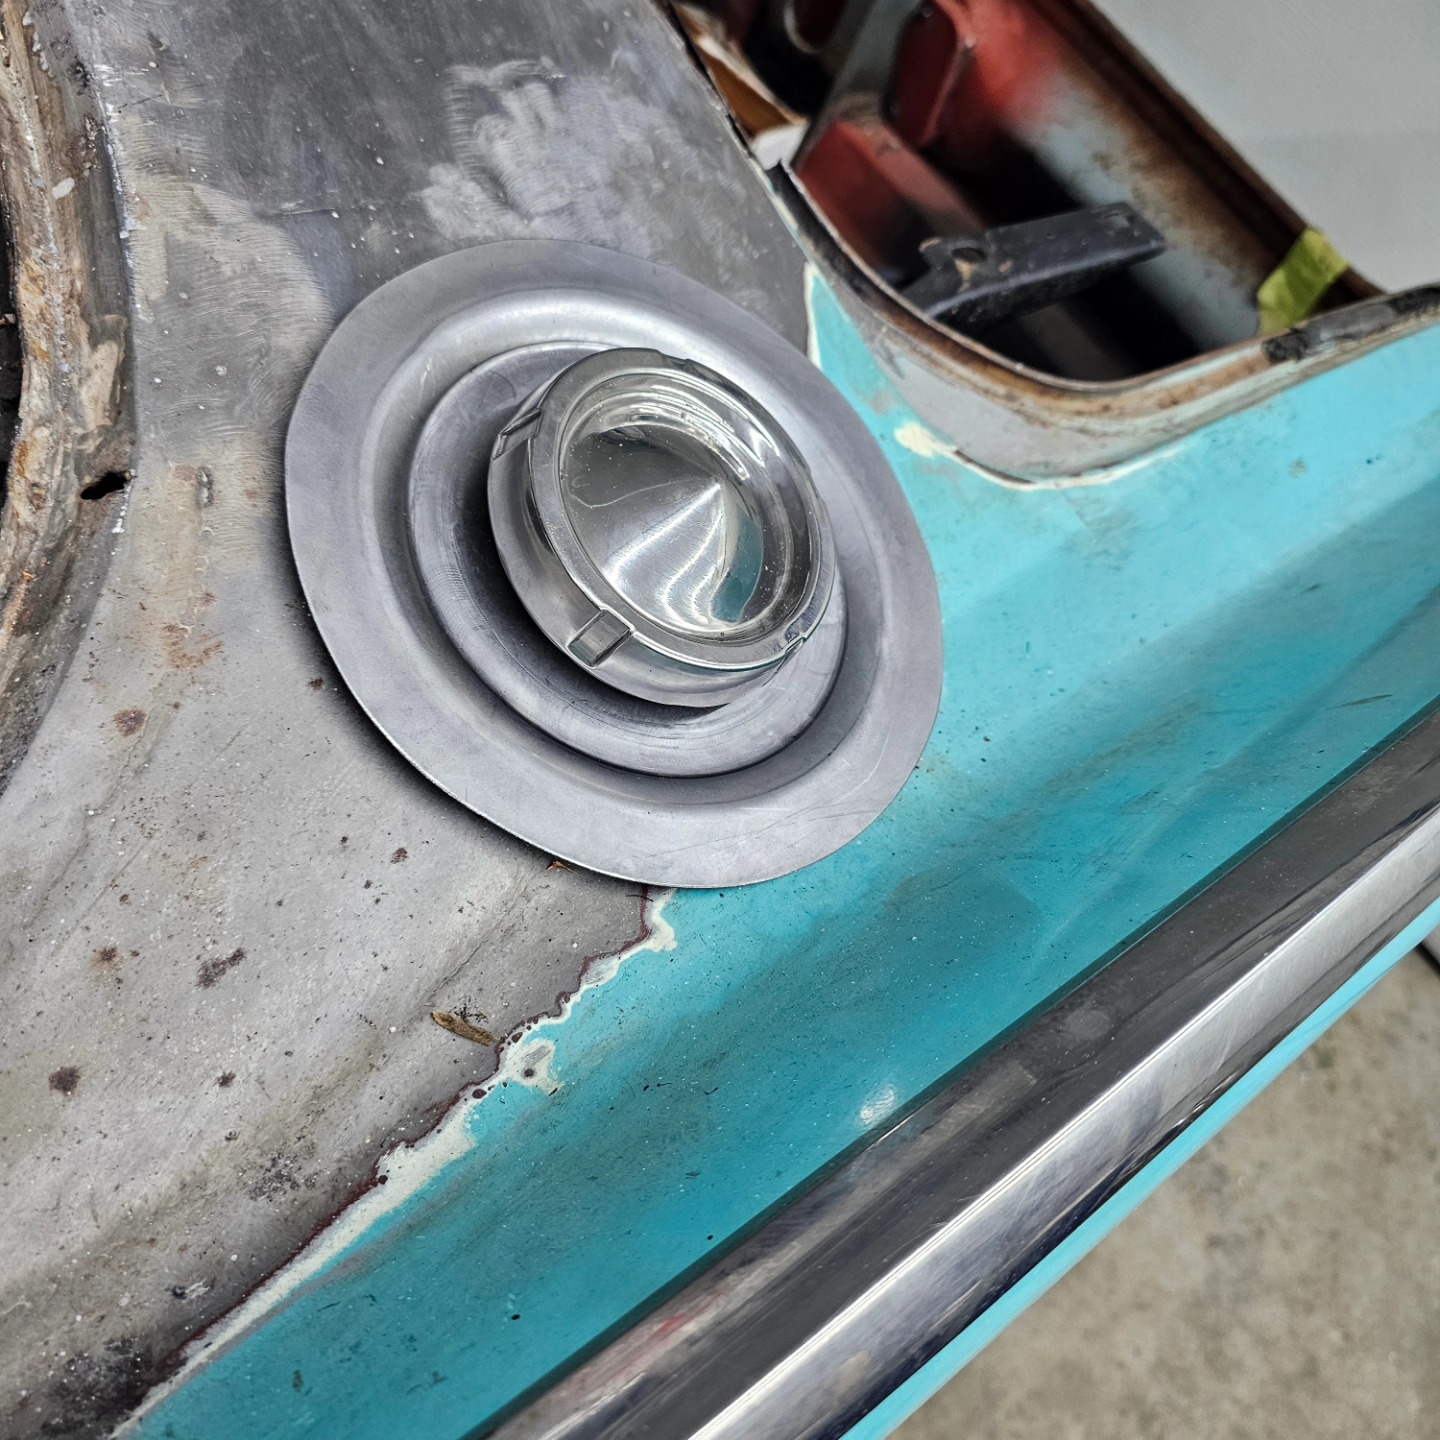
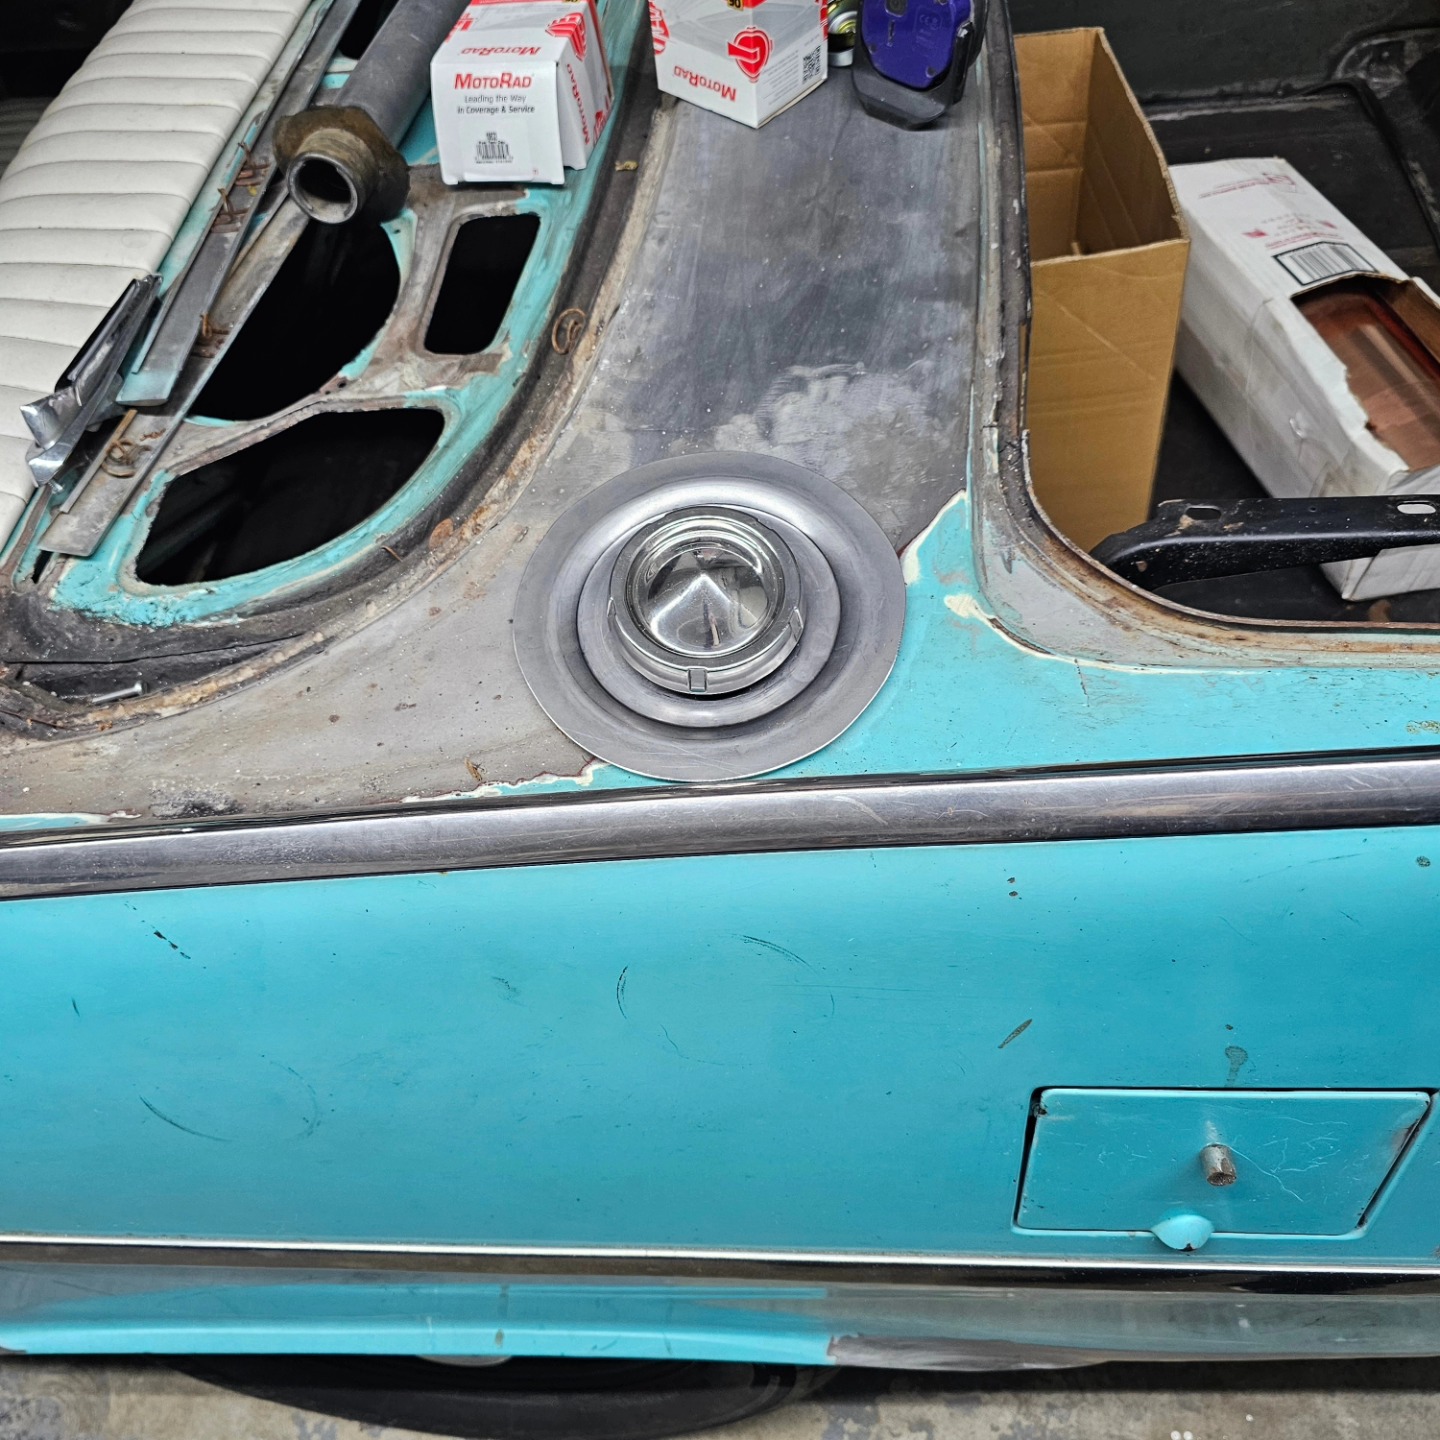
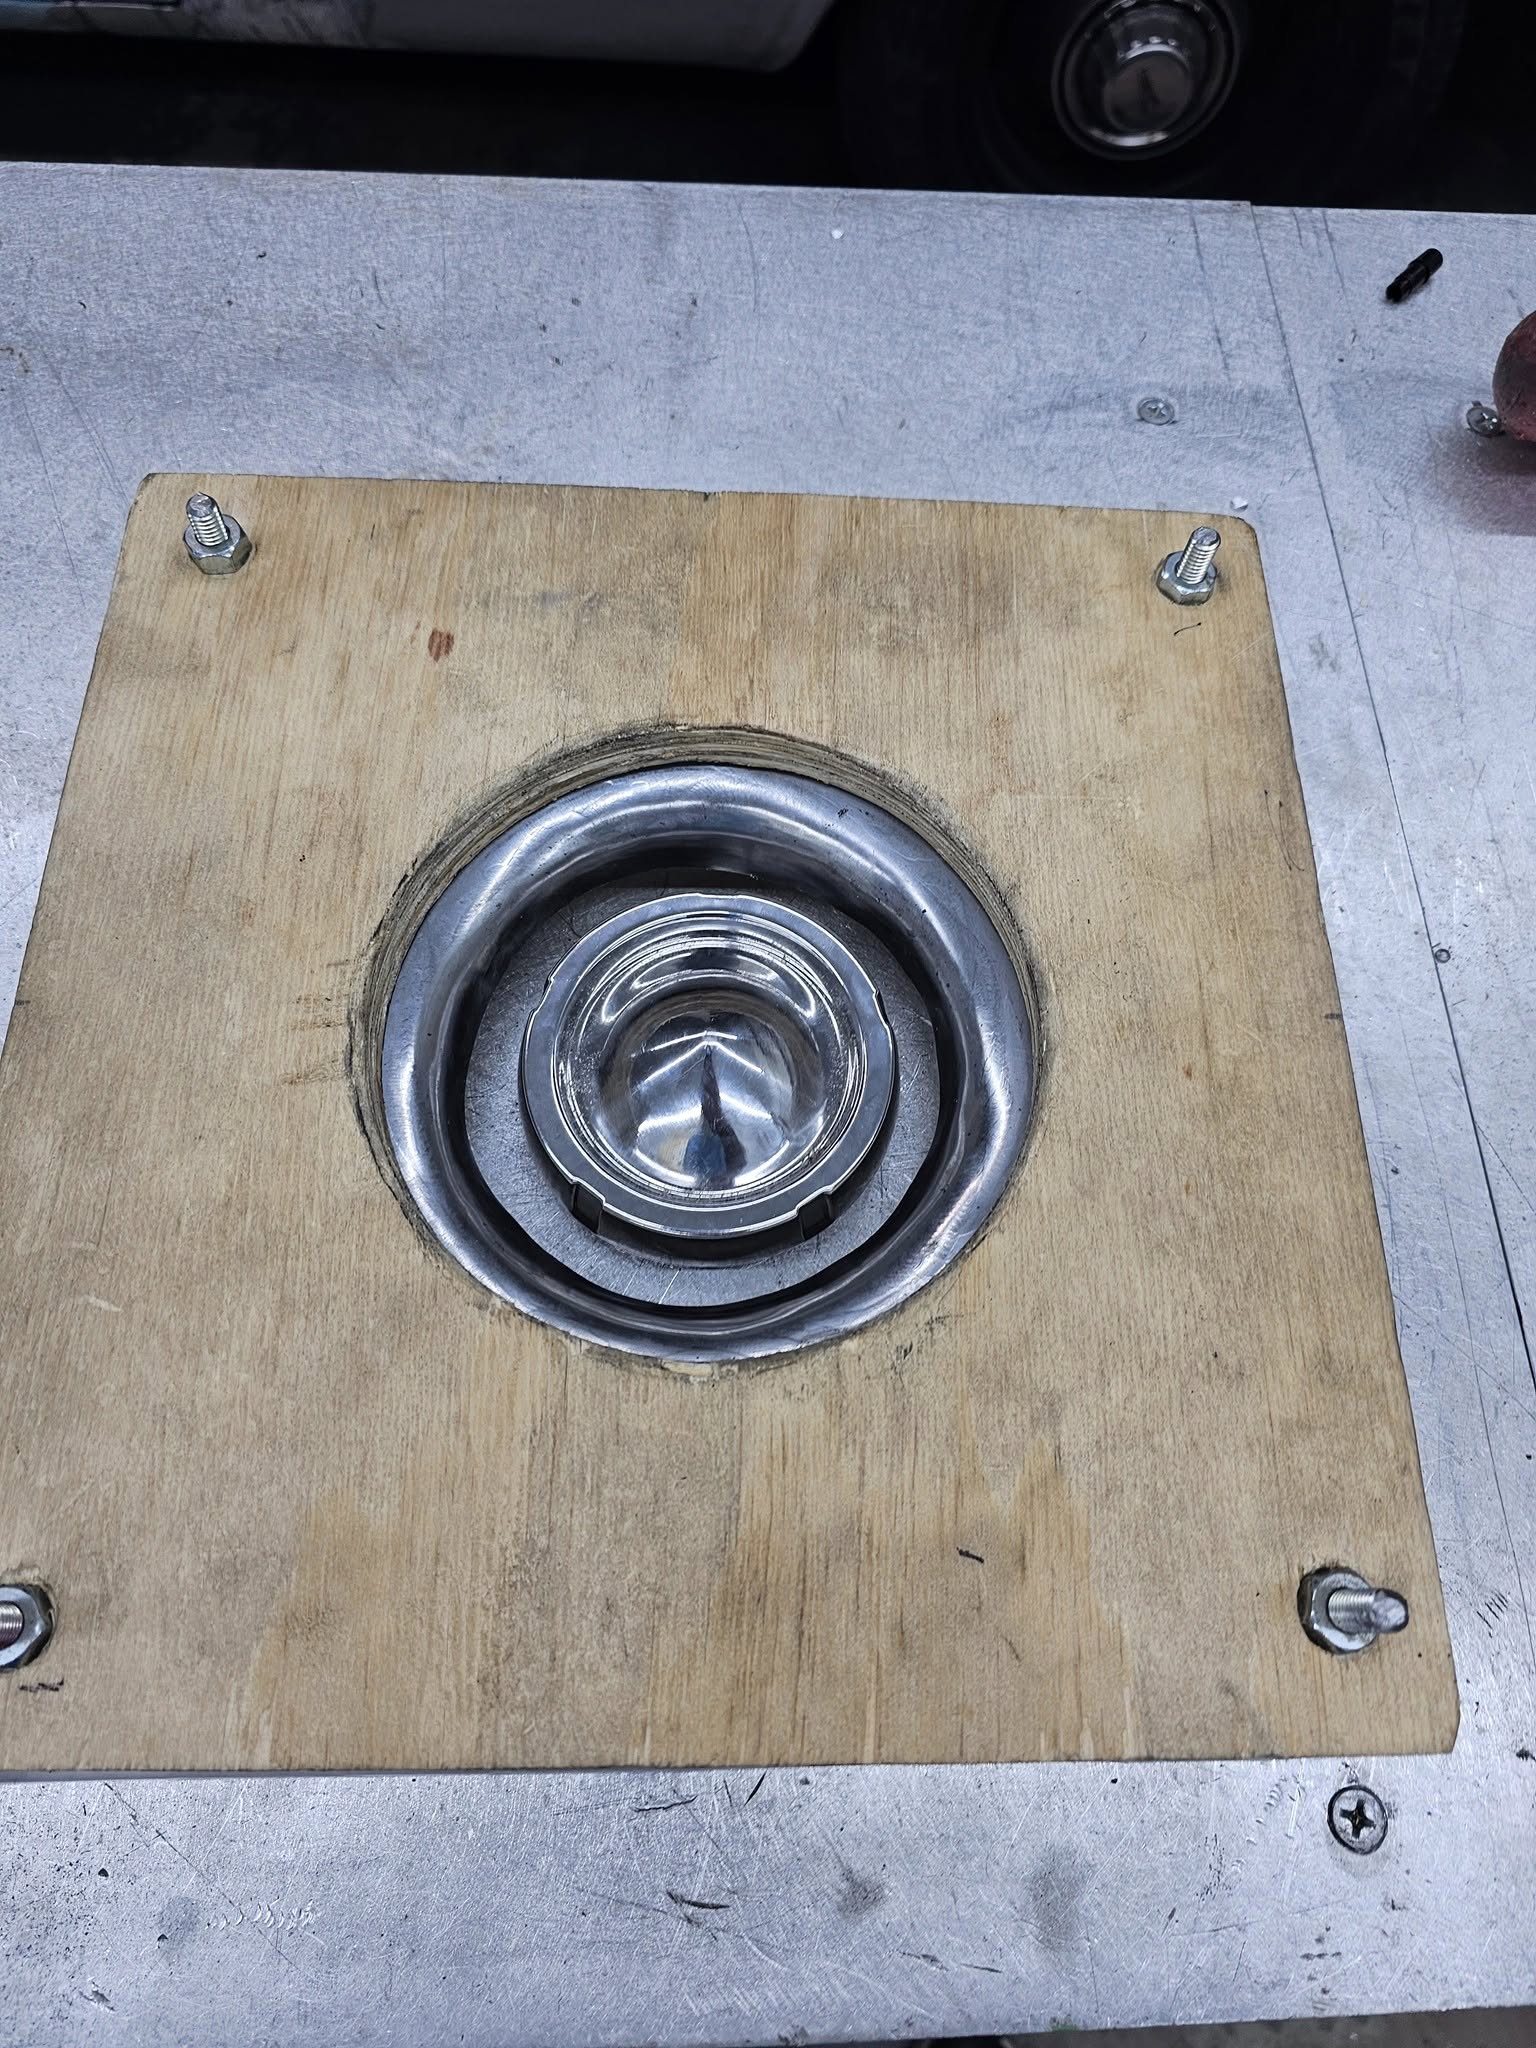
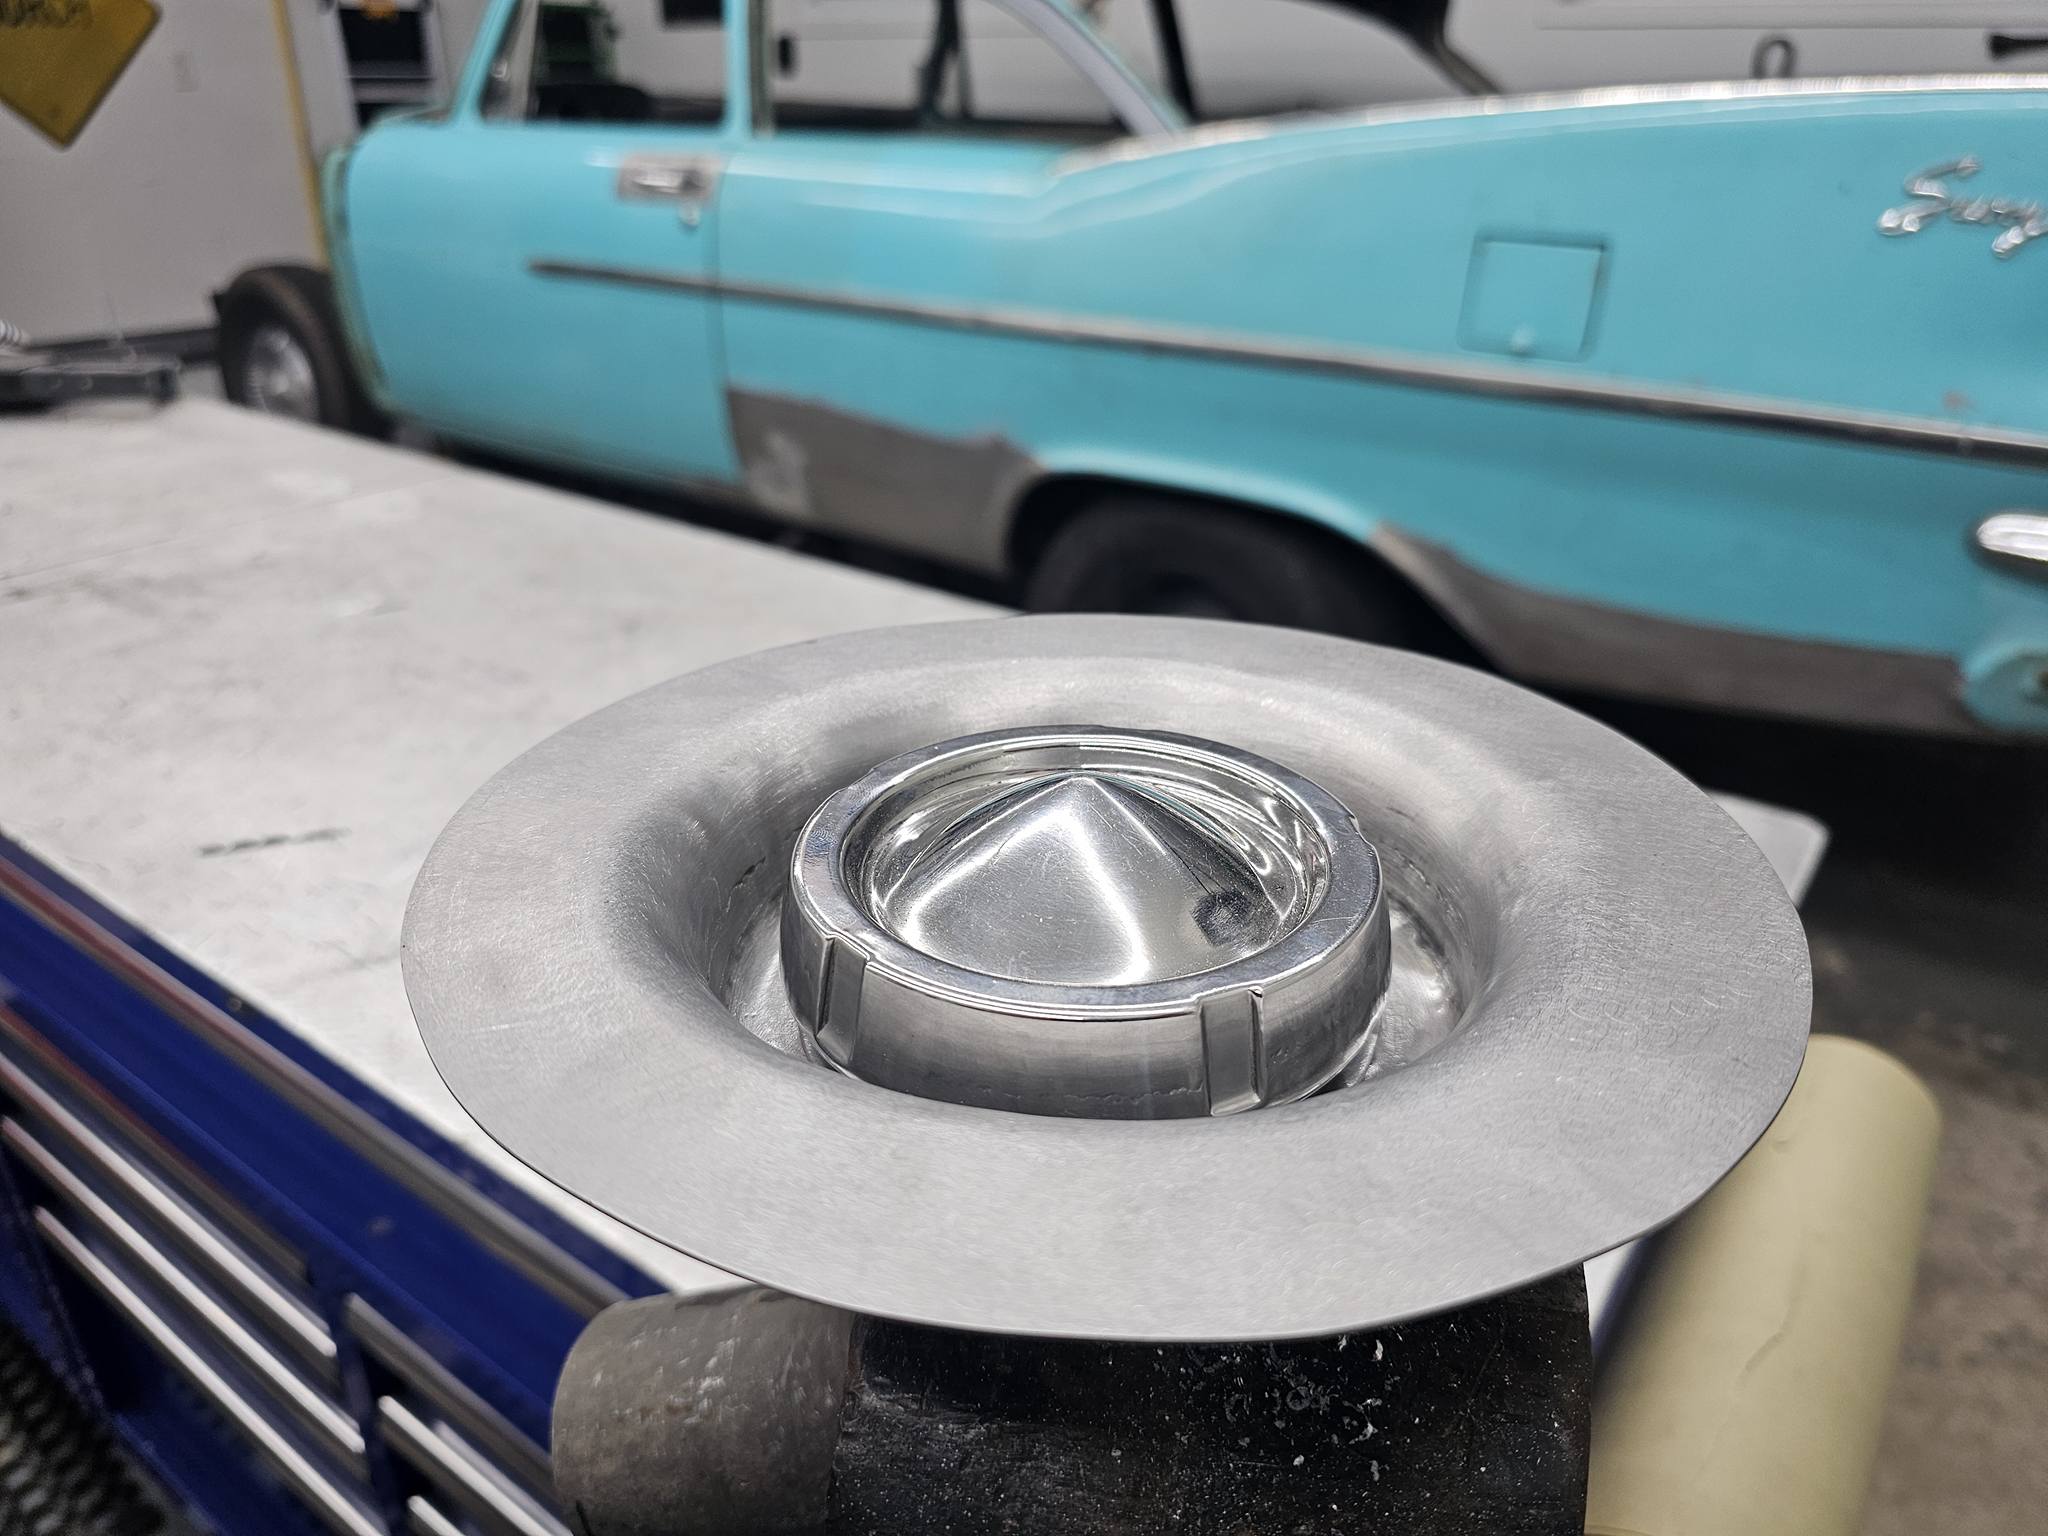
2025-12-28 Finished the gas cap filler neck assembly this morning. I had problems finding the correct fill neck so I bought an inexpensive 48 Dodge fill neck off ebay. It had the correct bends I need and I modified the “threaded” area to work with this gas cap. Now I just have to get my nerve up to cut the sail panel and weld this whole unit in.


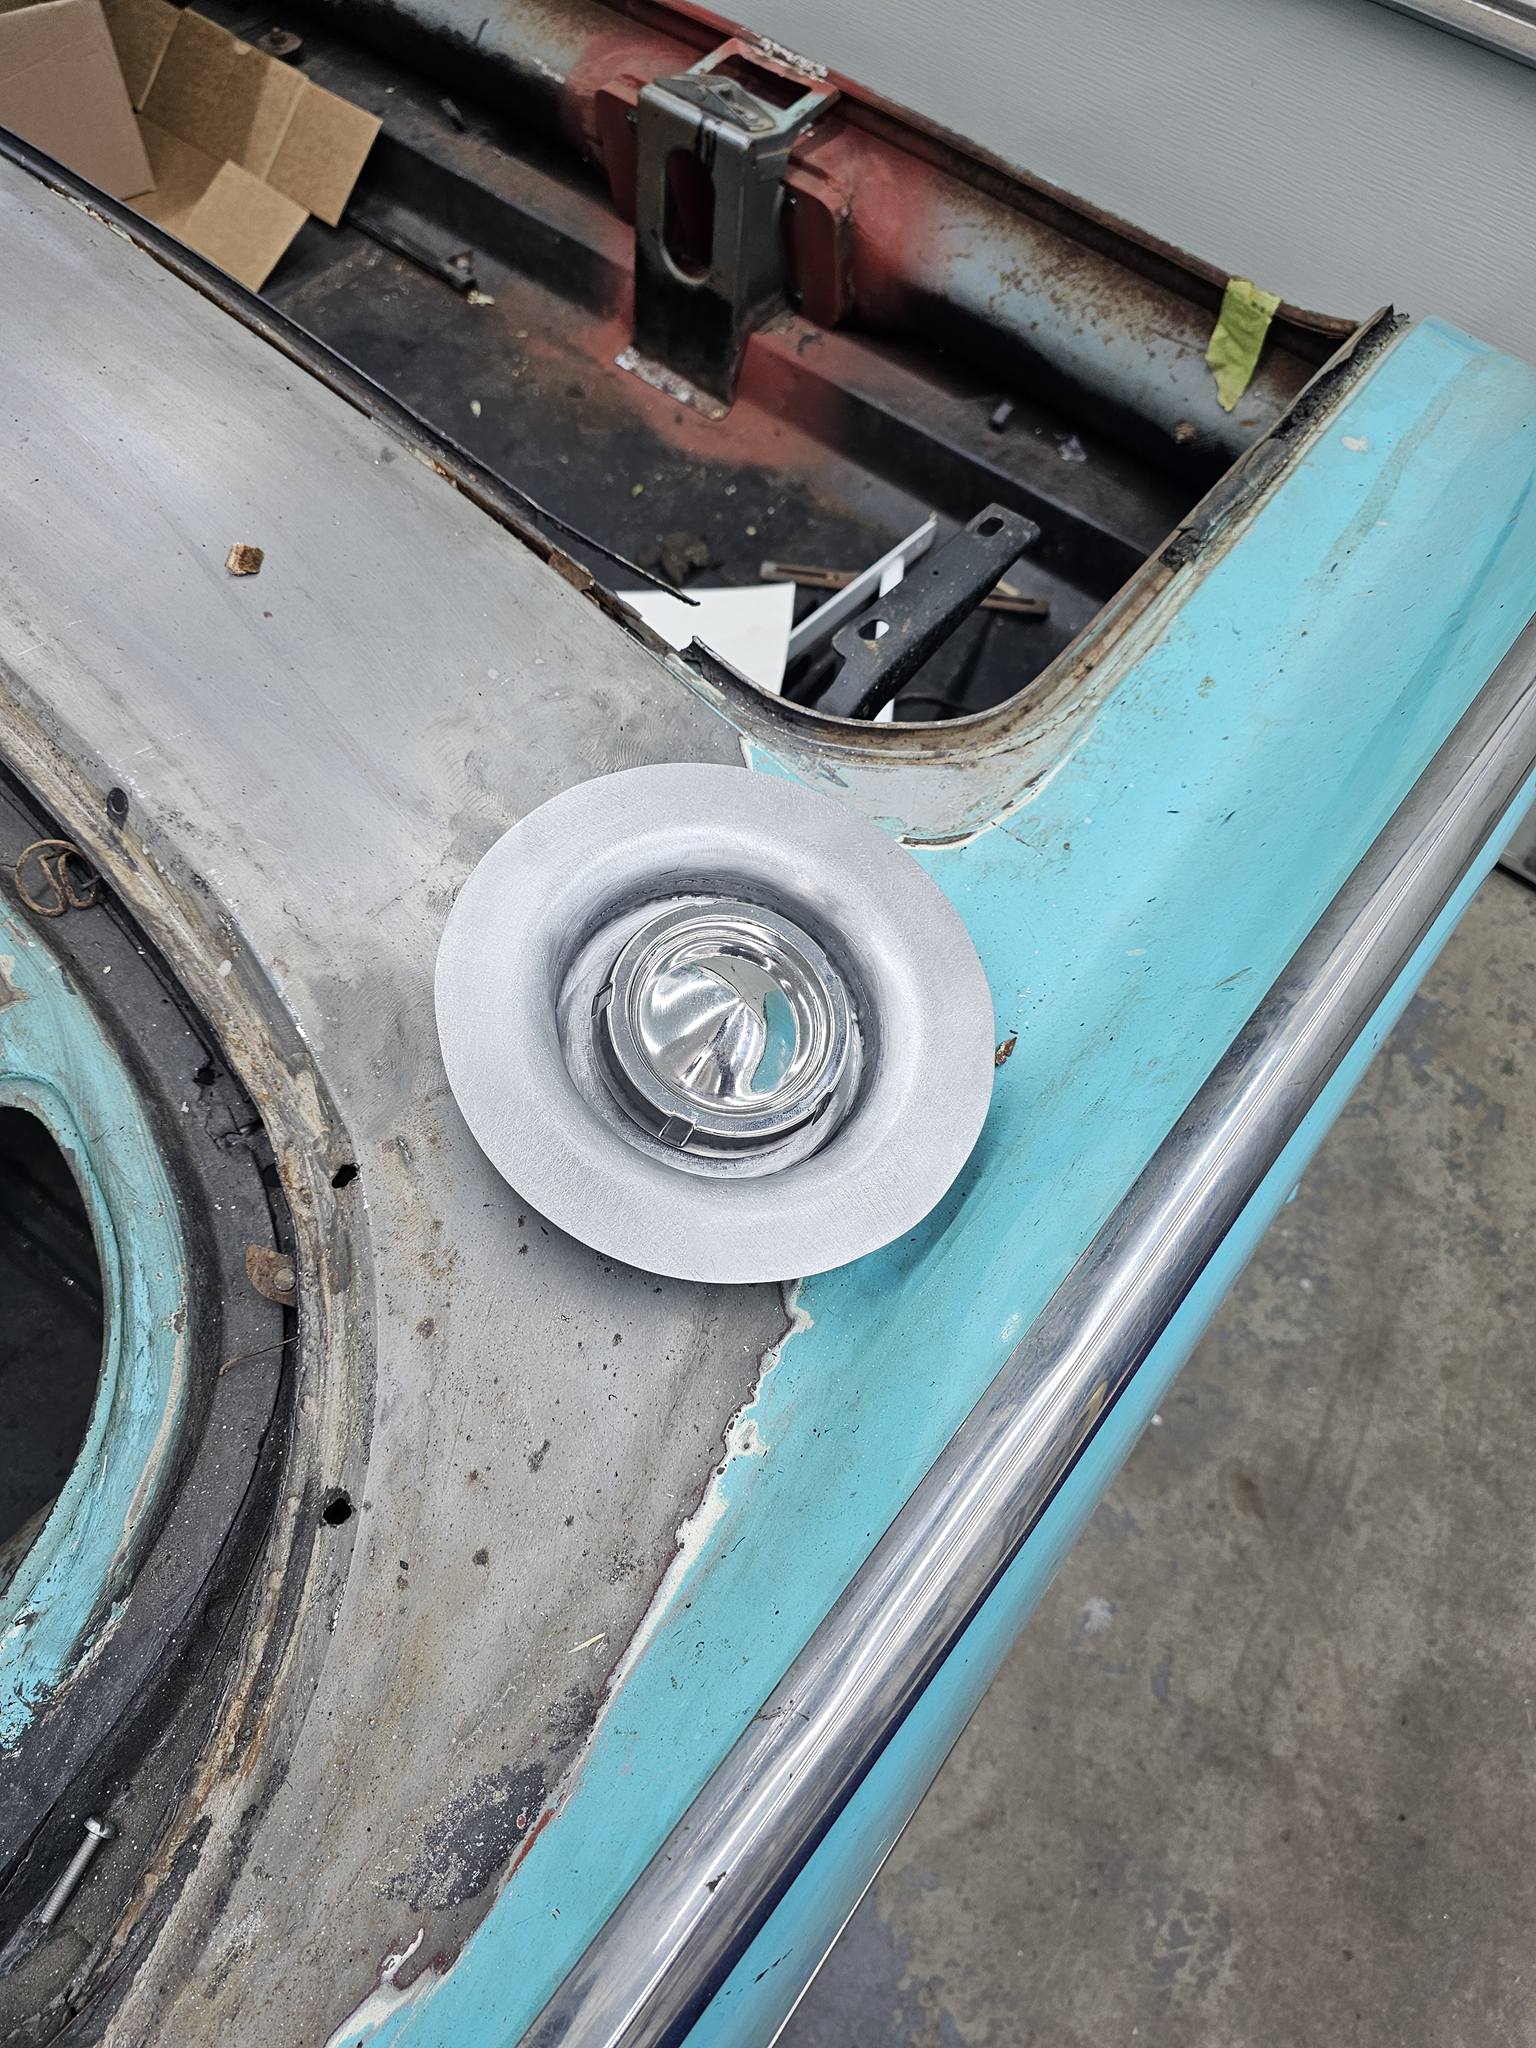
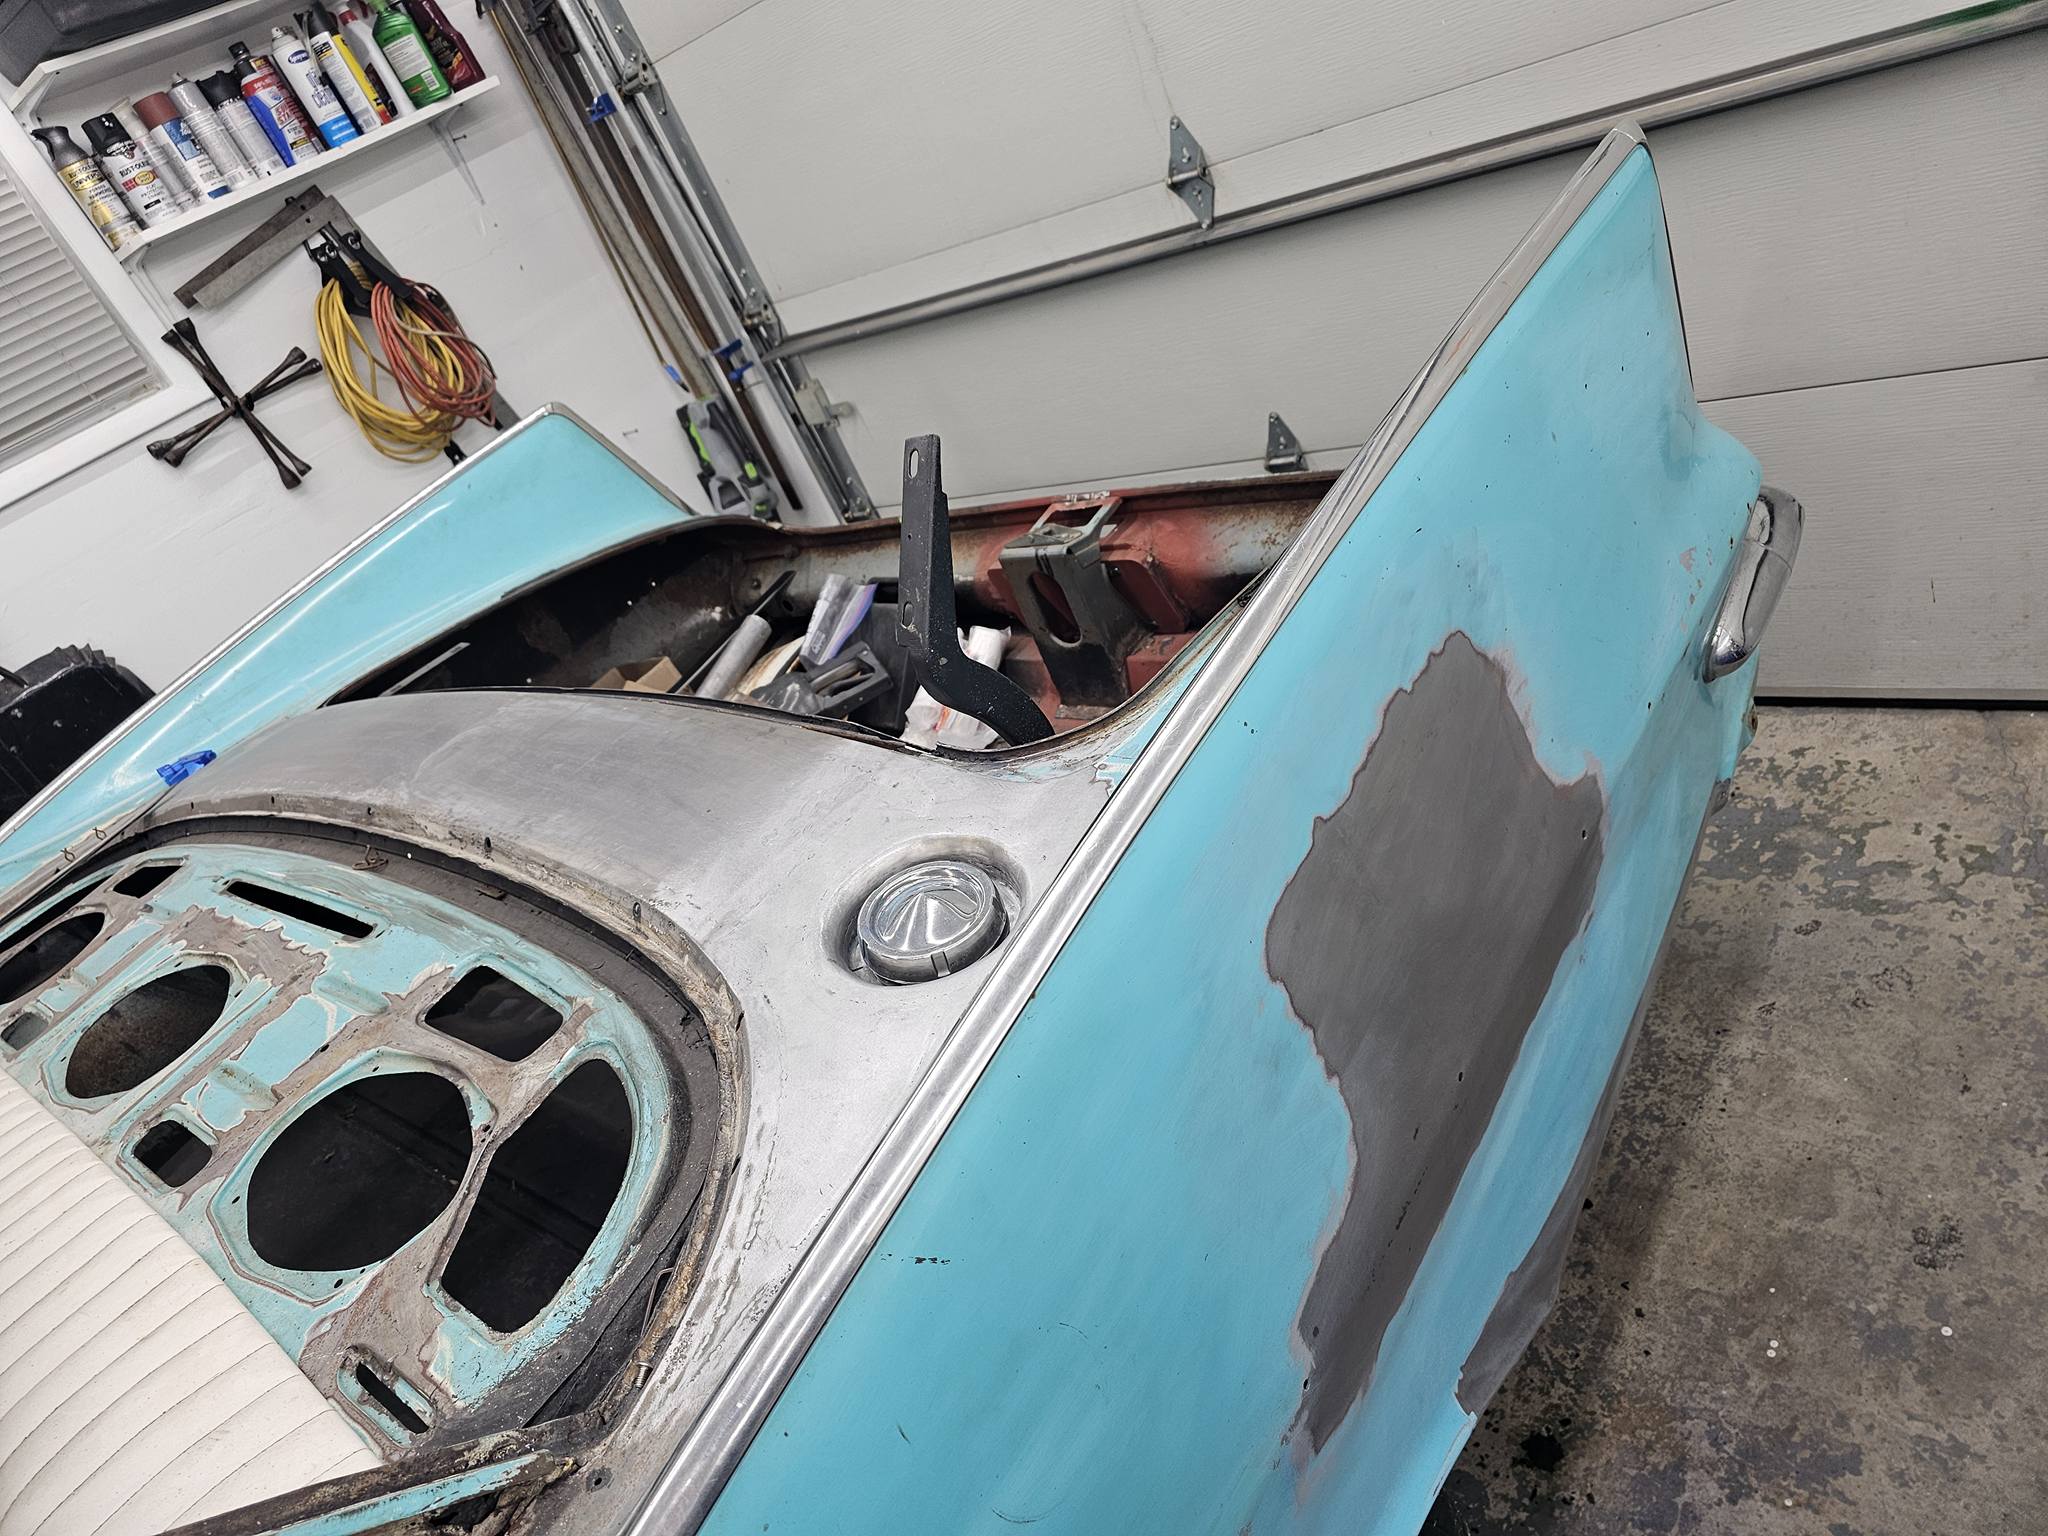
2026-01-16 I finished relocating the gas fill neck on the 59 Plymouth this week. The boring square gas fill door in the quarter never seemed to fit the rocketship/jet airplane inspired designs of the late 50’s Mopars. The gas cap is a 53/54 Chrysler piece, so the car continues to be customized with Chrysler only parts.


2026-01-18 Fairly quick trunk weatherstriping channel repair this weekend. Fortunately, I had good used channel from years ago to repair the rusted out channel on the 59. It was nice to do a repair on the 59 that didn’t take weeks of metal fab. ![]()
![]()


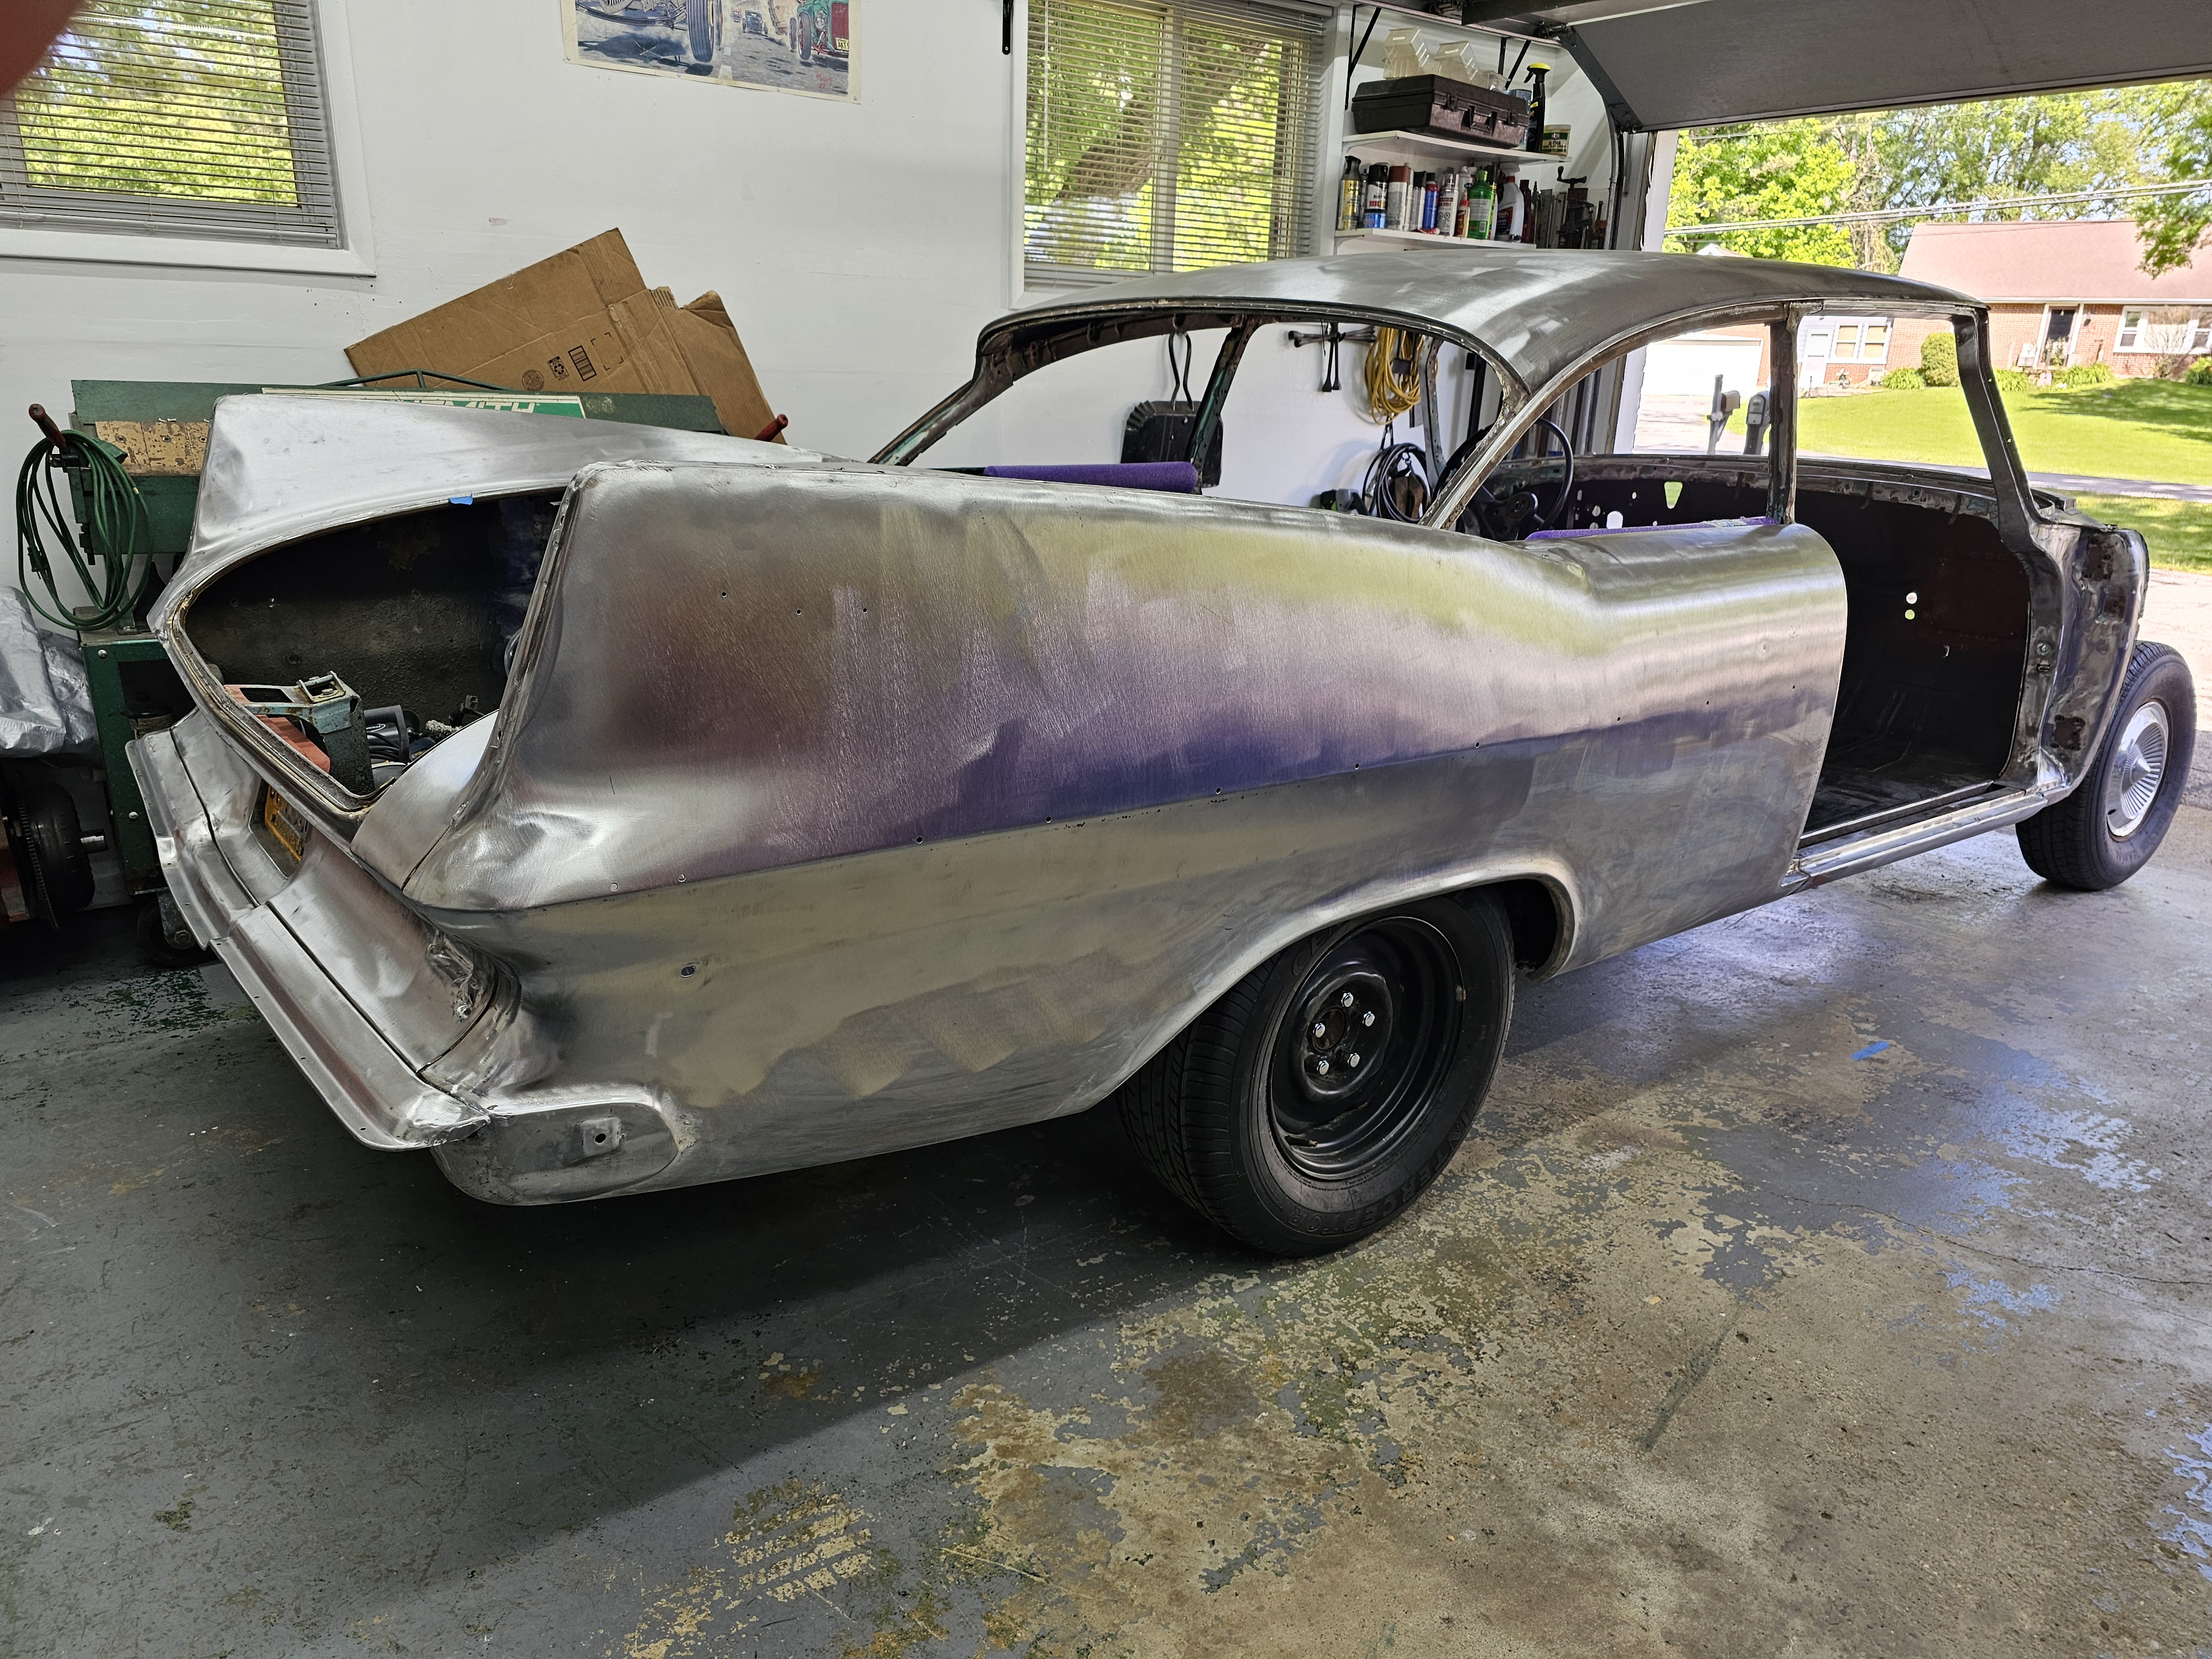
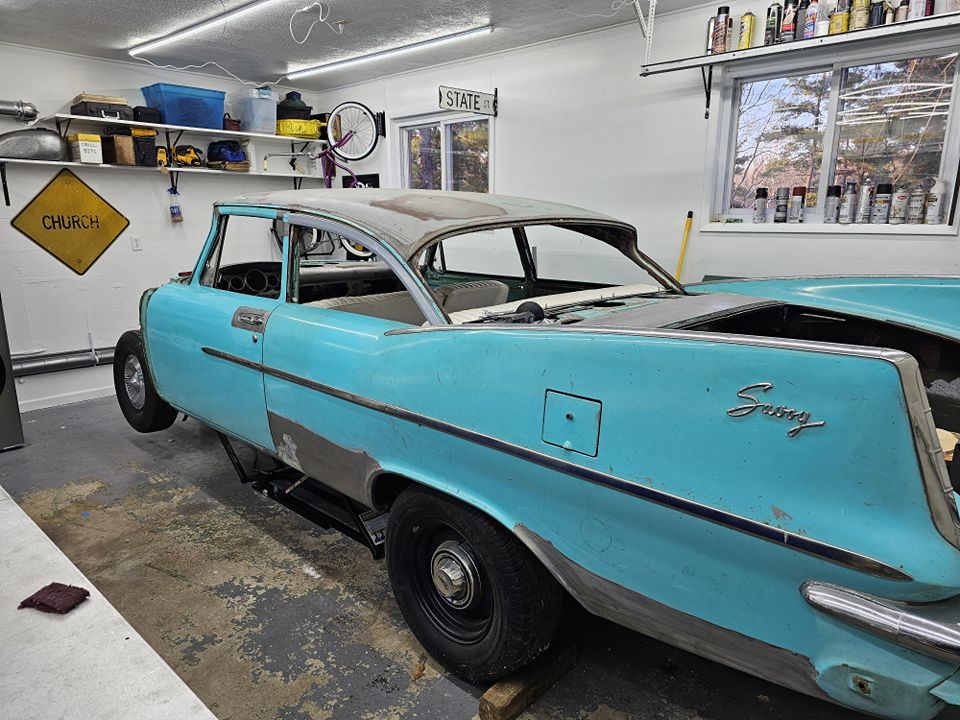
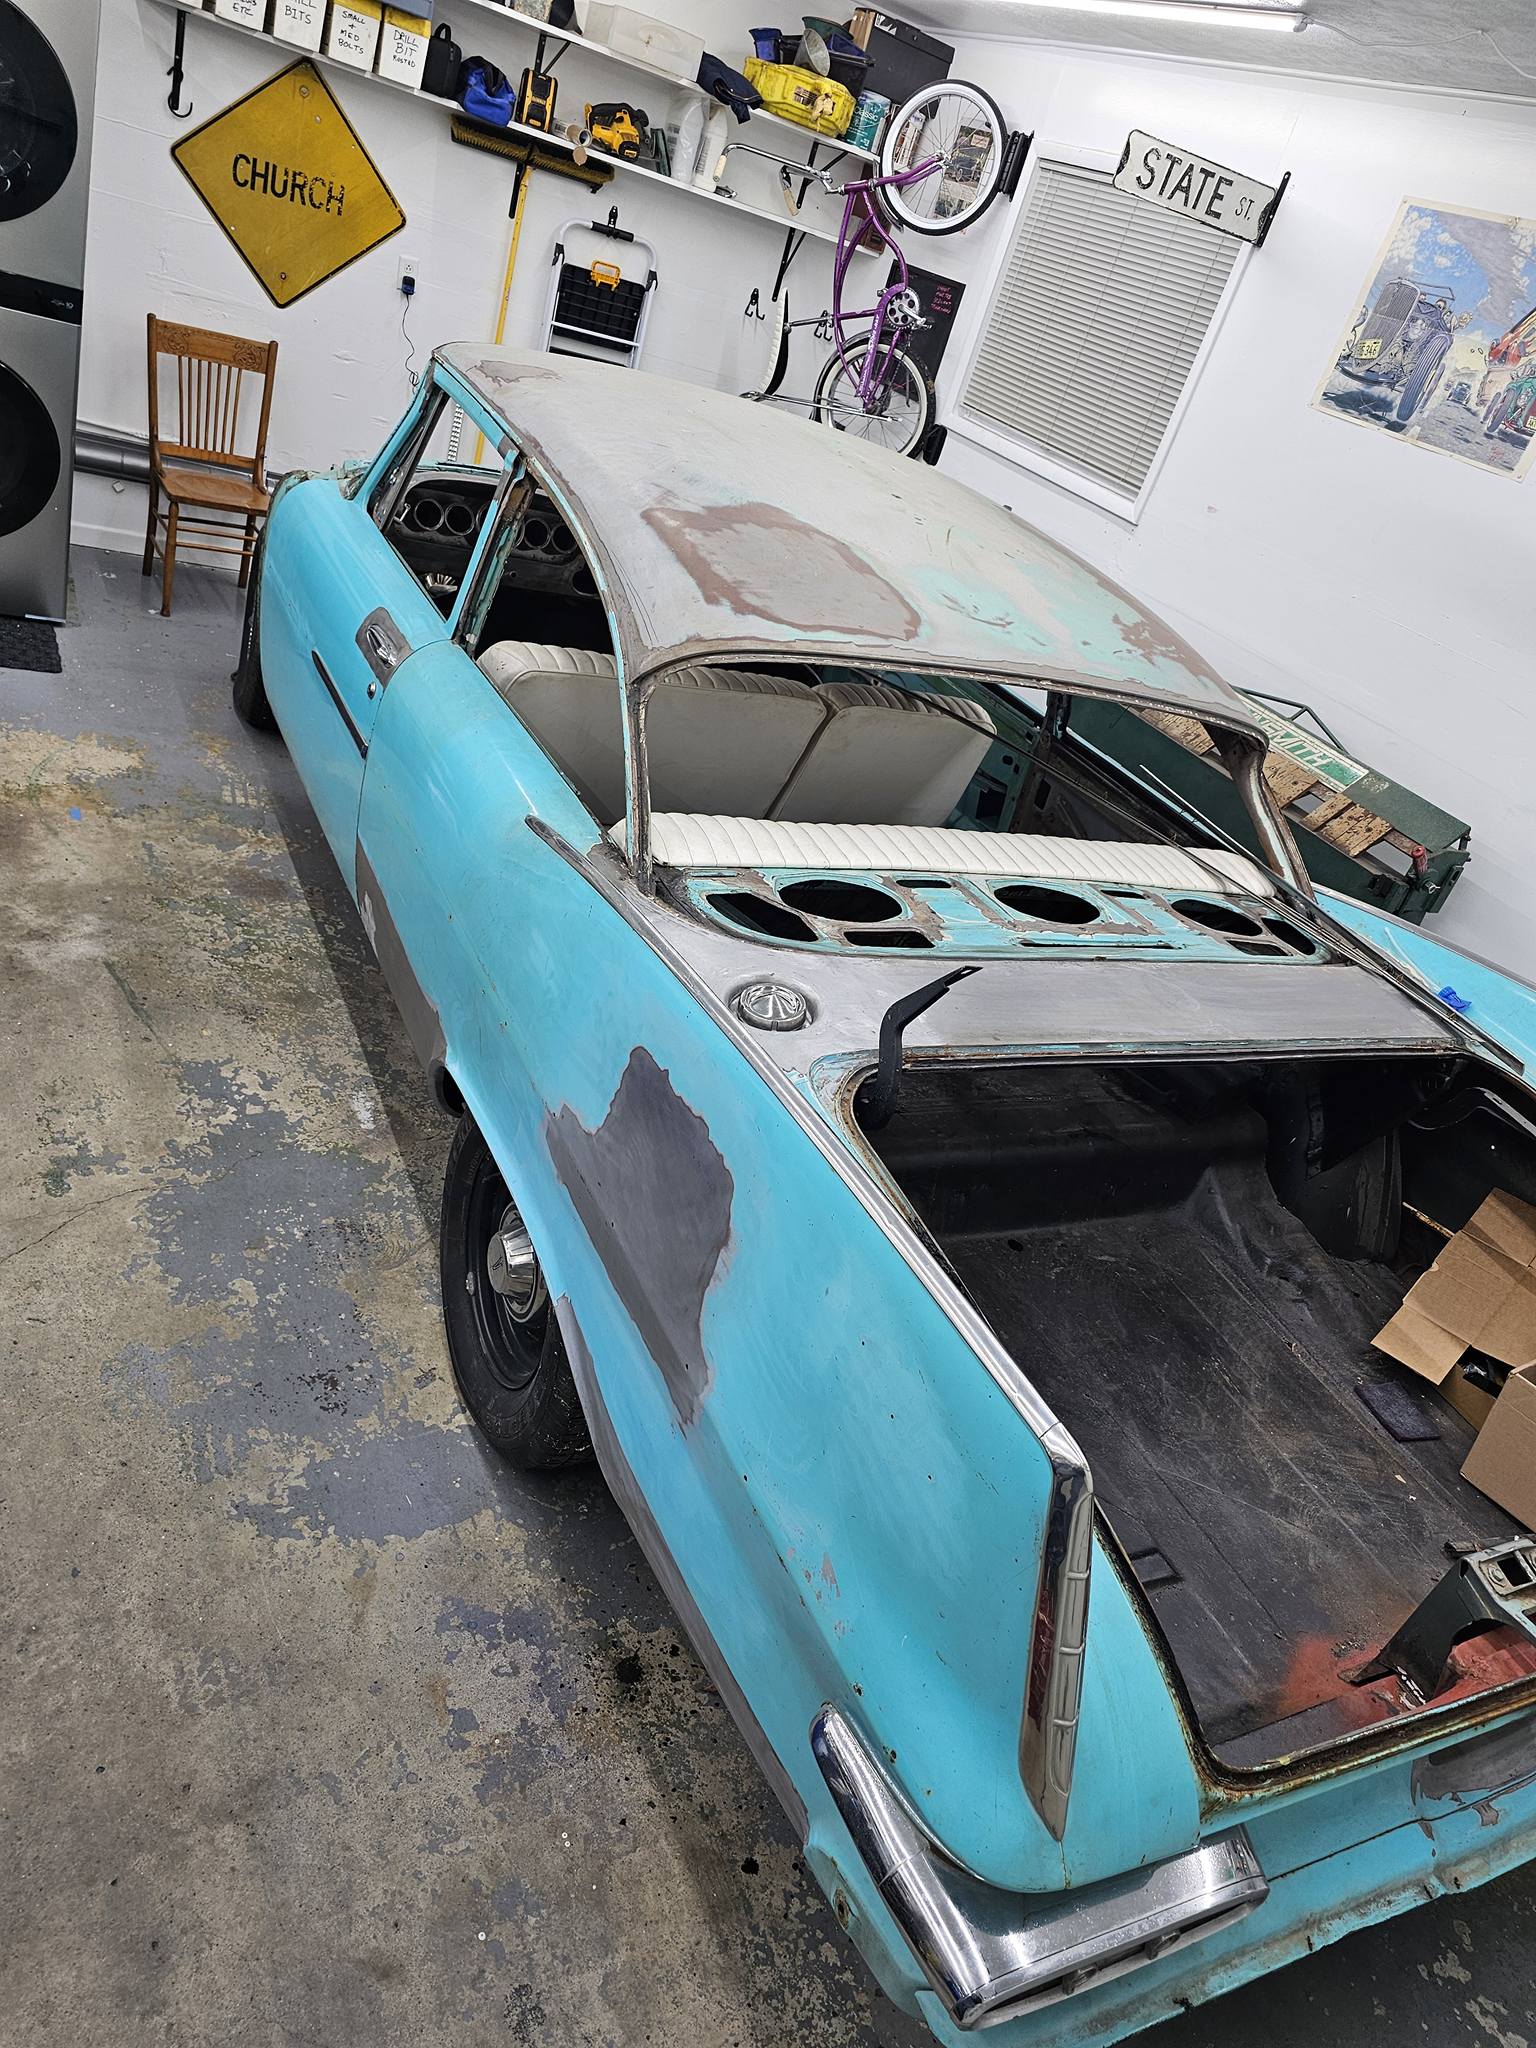
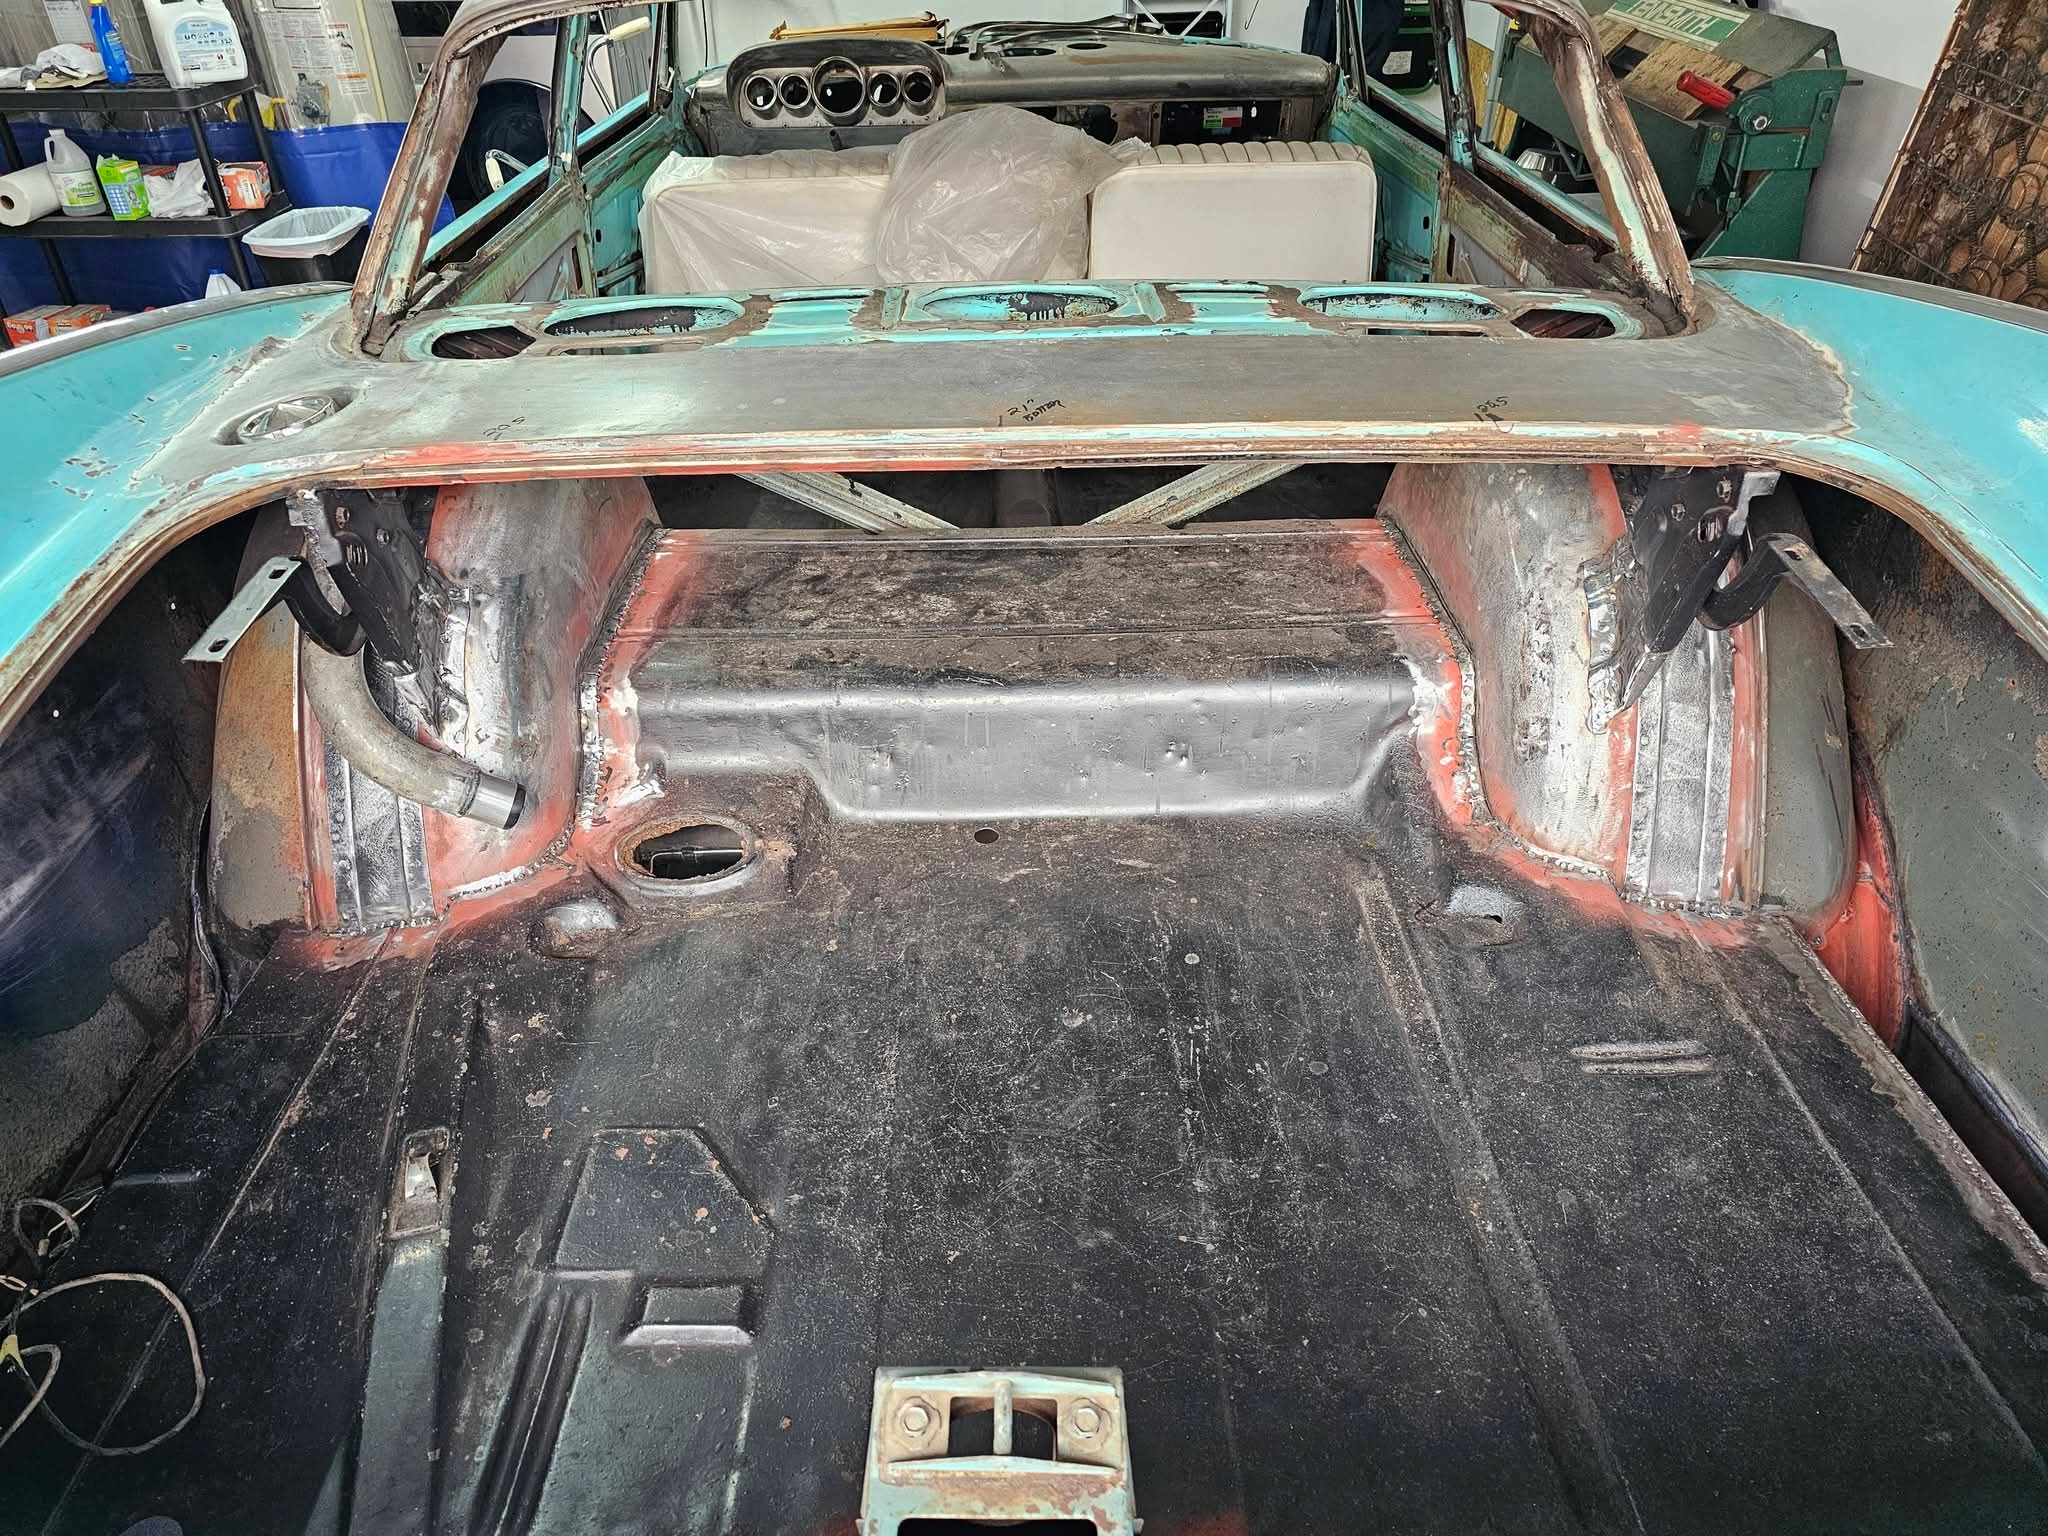
2026-02-01 Today I started the inglorious job of cutting out the rear wheel tubs for mini-tubbing on the 59 Plymouth. I intend on installing a 66/67 8 3/4 b-body rear end with a universal coil over 4 link after I am done with the mini-tub.
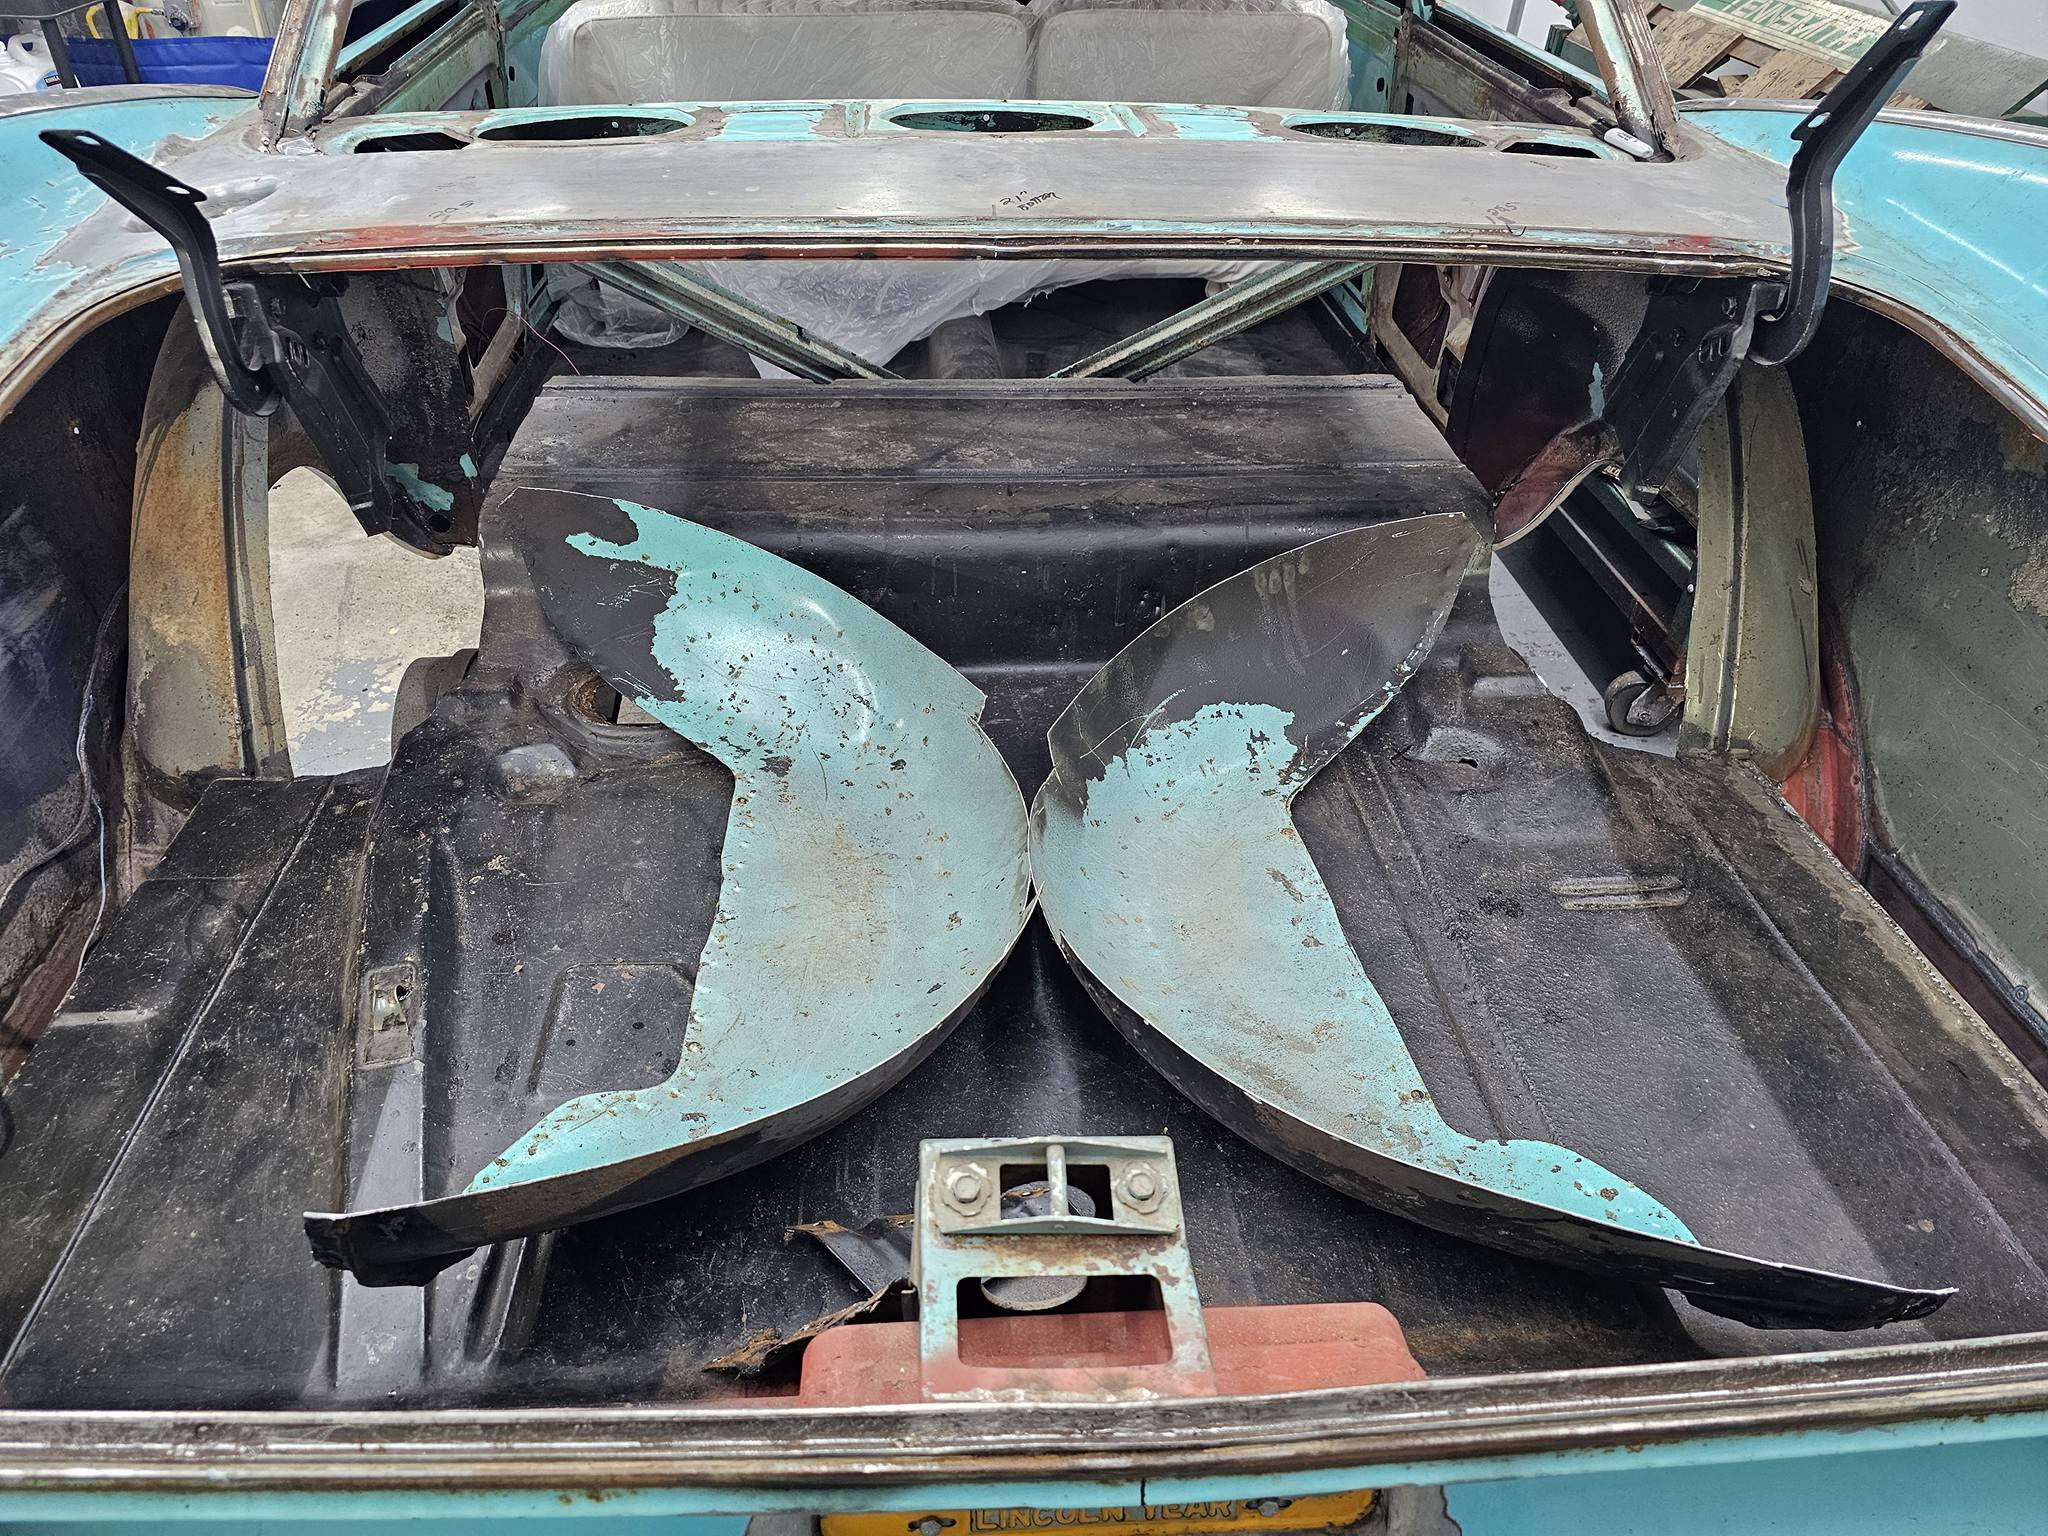


2026-02-15 Nothing earth shattering this weekend on the mini tub modification. I cut the trunk pan and did the initial fit. Spent most my time cleaning off paint and undercoating where the tubs will be welded back in. Wheel tubs are going to be approx 16 inches wide ![]() on the inside. Now I need to find the scratch to shorten the rear end to a-body length, to take advantage of the room if I do the 4 link. Also been looking at rear disc brake conversion…
on the inside. Now I need to find the scratch to shorten the rear end to a-body length, to take advantage of the room if I do the 4 link. Also been looking at rear disc brake conversion…![]()
![]()


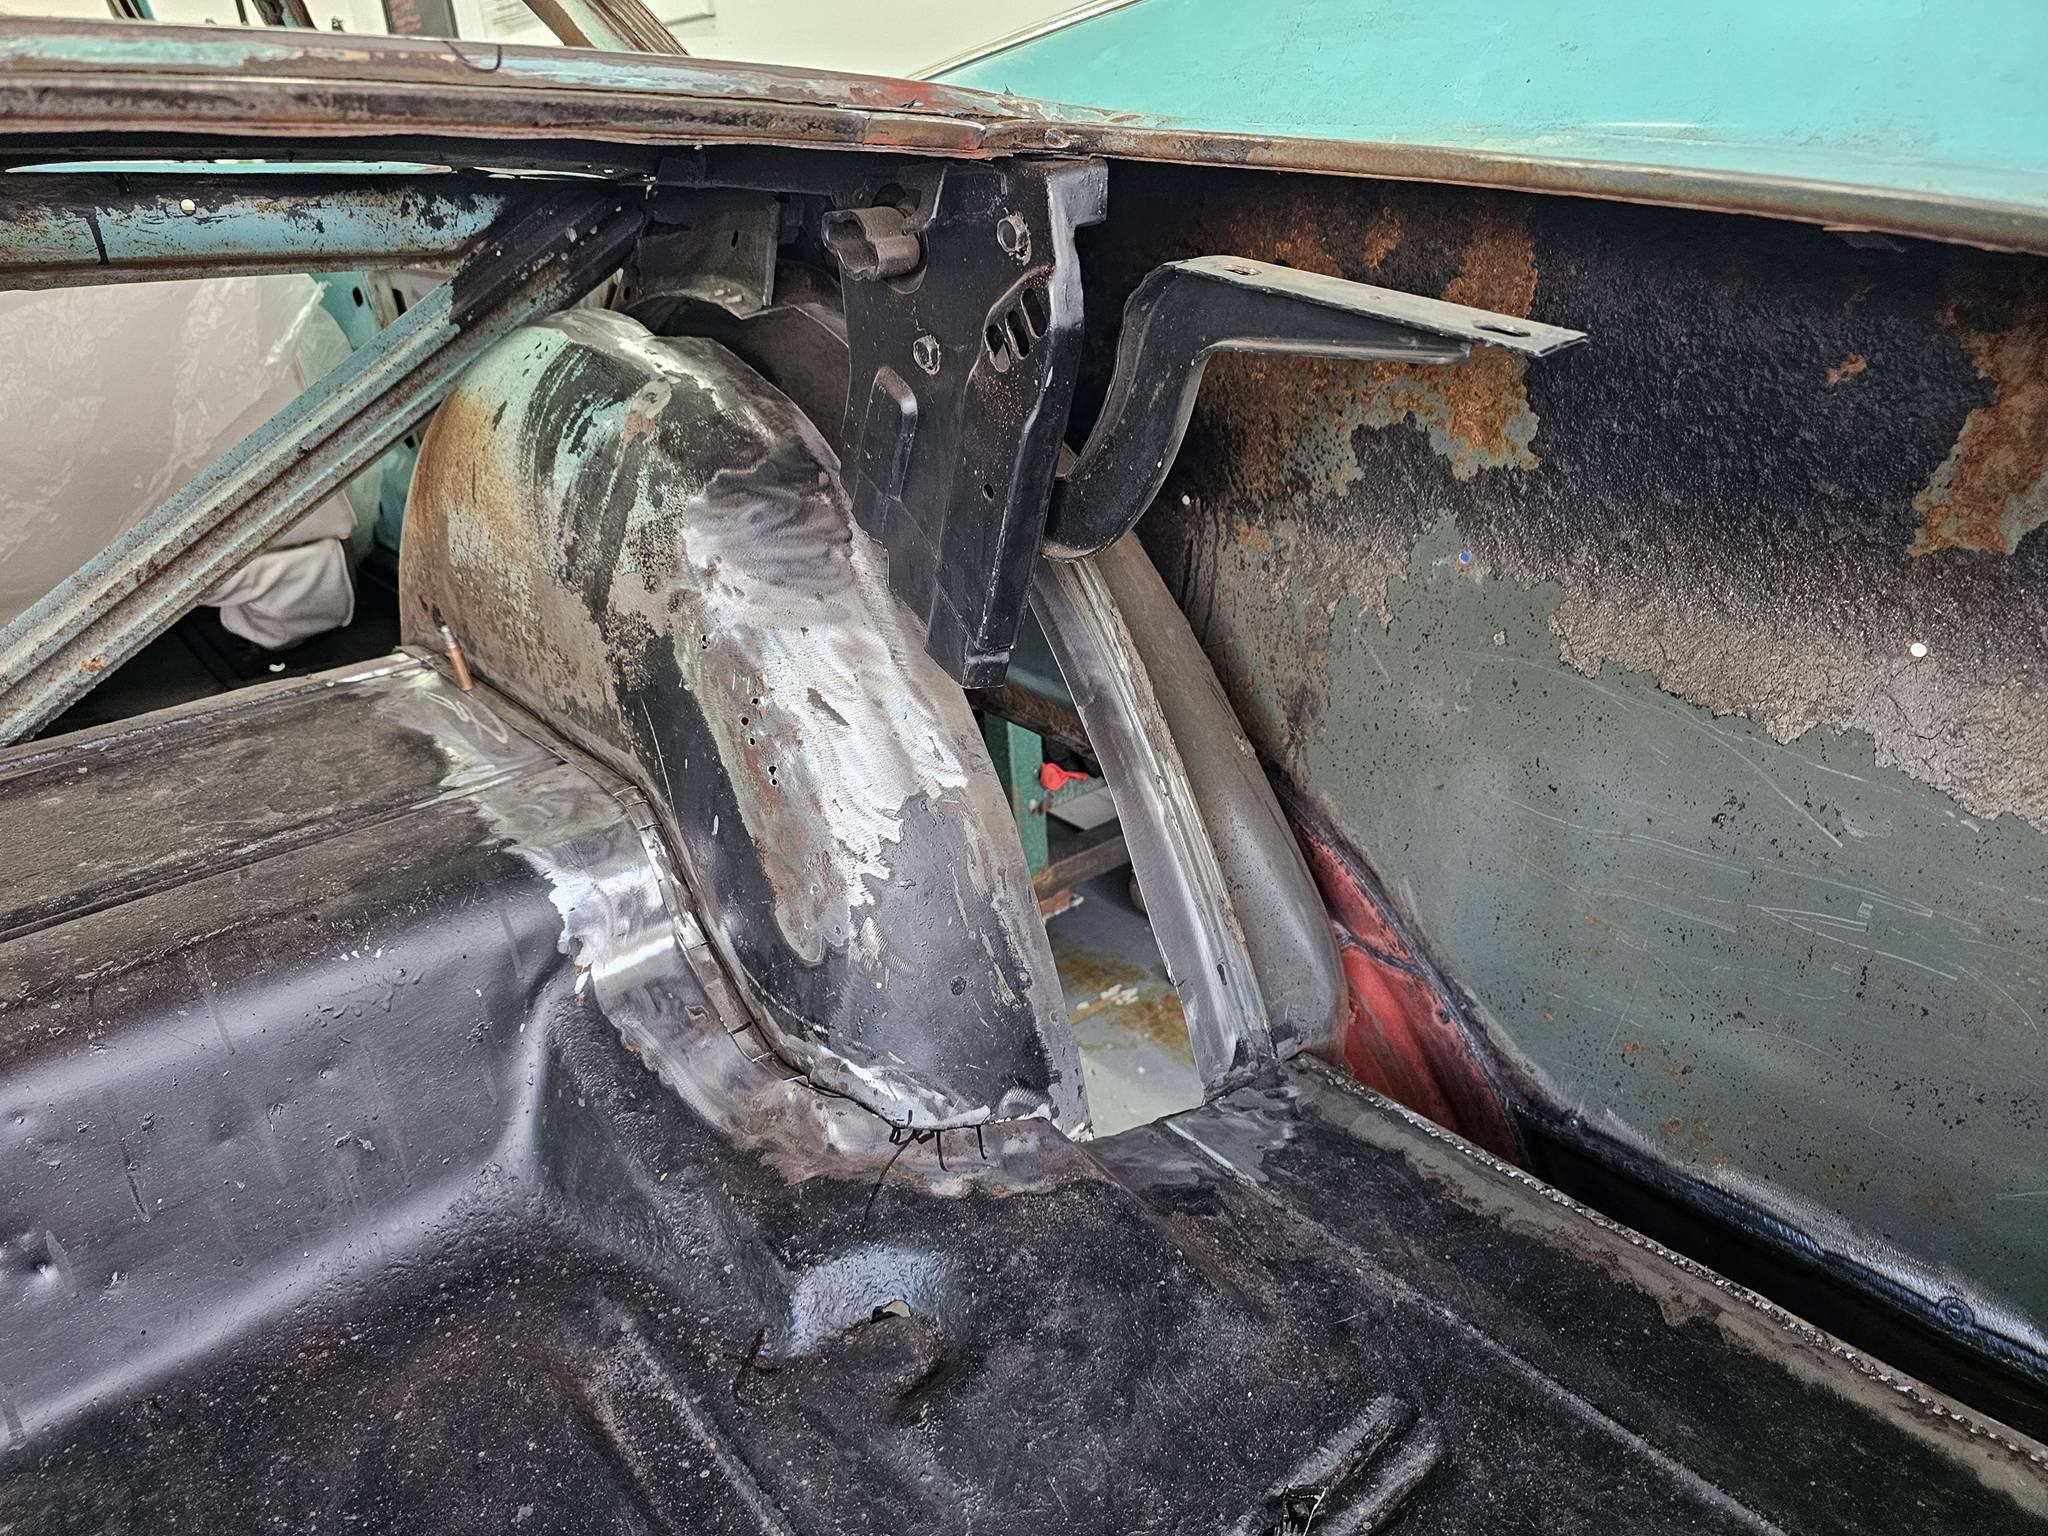


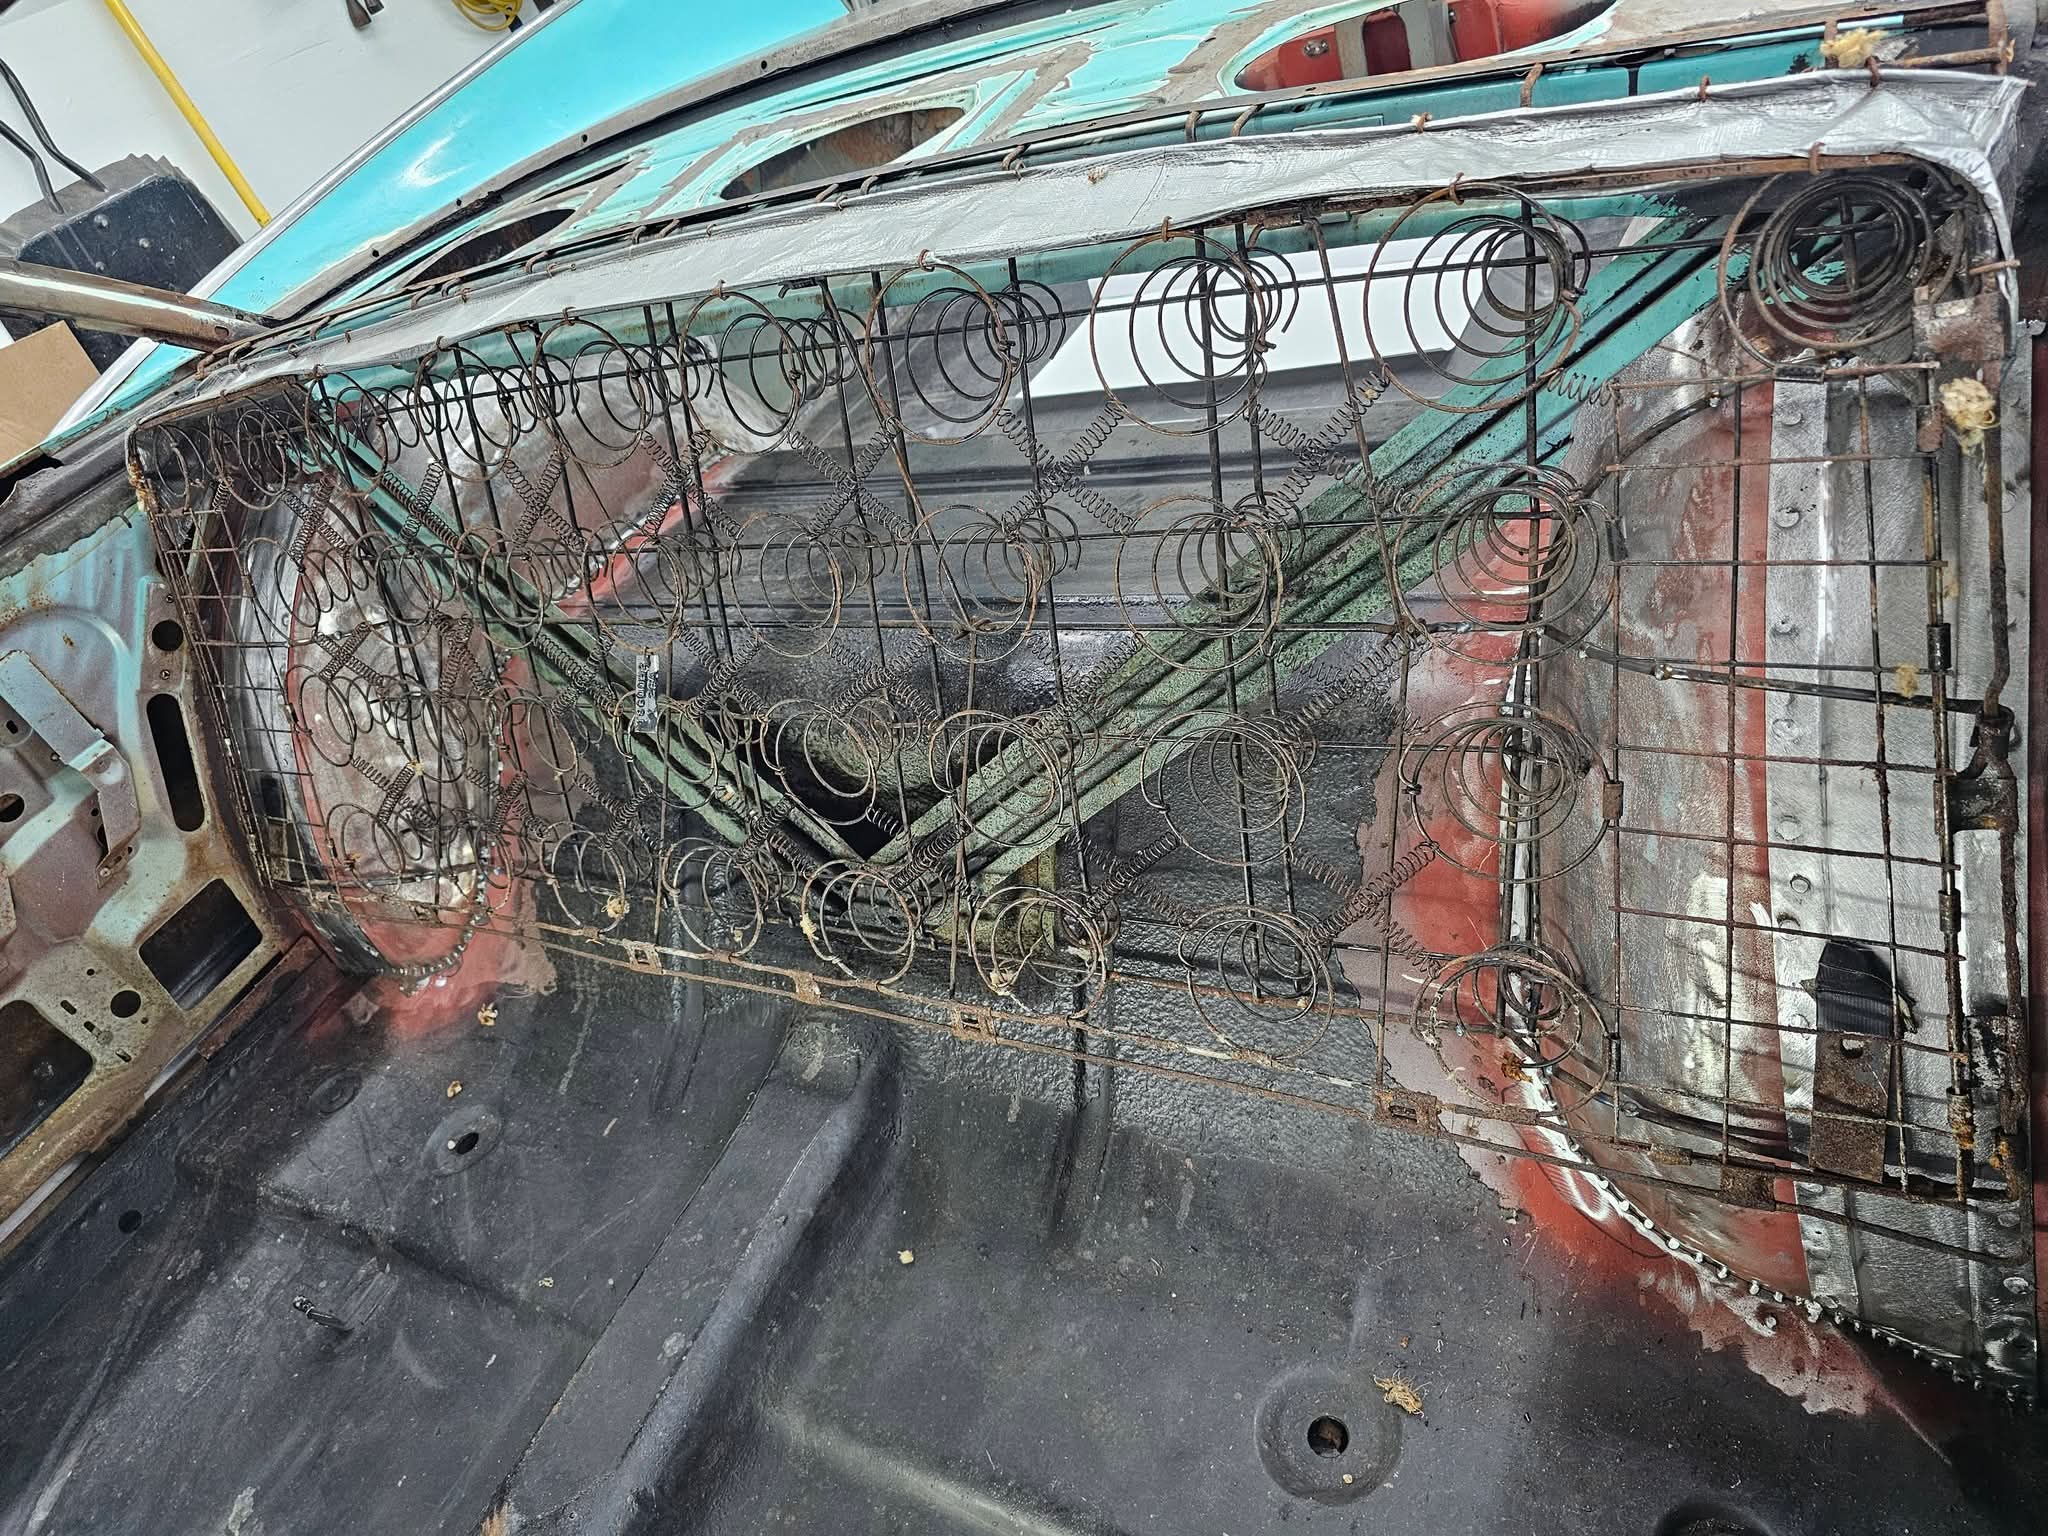
Some pictures of the finished mini-tub on the 59 Plymouth. I think I roughly gained between 2.5 to 3 inches of space on the inside of the wheel tubs. Total width inside is now approximately 15.75 inches for those collecting facts. This was basically a cut and patch job. Less then thrilling. Seam sealer will be spread around all joints similar to factory. The rear seat upright also required modification to accommodate the larger wheel tubs. On a side note I hated every moment of this modification. It was physically taxing on my old car guy back and completely unrewarding to look at when finished. Then there is an untold story of lighting the seat on fire during it’s modification as I initially refused to pull all the old upholstery off the seat frame.


Going to start stripping the paint off the firewall and jams. Hoping to get some fresh paint on those area’s so the glass and motor can be installed permanently.


Wow! Exciting news, Dan! ![]() I’m looking forward to seeing this…
I’m looking forward to seeing this…
1 Like
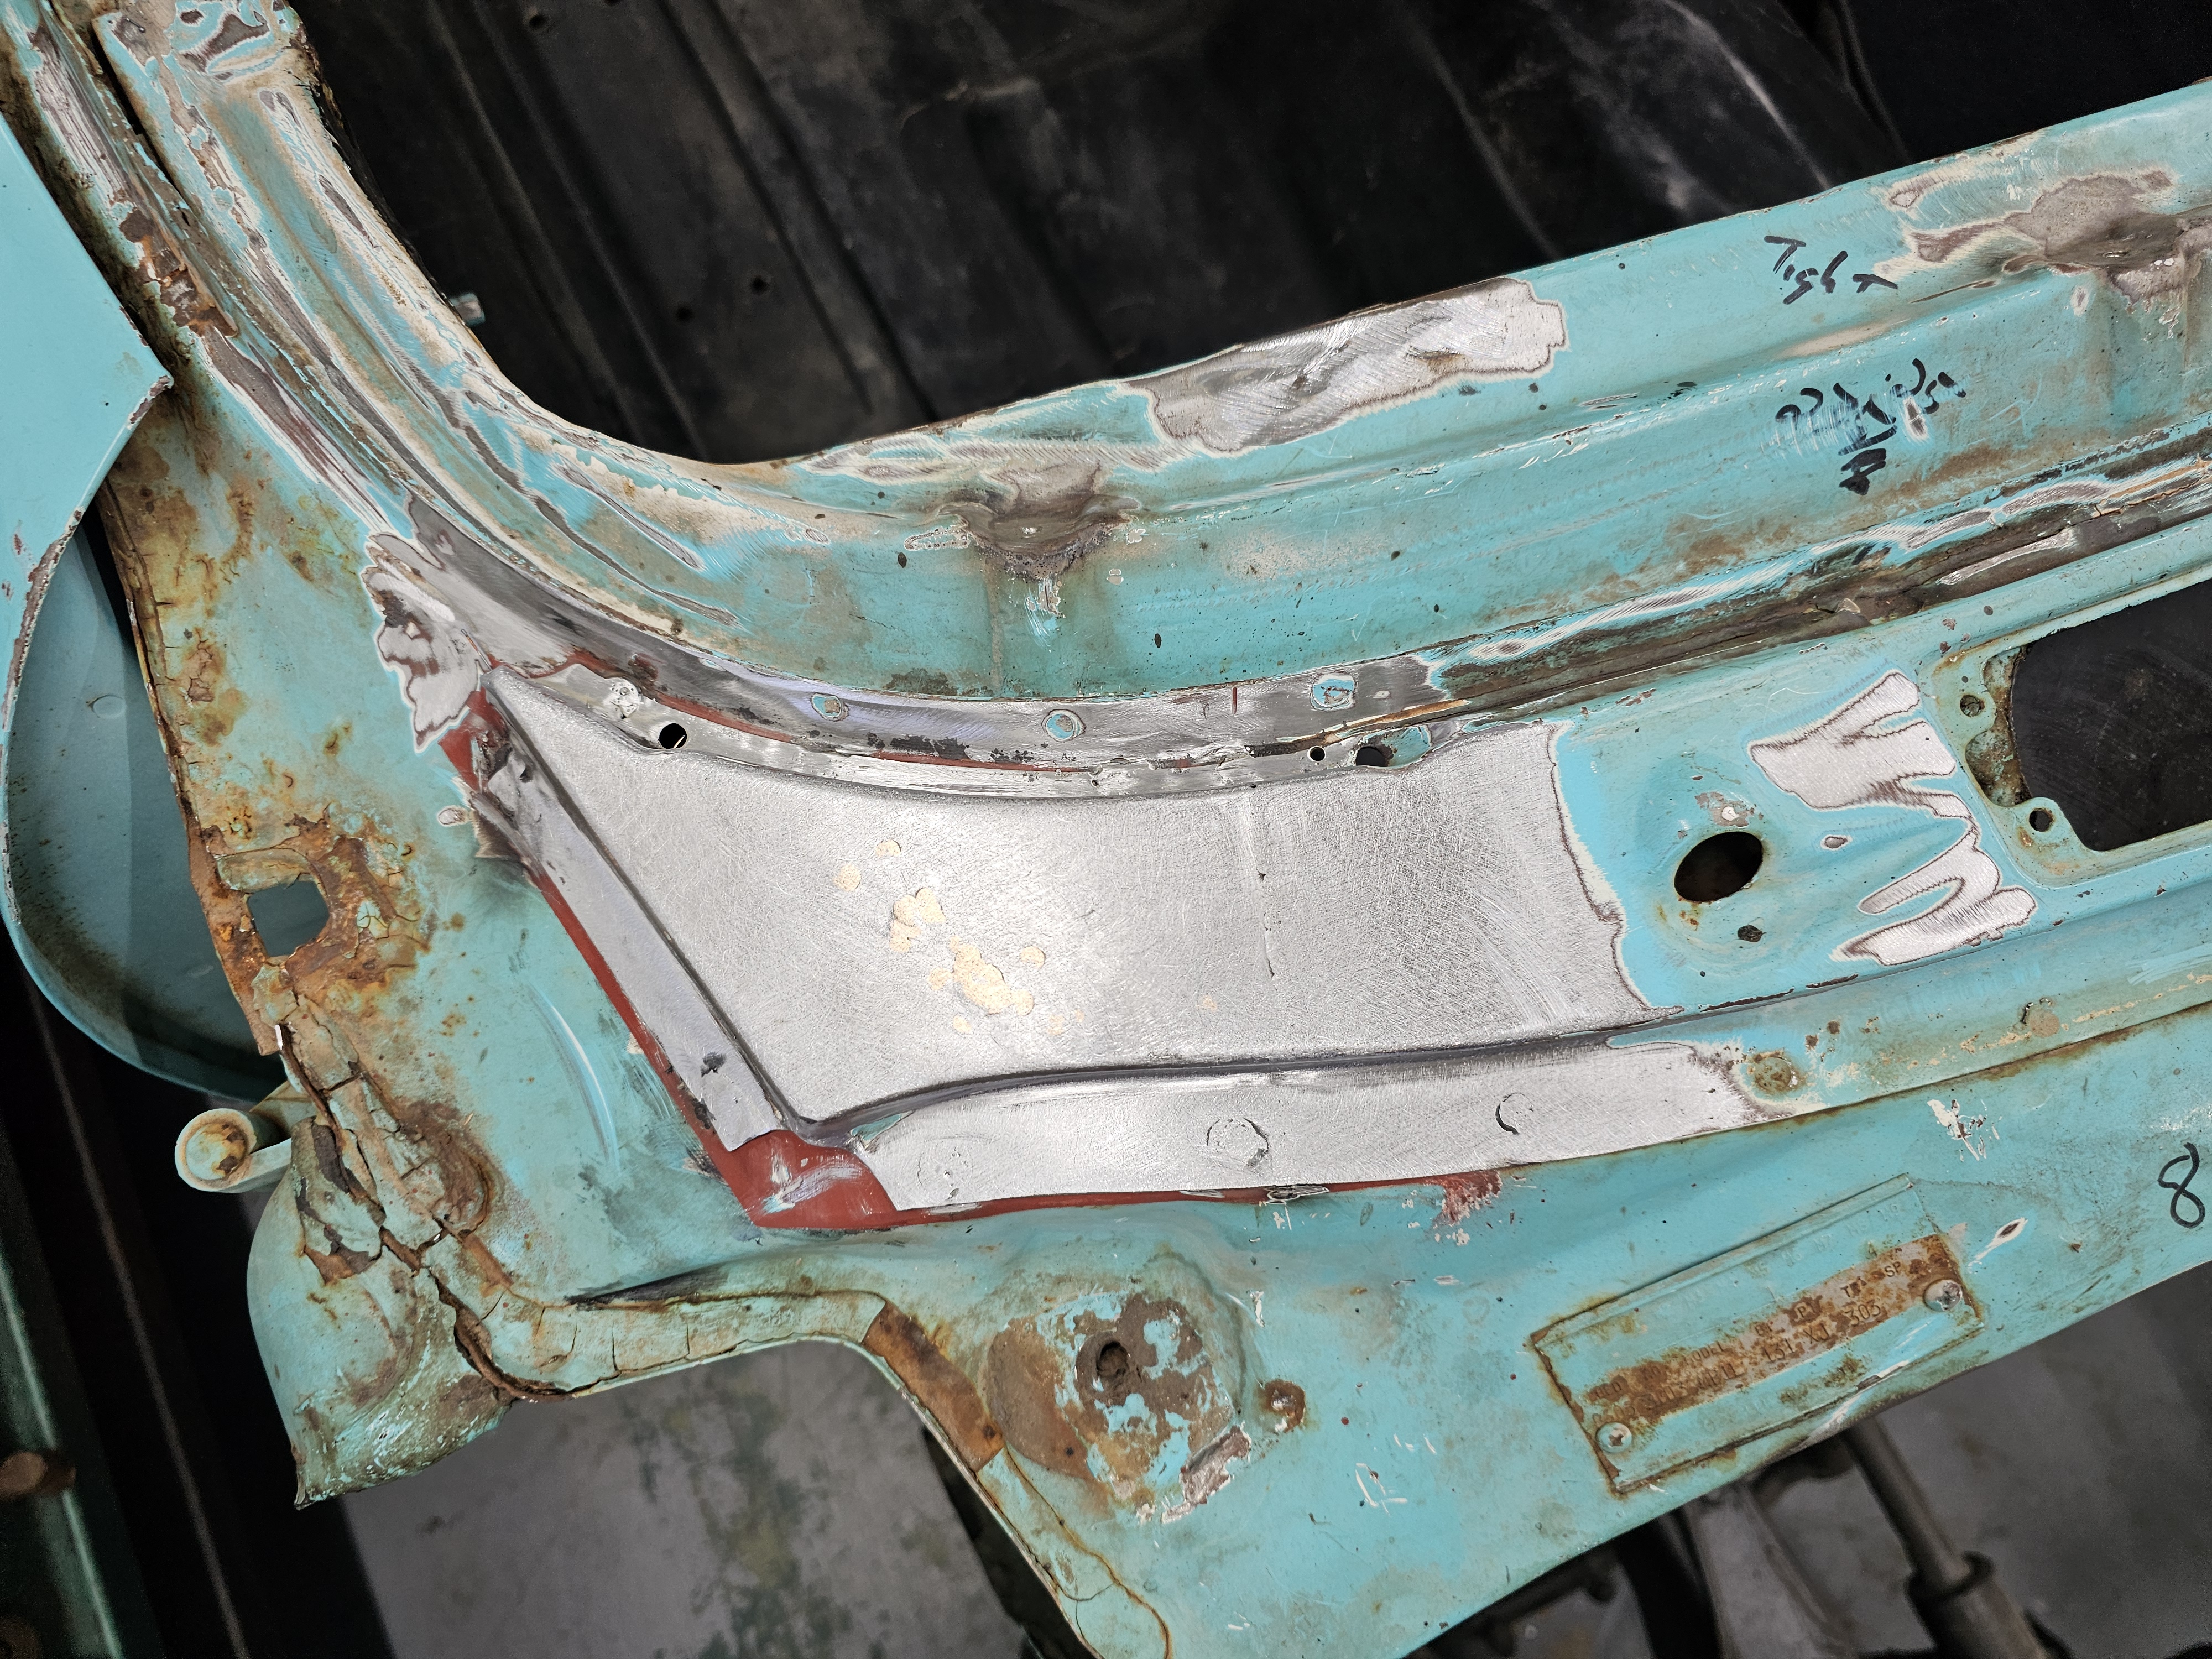
The cowl ends on the 59 Plymouth were full of sand and it caused them to rot out. I was unaware 'til I started stripping the paint off a few weeks ago. Even California cars have some rust surprises, I guess. I really should have made new cowl ends to repair this area, but choose to sandblast the originals and fill the rust pits with Silicone Bronze. Not my normal procedure for repairing rust, but I am starting to get impatient with progress on this car. It’s time to move on to getting the original paint off the rest of the car. This was the quickest avenue.


1 Like


OMGOMGOMGOMG… It’s really gonna happen
1 Like